Thursday, July 31, 2014

Gingham Style

Joy here, today at Classy Cards 'n Such, Beverly challenged us to show off some gingham. One of my favorite patterns - just look in my closet and you will see!


The paper is from Secret Garden, by Graphic 45, and the sentiment is from Inky Antics called Mighty Tower.

I made the flower called Mini Petals by Susan's Garden from and colored it like a pansy. Susan's Garden Tool Kit allows me to make the flower  very quickly.

A die called Beach Sprig, by Memory Box, was added to the back of the flower.

I stamped the sentiment and cut out with Spellbinders Labels Eighteen.

We would like to see what you would do a this Gingham Challenge.  Why not challenge a friend to play along with you? One of you could win a great gift!  Make your project and link it on the Classy Cards 'n Such blog.

Thanks for looking at my card. I'll be watching to see your projects!


Click on the Weekly Deals label found in the right column. You'll love the special sales!

Classy Cards 'n Such online store has added new products. Click here to find all the new items that have been added!

Thanks for stopping by!!! Until next time...


Pin It

It Is Well

Hello everyone! It's Jenn and I'm back with a card I created for our challenge this week at Classy Cards N Such.

Our challenge this week is to use some form of gingham on your card. As soon as I saw this challenge I knew that I wanted to pull out my Secret Garden paper pad by Graphic 45. It's one of my absolute faves and it has several different shades of gingham paper to choose from!


I started my card with a 5.5" x 5.5" square lavender cardstock base. I added a sheet of lavender gingham designer paper from Secret Garden paper pad. I wanted the paper to stand out just a bit from the base so I inked the edges with distress ink.

Before adhering the gingham paper to the base I added three strips of Black Polka Dot Trendy Tape diagonally across the paper.

For my next layer I cut a rectangle of lavender cardstock and ran it through my Cuttlebug with the Dots embossing folder. I added distress ink to the edges. 

For my focal point of the card I used Spellbinders Decorative Labels Twenty-Seven and white cardstock to create an elegant label to stamp my sentiment on.

I added Black Pearls to the centers of my stamped flowers and for finishing touches I added a black swirl in the lower corner.


You're invited to Classy Cards 'n Such to see all the amazing products available. 

Join the Classy Cards blog email list in the upper left column of this blog and receive exclusive weekly deals not available elsewhere! A one-time 20% discount on an order of your choice! Subsequent orders receive a 10% discount. Don't miss out, join today!

Thanks for stopping by!!! Until next time...


Pin It

Wednesday, July 30, 2014

Gingham Memories

Hello Classy Friends, Diane here with you on the blog today. This week is starting off with our Gingham challenge using the photo below for inspiration, you need to have gingham somewhere on your project!


I remember as a child how popular gingham was. I even had my bedroom decorated with gingham. We had to make a gingham apron in Home Economics" at school, so you might say I have always been a "gingham" girl!

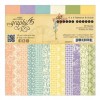
Impression Obsession has a nice line of "cover a card" stamps. I am using Gingham Cover A Card, just think with this stamp you can have any color of gingham you want. These stamps are wonderful as they stamp big and you can choose to use the entire image of just a fraction of it. I chose to use the entire stamp with a red ink. Don't you just love red gingham?


I used the Mega Mount to mount my Cover-A-Card stamp on. This is a very large acrylic block that fits the stamps perfectly!


I cut four of the Cottage Kutz Fancy Floral Butterfly Corners and positioned them around my card to make a frame. A little tip in using the intricate dies is to place a piece of wax paper over your die, then you paper on top of that before cutting, it makes for a much easier release. To help get all those little pieces out of your cut piece, there is a wonderful new tool by Spellbinders called Tool 'n One.

For the center of my frame, I stamped JustRite Hello Daisy with Versamark, first running the Anti-Static Bag over my card stock, then embossed with Sparkle 'n Sprinkle Black Fine Embossing Powder.

Using Spellbinders Floral Ovals, I positioned it over my stamped image and die cut it.

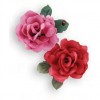
To finish my card, I added Red Pearls to each corner, a gingham bow and button.

Join our challenge with us, there is always a nice prize to win with 7 or more entrants. Tell your friends to join in too, the more the merrier!


Want to plan ahead and join our weekly challenges? Just click on the Challenge Calendar tab, located on the right side of the page. We would love to have you share your creative ideas! You could be our next Classy Cards 'n Such prize winner!

We appreciate your sharing our cards and ideas on Facebook, Pinterest, Google+, Instagram...anywhere your crafty friends can be found! The icons below my signature make it easy to share.

Thanks for stopping by!!! Until next time...


Pin It

Pretty In Pink

Good day everyone! It's Gracie here, ready to share a card with you inspired on our challenge for this week - Use Gingham! This time I went for a pretty monochromatic card, with lots of pink and cuteness.


I used Spellbinders dies to make my card. I started off by printing my gingham patterned paper on White Pearl Linen which is my preferred texture for this task. I then die cut the main layer with A2 Matting Basics A. Next I created a vertical column layering lots of borders in pink and white. I used the most wonderful metallic cardstocks, Stardream Rose Quartz and Riccio Astrosilver Embossed Metallic, for the borders. I die cut them with Classic Edges Two and dry embossed them with an M-Bossabilities folder to add interest and to spotlight the metallic papers. Right on the center I added a strip of gross grain ribbon that unifies the design.

Using the smallest die from Imperial Gold Labels Four, I die cut a label in White Pearl Linen, which was stenciled and sponged with Distress Ink in Spun Sugar. I stamped and heat embossed it with a French sentiment from Justrite's set French Frills, in Silver detail embossing powder.


Finally I embellished the card with half a dozen paper flowers I made using Spellbinders Bitty Blossoms. All the flowers were made using the same dies (medium and large size) but they vary in size and shape because of the different techniques I used to make them. For those that I decorated with pearl stamens, I simply started rolling the flowers around the stamens from the beginning. The more open I rolled the flower the larger it resulted. This flowers are distressed before they are rolled and that is why they have an organic look, so to speak. I added some little leaves in white and some little gingham patterned flourishes from Spellbinders French Frills set to finish the design.


I had a lot of fun making this card and I really hope you enjoyed it.


Click on the Weekly Deals label found in the right column. You'll love the special sales!

Classy Cards 'n Such online store has added new products. Click here to find all the new items that have been added!

Thanks for stopping by!!! Until next time...


Pin It