Showing posts with label Spellbinders. Show all posts

Monday, February 22, 2016

A New Baby Carriage

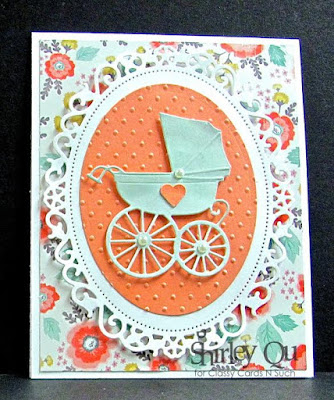
Hi, it is Shirley here posting today.    This week we are to make a Aqua and Coral card.  The colors look great together and I thought they would be perfect for a baby card.


I started with a white card base and added some floral designer paper for the next layer.  I used one of my Spellbinders, Floral Ovals, die to cut the white decorative oval.  I added a coral oval that I embossed using the Crafts Too Dots Embossing Folder.  I popped the oval up on the designer paper with Joy Foam Pads Small.

I used light aqua paper to cut the Memory Box Baby Carriage. I also used foam pads to pop the carriage up on the dotted oval to add to the dimension.  I added three white pearls and a punched coral heart for the final touch.

Thank you for joining us today.  I hope you will join us for our last challenge.

Thanks for stopping by!!!  Until next time...


Pin It

Friday, February 19, 2016

Caught a Bug

Hello, it is Shirley posting today.  I have made a Get Well card to share with you.   I decided to keep it in monochromatic colors.


I started my card with a green card base and followed with a layer of vanilla.  I used Graphic 45 Botanical Tea designer paper for the top layer.  

I cut the little jar  from vanilla paper using the Sweet 'n Sassy Get Well Critters Dies.  I stamped the bug and colored him with markers.  For fun, I added some googly eyes hoping it will bring a smile to the recipient.

The sentiment was stamped on vanilla card stock that I  cut using the Spellbinders A2 Divine Eloquence dies.  I sponged around it with green ink.  I added a twine bow at the top  for the finishing touch.

Thank you for looking at my card!


The CCNS inventory is quickly shrinking, so if there is something you have your eye on, I would recommend ordering it right away.  Many items have only one or two left.   When they are gone, they are gone!

Thanks for stopping by!!!  Until next time...


Pin It

Thursday, February 18, 2016

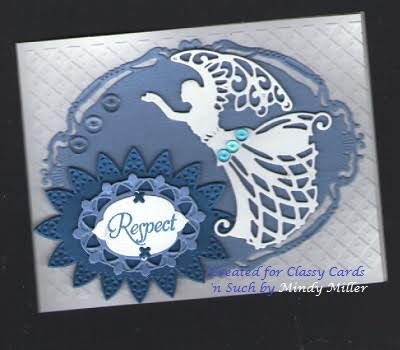
Respect

Mindy with you today to share an inspirational card that is quick and easy to make for many occasions.  I started by dry embossing the background with the Lattice Embossing Folder by Crafts Too!  I then die cut several layers of oval dies, Oval Regalia and Fleur de Elegance both by Spellbinders, and layered them to make a background and sentiment spot.  

An angel die was also added, along with the sentiment stamped using the Just the Right Words Stamp by JustRite Stamps.  A few Water Dew Drops from The Robin's Nest were added for the finishing touch.


Cards need not be extensive and expensive to look elegant and classy.  With just a few die cuts and embellishment you can create a lovely card. 

Want to purchase some or all of the products used in today's card?   Classy Cards carries those that are in gold and underlined.   Click those or the pictures below.  Happy shopping!!

Thanks for stopping by!!!  Until next time...


Pin It

Serene Butterflies

Good morning!  Diana here!  As I am writing this, it is so windy and cold that it makes me long for spring.  So here is my own version of spring in February!  


I started with the ever useful Spellbinders A2 Matting Basics A.  I made the white frame as well as the trimmed sheet I would use to sponge on my distress colors Broken China, Mowed Lawn, and Wild Honey.  I did a bit of water splattering on it and then set it aside to dry.  Next, I die-cut and trimmed Memory Box Fairyland butterflies 
and Fresh Foliage out of white card stock for a silhouette look.  A bit of sequins and I was done with this simple yet serene card.

There is still time to join our Classy Cards 'n Such challenge. Click on the Current Challenge tab on the right side of the blog for all the details. Come and join the fun!

Thanks for stopping by!!!  Until next time...


Pin It

Wednesday, February 17, 2016

Puppies Galore

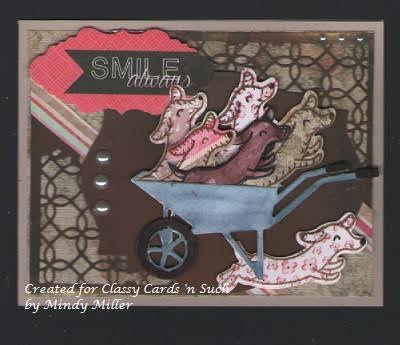
There is nothing cuter than a load of puppies. Hi friends, Mindy here to share with you my sample card for this week's challenge #124 Colors, Stitching, and Pattern.  The inspiration photo for this challenge is so cute, I was inspired to use the colors and pattern of the puppies to create my own passel of pups.


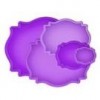
I decided to try and use up some leftover paper scraps I had on my work desk for this card. I started by cutting two of the Distressed Addington Collage Dies by Memory Box and anchoring them to opposite corners of my card.  From the same paper, I cut a label die from the Labels Eighteen Dies by Spellbinders and adhered it to the card front.  From watercolor paper, I die cut the Wheelbarrow by Impression Obsession and used watercolor markers to color it. While it was drying, I used a weenie dog die, to cut lots of pups from various papers inspired by the color photo.  I then inserted them into the wheelbarrow and adhered it to the label die.
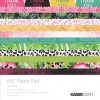
To complete this card, I added a pre-printed sentiment label from the Say Aloha paper pad by Kaisercraft and a few decorative pearls. I hope you can join us for this challenge, there are so many possibilities for inspiration in the wonderful photo.


Thanks for stopping by!!!   Until next time...


Pin It

Monday, February 15, 2016

Mitten Shaker Card

Diana here today and I was in the mood to make another shaker card. This time I used PoppyStamps Stacked Mittens with some heart shaped glitter for my card. 

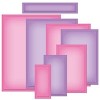
The frames were made using Spellbinders A2 Matting Basics A, Scor-tape, and clear cardstock. By nestling the rectangle dies together, you can create a window for your shaker element. I find this is the easiest way to make a shaker card. Instead of using foam tape, I used the same set of dies on fun foam to add space between the clear card stock and the blue background paper. I also used a white gel pen to add stitching details around the frame.


Thank you for looking and hope you get a chance to play in the Stitches, Patterns, and Colors Challenge.


Want to purchase the products used in today's card?   Classy Cards carries those that are in gold and underlined.   Click those or the pictures below.  Happy shopping!!

Thanks for stopping by!!!  Until next time...


Pin It

Patterns stitching colors

Hello, it is Shirley posting today.  I have made a card for the new Classy Cards 'n Such challenge for this week.   We have an inspiration picture with stuffed puppy dogs on it.  We are suppose to use the Colors, Stitches or Patterns on our cards.  We can use them all if we like.  I went with the colors.  Here is my card.


All of the patterned paper that I used in my card including the image came from the Graphic 45 Raining Cats And Dogs Paper Pad.  This paper does all the work and takes the guess out of what papers to put together for a card.

The circle was cut using the Spellbinders Teardrop Circles die.  This set comes with four dies.  I used the Spellbinders Tool 'n One to clean my die.  Here is a video on how well it works.  It sure saves a lot of time.

I made my flower using Heartfelt Creations Botanical Rose stamps.  I sponged them with ink.   I shaped them using the Paper Blossoms Tool Kit.   I added stickles to the center of the flowers.  I colored the leaves and scrunched the tips.

I hope you will join us for the challenge.

Do be sure to take advantage of our store closing sale!   Details and coupon code are here.

Thanks for stopping by!!!  Until next time...


Pin It

Friday, February 12, 2016

Would You Be Mine?

It's Shirley here today.  I had to make one more Valentine and I want to share that with you today.  If you haven't got your honey a Valentine, you might want to think about it since it is two days away.


I started off with a white card base.  I then used the Spellbinders A2 Filigree Delight die to make the decorative red layer.  The third layer was made by using the large die from the Spellbinders Floral Ovals die set on white card stock.  I then used the smaller die using the same set to cut the red layer.

My heart was cut using the Spellbinder Lace Heart dies.  I cut a white layer to go behind it.  I put a red heart in the center.  I used Art Institute Dries Clear Adhesive to adhere the pieces of my card together.

For the finishing touch of my card, I added a small checked heart with a button and added white pearls.

I am happy you came by today.  Have a wonderful Valentine weekend.

There is still time to join our Classy Cards 'n Such challenge. Click on the Current Challenge tab on the right side of the blog for all the details. Come and join the fun!

Thanks for stopping by!!!  Until next time...


Pin It

Thursday, February 11, 2016

Starry Shaker Card

My son had seen some shaker cards I made in the past and wanted one for his birthday (along with cheese pizza for dinner.)  Love it when it's this easy!


To make this card, I started with a trimmed sheet of white card stock using Spellbinders A2 Matting Basics A. I then sponged several different shades of blues and purple distress colors including Seedless Preserves, Broken China, and Tumbled Glass. I then splattered some water mixed with Perfect Pearls for some extra shimmer.

I made a navy frame using more rectangle dies and made the window using clear cardstock and foam tape. I added star shaped confetti and glitter inside the card. My son also loves the metallic colors so I die cut the Happy Birthday die from Elizabeth Craft Designs from gray card stock and embossed twice with silver embossing powder for an extra thick look. I love how it looks like the Happy Birthday is floating above the card.


Thanks for looking!!


Be sure to take some time today to check out the CCNS store closing sale where you are sure to find just the right bargains for your crafting needs!   Details here

Thanks for stopping by!!!  Until next time...


Pin It