Showing posts with label Darice. Show all posts

Friday, January 29, 2016

You're the Best

Good morning!  Joy here today showing you a card that I made this week using supplies from the Classy Cards 'n Such on line store.  


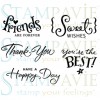
First was to emboss a piece of cardstock using the folder called Quilt Blocks by Darice.  Then I sponged on a little color using a Ranger Mini Ink Blending Tool.  The stitched khaki color rectangle base was die cut using My Favorite Thing's Blueprints 13.  The sentiment  from Stampavie called Sweet Wishes was heat embossed using Sparkle 'n Sprinkle's Brown Fizz Embossing powder - it has a pretty sparkle and shine that I tried to capture with my camera.  The sentiment was popped up using Small Joy Foam Pads.   You might take the opportunity to check out the sale at the Classy Cards 'n Such on line store.

Thanks for looking at my card.  Have a Happy Stamping day!
There is still time to join our Classy Cards 'n Such challenge. Click on the Current Challenge tab on the right side of the blog for all the details. Come and join the fun!

Thanks for stopping by!!!   Until next time...


Pin It

Thursday, January 28, 2016

Love You, Sweet Pea

Hi friends, Mindy with you today sharing a Valentine's Day themed card using one of the NEW Stacy Stamps floral images available in the Classy Cards 'n Such Online Store, as my focal point and several leftovers from previous cards as accents.


I started with the Ornate Frame Embossing Folder by Darice as my background. I then stamped the Sweet Pea stamp from Stacy Stamps on white card stock and colored it with watercolor markers before adhering it with foam tape to give dimension to the front of my card. I then added a banner stamped with a Valentine message from my stash, and decorated the card front with the inside remaining hearts from my Heart of Hearts die from Impression Obsession that I used on my previous challenge card. I also added a few sequins here and there to give the card a little sparkle.

I usually save my negative images from the die-cuts to use in future cards. I love to use, reuse, and recycle various embellishments and use them in my card making when I can. Have a wonderful day, and be sure to check to the Classy Cards 'n Such Online Store for special prices available this week.
There is still time to join our Classy Cards 'n Such challenge. Click on the Current Challenge tab on the right side of the blog for all the details. Come and join the fun!

Thanks for stopping by!!!   Until next time...


Pin It

Tuesday, January 26, 2016

Hello

Hello Classy Friends!  This week our challenge is to use a neutral palette.  We have a beautiful inspiration photo to get you started!

I decided to go with totally cream colors.  Using the inspiration photo for guidance, (click on the current challenge tab on the right of the blog to see photo).


I embossed a cream panel with Darice Quilt Blocks embossing folder.  This has to be one of my most favorite folders to date!

Next I cut a heart from Spellbinders Lace Hearts.  To achieve the heart shown, I used two hearts from the set, one inside the other, then cut...pretty isn't it?


Next I cut Impression Obsession Bird On a Branch from Authentique 6 x 6 paper pad Faith.  This pad has a beautiful collection of neutral papers.

I finished by adding a sentiment held by a tiny clothespin
and added a few gold Dew Drops.

Thank you for visiting with me today!

Want to purchase some or all of the products used in today's card?   Classy Cards carries those that are in gold and underlined.   Click those or the pictures below.  Happy shopping!!

Thanks for stopping by!!!   Until next time...


Pin It

Tuesday, January 19, 2016

Thinking of You

Hello, Diane with you today.  This week on the blog the challenge is Buttons.  What fun!  I think buttons are so interesting with so many colors, shapes, and sizes to choose from!

I made a rather large card, 6 x 6. I first started by embossing a Mason Jar onto Heartfelt Creations' Clear Card Stock.

Next, I cut a piece of plain white card stock to fit the
embossed mason jar. I laid it on top so I could get the placement of my buttons.  Then I removed it and adhered each button down.  Here are some beautiful buttons for you to make your own jar and both are on sale!  Boutique Bubblegum and Boutique Cupcake.

I then ran adhesive down each side to attach the jar to the background. To cover up the adhesive, I cut two Impression Obsession Border Duo 1 edges and adhered over the edges.

To finish, I simply adhered the entire piece to a designer paper, added lace trim and bow to the top, and a sentiment.

Thank you for visiting with me today.`

We've made it easy for you to find our future challenges!  Click  on the Challenge Calendar tab on the right side of the blog. All of the challenges are listed through February 2016!

Thanks for stopping by!!! Until next time...


Pin It
Tuesday, January 5, 2016

Winter Wishes

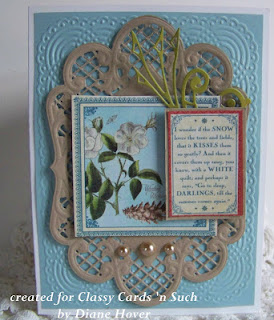
Hello, Diane with you today!  Our challenge this week is winter blues, make it blue and white and to use the inspiration board.  Well, you can also see I was inspired a bit by the kraft color in the bottom photo.


I started my card by embossing with the Darice embossing folder Doily Lace.  Using a Kraft paper, I die cut Marianne Anja's Large Oval.  The green flourish you see is also from the same set.


The image and the snow verse you see are both from the
gorgeous Graphic 45 Time To Flourish paper pack.  This paper pack is so beautiful that I had to purchase two pads, as I knew one I would hoard!


I added a bit of sparkle by using Wink of Stella Glitter Pen on the image.  I finished up with a few Le Creme pearls.

Thank you for visiting with me today!


Thanks for stopping by!!!  Until next time...


Pin It
Tuesday, November 24, 2015

Trim The Tree

Hello, Diane with you today. This week our challenge is all about ornaments.  There are so many beautiful ornament dies to choose from.  Trust me, I know as I own several and what a hard choice to decide which one I wanted to use.

I ended up choosing this beautiful and intricate Memory Box Corby Ornament.  It was cut from a coordinations green glitter paper.  I cut it a second time using red for the cardinal.


This ornament die has a separate back you can purchase
if interested, Memory Box Drop Ornament.  It fits perfectly for the back layer.  I used Pearlized Esse White Metallic paper for the ornament backing.

The ornament was attached to an Impression Obsession Pine Branch.  I added a Snow Marker to the branch.
As you can see, I got a little carried away with the snow!

The snowflake paper behind the ornament was cut using a die from Sue Wilson Greek Island Collection Kefalonia.
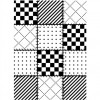
I know it is difficult to see in the photo, but this was then embossed with Quilt Blocks by Darice.

I added an embossed under panel on red card stock
and a pretty red bow to finish it off.


Thank you for visiting with me today!


We've made it easy for you to find our future challenges!  Click  on the Challenge Calendar tab on the right side of the blog. All of the challenges are listed for the rest of the 2015 year!

Thanks for stopping by!!!   Until next time...


Pin It

Monday, October 26, 2015

Elegant Christmas

Hello, crafting friends!  It is Shirley here today, with a card that I have made for Challenge #108 Squirrel-y Friends. Make a friend card and add a squirrel or a bird.


I started my card with a white card base. I cut another white layer and embossed it using the Darice Doily Lace  embossing folder.

Next I chose two stamps to stamp my sentiment. One of them had My Friend on it, and the other one had Merry Christmas. I aligned them on my block, stamped them in Versamark and followed with Gold Detail embossing powder. This is a great way to stretch your stamps.

I took the Impression Obsession Pine Branch die to cut the white pine branches. I attached them to my card using Art Institute Dries Clear Adhesive.

I used Gold shiny card stock to cut my birds using Bird Song Dies  Secret Treasures Collection. I attached the gold birds to the branches, also using the Art Institute Dries Clear Adhesive.

My finishing touch to my card was to make a bow with gold ribbon and using the Bow Easy. This is a great tool for me because I cannot tie pretty bows.

I hope you will join us for the challenge this week.  Beverly always has a nice prize for the winner.


Join the Classy Cards newsletter list in the upper left column of this blog and receive exclusive weekly deals not available elsewhere! A one-time 20% discount on an order of your choice! Subsequent orders receive a 10% discount. Don't miss out, join today!

Thanks for stopping by!!! Until next time...


Pin It