Showing posts with label Dee's Distinctively. Show all posts

Friday, December 4, 2015

Blessed Christmas

My card represents a snowy white branch with berries, that could be a pine branch covered with white fluffy snow.  Mindy with you, to share my card that could be used for Christmas or any winter holiday or occasion.


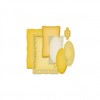
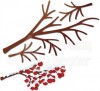
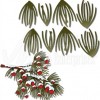
I built two frames from the Radiant Rectangles Die by Spellbinders, and attached my Branch Set 1 and Ponderosa Pine Sprig both from Dee's Distinctively Dies. For berries on my branch, I punched red dots from a regular hole punch, and glittered them with Clear Glitter Pen from Wink of Stella. I tucked them in amid the pine sprigs and added a Christmas sentiment to complete my card.


I hope you have a wonderful week, and enjoy the many sample cards our design team shares on our blog.

Only 22 more days until Christmas! Shopping is easy at Classy Cards! No walking...just pick your items, submit and pay and you will find them in your mailbox very soon! Plus you can use discount code BLOG10 anytime for 10% off your entire order!!

Thanks for stopping by!!! Until next time...


Pin It

Monday, September 14, 2015

Wispy Flowers

Hi, it is Shirley posting today. I have made a card for the Challenge - #102 An Apple A Day to share with you. I was inspired by the colors and the patterns in the cute apple cookies. The patterns I incorporated in my card was the hearts and plaids.


I used white, pink and green card stock for my card today. The top layer of white was embossed using the Darice Plaid Background embossing folder.

The stems for the flowers were cut using the Memory Box Tall Chloe Stem die. The wispy blooms were cut using the Dee's Distinctively Secret Garden Flower 1 die. I put a light coat of glue on the flowers and sprinkled them with Crystal Ice glitter.

The birdhouse  and hearts were cut using the Impression Obsession Birdhouse die set.The grass was cut using Impression Obsession Small Grass Border.

I cut the fence using Poppy Stamps Country Fence.  I cut two of them, and stacked them on top of each other to make the garden fence taller. I placed a bow over the center of the fence, using the Sue Wilson Finishing Touches - Filigree 3D Itty Bitty Bow.

The clouds were cut using the Memory Box Puffy Clouds die.

I adhered all of the card pieces to the card using the Art Institute Dries Clear Adhesive.

Please join us for the challenge this week. I would love to see what inspires you from the inspiration picture. 


Join the Classy Cards newsletter list in the upper left column of this blog and receive exclusive weekly deals not available elsewhere! A one-time 20% discount on an order of your choice! Subsequent orders receive a 10% discount. Don't miss out, join today!

Thanks for stopping by!!! Until next time...


Pin It

Wednesday, May 20, 2015

A Wish For You

Good Wednesday, friends! Mindy with you to share my card for this weeks challenge at Classy Cards 'n Such. The theme this week is to use the inspiration photo and add a Hummingbird.


I started with one of the new dies from Spellbinders titled, Fleur de Elegance, and cut it twice from white card stock. I trimmed and folded down one die cut, and adhered it at the top, and made a shaped card using the full die image as the base of my card. I then cut an oval from the Romance Paper Bloc by Joy! Crafts, and adhered it to the base before building my flower stem and hummingbird.

The hummingbird was formed from a die in my stash from Dee's Distinctively, and colored with my markers. I then used one of the Build a Flower dies from Cheery Lynn Designs, also in my stash, to build the powder puff flower the bird is feeding from. Both of these die sets are no longer available in the Classy Cards shop, but there are other die sets available that will give you the same feel to this card.

The sentiment frame, also from the Fleur de Elegance die, was stamped with a greeting from the Mums stamp set from JustRite Stamps. It is edged with adhesive backed pearls from Sleek Strips Pearls- Le Creme from Want2Scrap. The pearls in this set comes in two sizes, so I used the smaller ones on the sentiment die and the larger ones at the top and bottom of the card base die.

Have a happy stamping day, and don't forget to participate in our weekly challenge for a chance to win a wonderful prize.


If you are unable to find an item in the store, or would like something special ordered, please email me at beverly@classycardsnsuch.com. 

Thank you for stopping by!!! Until next time...


Pin It

Saturday, February 21, 2015

Thinking of You

Hi, it's Jenny posting again today.  I was inspired to use my new Dee's Distinctively flower die.


First I cut the Dee's Distinctively Secret Garden Flower 4 flowers, and colored them using Distress Ink and my Mini Ink Blending Tool. I cut the stems from a die from my stash, and had to modify it by cutting off the flowers that went with that die. I colored the stems with Shabby Shutters Distress Ink.

I cut the background with a light blue cardstock and the Tied Together die. This is an A6 size card. I cut a quarter inch off the side of the card to leave a symmetrical white frame around the die. The card is now tall and narrow.

I added some sparkle to the yellow flower layer with a Wink of Stella pen. I assembled and glued the flowers together and added the tops with Joy Foam Pads.  I also used Foam Pads to adhere the flowers to the card front for dimension.


To finish off the card, I cut the 'Thinking of You' phrase from the Impression Obsession Greeting Set.  I sponged distress ink on the words to match the flowers and then glued them to the card front.

Order at least one item Jenny used in today's card and take 20% off your entire order!!!   Enter coupon code TOY20 at checkout.   Happy shopping!!

Thanks for stopping by!!! Until next time...


Pin It

Wednesday, January 21, 2015

Brighten the Way

Greetings friends, Mindy with you today to share my card sample for the Winter Birds Challenge #68 at Classy Cards n' Such.  My card is titled Brighten the Way, and features a winter-like background with two beautiful Cardinals, one male, one female.


I started with two embossing folders, Lattice, by Crafts Too!, and Swirl Frame by Nellie Snellen, and embossed a sheet of white card stock with each one. I then trimmed around the Swirl Frame and cut out the oval opening, and glittered around the opening for a little bling.

I then die cut two of the Cardinal - Right Facing bird dies from Dee's Distinctively, and one of the Branch Set 1, also from Dee's Distinctively. I cut one bird from red card stock, and one from Kraft colored stock. The branch was cut from Kraft colored stock also, and I used a marker to give it brown grain lines to look like a branch. I brushed on some Light Molding Paste to look like snow on the branch, but you could also use Dreamweaver Regular White embossing paste for the look of snow. I also added a bit of glitter to the branch to give it some winter sparkle.

I colored the female cardinal with some Distressed Markers from Ranger and used my Tim Holtz Water Brush by Ranger to blend the colors on the wings, tail, and topknot feathers. I used Foam Pads- Large by Joy! Crafts, to adhere the birds to the card front.

The sentiment used was from the stamp set Flowers in Bloom by Sweet and Sassy Stamps, and was stamped on white card stock backed with Silver Mirror card stock.  To complete the card, I adhered a strip of ribbon trim down the fold to add a bit of color and shine.

I hope you have enjoyed my Winter Birds, and will join our challenge this week with some of your own. Happy Stamping! 


If you are unable to find an item in the store, or would like something special ordered, please email me at beverly@classycardsnsuch.com.

Thanks for stopping by!!! Until next time...


Pin It