Showing posts with label Crafts Too. Show all posts

Friday, February 26, 2016

Thanks a Bunch

This is the last card posting for my time on the Classy Cards 'n Such Design Team. Mindy here, and I thought a Thank You card would be appropriate for my final card.


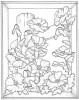
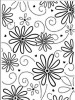
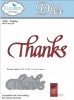
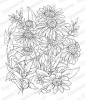
I started by stamping the Coneflowers from Impression Obsession on a piece of watercolor paper and coloring with watercolor markers.  When it was dry, I ran it through my embossing machine with the Daisy Flourish Embossing Folder from Crafts Too!  I layered it on my card front, and then die cut the sentiment, Thanks by Elizabeth Crafts Designs along with a layer of thin craft foam to give the card some dimension.

I have really enjoyed my time with Beverly and the design team, working with the products she carried in the Classy Cards 'n Such Online Store.  The store is closing on Monday, February 29th, so click on the link to see the wonderful sale prices available on the remaining product.  Thank you for your comments and support during our many challenges.

Only four more days until Classy Cards closes, so take advantage of the wonderful sale going on!

Thanks for stopping by!!!  Until next time...


Pin It
Monday, February 22, 2016

A New Baby Carriage

Hi, it is Shirley here posting today.    This week we are to make a Aqua and Coral card.  The colors look great together and I thought they would be perfect for a baby card.


I started with a white card base and added some floral designer paper for the next layer.  I used one of my Spellbinders, Floral Ovals, die to cut the white decorative oval.  I added a coral oval that I embossed using the Crafts Too Dots Embossing Folder.  I popped the oval up on the designer paper with Joy Foam Pads Small.

I used light aqua paper to cut the Memory Box Baby Carriage. I also used foam pads to pop the carriage up on the dotted oval to add to the dimension.  I added three white pearls and a punched coral heart for the final touch.

Thank you for joining us today.  I hope you will join us for our last challenge.

Thanks for stopping by!!!  Until next time...


Pin It
Thursday, February 18, 2016

Respect

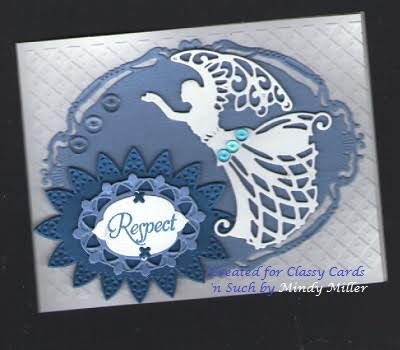
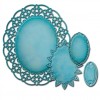
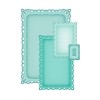
Mindy with you today to share an inspirational card that is quick and easy to make for many occasions.  I started by dry embossing the background with the Lattice Embossing Folder by Crafts Too!  I then die cut several layers of oval dies, Oval Regalia and Fleur de Elegance both by Spellbinders, and layered them to make a background and sentiment spot.  

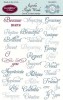
An angel die was also added, along with the sentiment stamped using the Just the Right Words Stamp by JustRite Stamps.  A few Water Dew Drops from The Robin's Nest were added for the finishing touch.


Cards need not be extensive and expensive to look elegant and classy.  With just a few die cuts and embellishment you can create a lovely card. 

Want to purchase some or all of the products used in today's card?   Classy Cards carries those that are in gold and underlined.   Click those or the pictures below.  Happy shopping!!

Thanks for stopping by!!!  Until next time...


Pin It
Thursday, February 11, 2016

Poppy Fence

Greetings, friends. Mindy with you today to share a card I really love. I have always loved poppy flowers, and when I saw this framed Poppy by Stacy Stamps, I knew I had to purchase it.


To start my card, I stamped the design on watercolor paper and colored and shaded the design with watercolor markers.  While it was drying, I embossed a rectangle of metallic bronze card stock with the Daisy and Swirl Embossing Folder by Crafts Too! for the background. I then adhered a doily die before adhering the framed poppy picture on top, raised up with foam adhesive to give dimension.

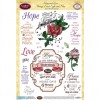
To complete my card, I stamped a sentiment from the Hope and Love Vintage Labels Eight and Nine by JustRite Stamps, a Medium Butterfly by Impression Obsession and a few sequins cut from the Sequins Die-Namics die from My Favorite Things.

Enjoy your week, and be sure to join us for our weekly card challenge on our blog.
Thanks for stopping by!!!  Until next time...


Pin It

Wednesday, February 10, 2016

Silver Hearts

Hi, everyone, it is Shirley posting today.  I have made a wedding card to share with you.  It is made with neutral colors just like the one I made for last week's challenge. 


I used layers of silver and white on my card.  The top layer was embossed using the Crafts Too Dots embossing folder.    I cut two white hearts using the Spellbinders Classic Scalloped Hearts.  I took a silver and white invitation that I had in my stash to cut the top hearts.  I popped them up on my card using Joy Foam Pads Small.

I took silver card stock and used the Memory Box Madera Corner die to cut two of the corners.  I placed them behind the hearts and used Art Institute Dries Clear Adhesive to adhere them to the card.  

I used the Spellbinders Sentiments Three to cut the Love with silver card stock.  The silver heart at the top of my card was cut using the Impression Obsession Heart Flourish.

I hope you enjoyed my card today. 

Our store closing sale is going great!   Have you picked up your fabulous deals yet?   Sale details are here.   Hurry!!!  

Thanks for stopping by!!!  Until next time...


Pin It

Monday, January 25, 2016

White Lace Hearts

Here is a card I made for the Classy Cards 'n Such challenge #121-make a card using neutral colors.


I started my card with a white card base.  I used the Spellbinders Romantic Rectangles die to cut the next layer.   I used the Crafts Too Dots Embossing Folder on the white rectangle.   This is my favorite and most used embossing folder in my collection.   It really gives my cards an elegant look.  

I added a piece of heart lace across the front of the card.  I used the Spellbinders Lace Hearts to cut the elegant heart.  I used Joy Foam Pads Small to pop the heart up over the lace.  I added white swirled pearls around the lace heart.  I cut the key, that is also from the Lace Heart Dies, from an old thank you card that had not been used. I liked the paper as it was not a real shiny silver and it is not completely silver.  I did not want a shiny silver because it would take away from the beauty of the white card.  I used the Spellbinders Classic Scalloped Hearts die to cut the heart that is placed over the key and embossed it with the Dots embossing folder.  The key was popped up using Joy Foam Pads Small.

Thanks for coming by today.  Be sure and join us for the challenge this week.  We love seeing the beautiful cards you all make.
Be sure to take a good look around the Classy Cards shop and get the items you want.   Things are going quickly!   Some entire categories are already gone!!   You can find all of the details here on our close-out sale!

Thanks for stopping by!!!   Until next time...


Pin It

Thursday, January 21, 2016

Morning Glory

Welcome friends, Mindy with you sharing a watercolor card using one of the New Framed Flowers stamps by Stacy Stamps.


I stamped the image Morning Glory by Stacy Stamps on watercolor paper and colored the image with some Copic and some watercolor markers.  I then embossed accent lines around the image with my Scor-Buddy scoring tool and bone folder, accenting the edges of my watercolor paper. I then adhered a background paper embossed with the Mini Fans Embossing Folder by Crafts Too to my card base, then my Morning Glory image as the top layer.  A single layer bow and tag with sentiment from God's Purpose Stamp Set by Sweet 'n Sassy Stamps completed the card.

I love these little watercolor images, they make great accents for classy cards and there are several to choose from.  Have a great week, and create a card to join in our weekly challenge.
There is still time to join our Classy Cards 'n Such challenge. Click on the Current Challenge tab on the right side of the blog for all the details. Come and join the fun!

Thanks for stopping by!!!  Until next time...


Pin It
Wednesday, January 20, 2016

Button Bouquet

Button, button. . . . Whose got the button? We do!  The theme for this weeks challenge at Classy Cards 'n Such is Buttons, all shapes and colors.  Mindy here, and when I saw this weeks inspiration photo on the calendar page, I wanted to make a flower arrangement from buttons.


I started by assembling several layers and colors of buttons suitable for my card. I die cut the Lattice background from card stock and one from craft foam, to build it up and give the card dimension. I embossed a background card with the Mini Fans Embossing Folder by Craft's Too and adhered the lattice oval to the background with Art Institute Dries Clear Adhesive. I then die cut the Bamboo Shoots die and adhered it before adding my button flowers to the arrangement.  Two Medium Butterflies from Impression Obsessions were added with button bodies, and a twine bow as added for a bit of sparkle.  A birthday sentiment completed the card.

I hope you have been inspired by my card, and will join us in our challenge this week.


Watch for a BIG announcement here later today!

Thanks for stopping by!!!  Until next time...


Pin It