Showing posts with label Stamps. Show all posts

Friday, February 26, 2016

Thanks a Bunch

This is the last card posting for my time on the Classy Cards 'n Such Design Team. Mindy here, and I thought a Thank You card would be appropriate for my final card.


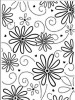
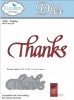
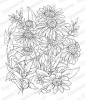
I started by stamping the Coneflowers from Impression Obsession on a piece of watercolor paper and coloring with watercolor markers.  When it was dry, I ran it through my embossing machine with the Daisy Flourish Embossing Folder from Crafts Too!  I layered it on my card front, and then die cut the sentiment, Thanks by Elizabeth Crafts Designs along with a layer of thin craft foam to give the card some dimension.

I have really enjoyed my time with Beverly and the design team, working with the products she carried in the Classy Cards 'n Such Online Store.  The store is closing on Monday, February 29th, so click on the link to see the wonderful sale prices available on the remaining product.  Thank you for your comments and support during our many challenges.

Only four more days until Classy Cards closes, so take advantage of the wonderful sale going on!

Thanks for stopping by!!!  Until next time...


Pin It
Wednesday, February 24, 2016

A Rose is A Rose

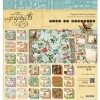
Welcome friends, Mindy with you to share my sample card for our Weekly Challenge # 125 - Aqua and Coral, make a card or project using the colors aqua and coral.  I started with a background patterned paper from the pad Time to Flourish by Graphic 45. The pad is broken down by months so that you can make your own calendar or celebrate an occasion by-the-month.


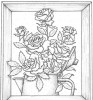
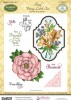
It just so happens that the paper for June, my birth month, is aqua with coral and pink roses on it. My favorite flower has always been the rose, so I featured one of the Framed Floral Stamps by Stacy Stamps, Rose to be the focal image of my card.  I stamped it on watercolor paper and colored it with watercolor markers. I was able to shade the roses to give them depth and dimension using the watercolor markers and a water pen. I also die cut a party bow and shaded it with the coral color.

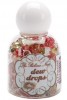
To complete my card, I added a tiny tag with the sentiment, Hello, stamped from the Floral Vintage Labels Two by JustRite Stamps and a few Poinsettia Dew Drops from The Robin's Nest.  I hope you will join in with your submission to make this final card challenge one of the best!
I've just increased the discount on the close-out sale for the Classy Cards shop!   Be sure to take advantage of it!   Details here.

Thanks for stopping by!!!   Until next time...


Pin It
Thursday, February 18, 2016

Respect

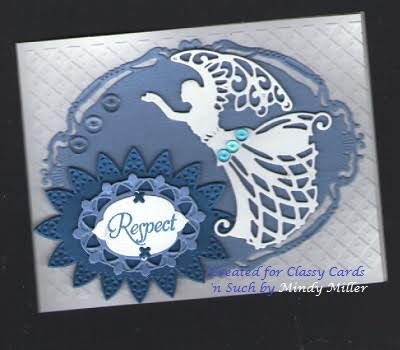
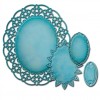
Mindy with you today to share an inspirational card that is quick and easy to make for many occasions.  I started by dry embossing the background with the Lattice Embossing Folder by Crafts Too!  I then die cut several layers of oval dies, Oval Regalia and Fleur de Elegance both by Spellbinders, and layered them to make a background and sentiment spot.  

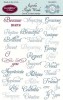
An angel die was also added, along with the sentiment stamped using the Just the Right Words Stamp by JustRite Stamps.  A few Water Dew Drops from The Robin's Nest were added for the finishing touch.


Cards need not be extensive and expensive to look elegant and classy.  With just a few die cuts and embellishment you can create a lovely card. 

Want to purchase some or all of the products used in today's card?   Classy Cards carries those that are in gold and underlined.   Click those or the pictures below.  Happy shopping!!

Thanks for stopping by!!!  Until next time...


Pin It
Tuesday, February 16, 2016

Thinking of You

Hi, Joy here today.  This card was made using supplies from the Classy Cards 'n Such online store.  So many things are on sale - You might want to take a look before all the good things are gone!  Now on to the challenge.  Today it was stitching, using the colors in the pic posted on Beverly's blog.  I used the colors of the blue  & red dog and the dog with the green ear. Here is my card.


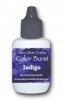
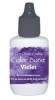
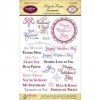
I water colored a piece of card stock with Crimson, Yellow, Green, Indigo and Violet Color Bursts by Ken Oliver. The sentiment is from Hugs & Kisses Sentiments by JustRite. The little red flower is from Floral Fan Elements by JustRite. The stitched sentiment was popped up using Large Joy Foam Pads.

Why don't you join in this challenge - It's such a cute picture. Just use stitching and let the colors and patterns inspire you. Check out the guidelines at Classy Cards 'n Such. Get some inspiration from the designers and link your project at the Classy Cards 'n Such blog. Classy Cards 'n Such has some super bargains on right now!!


Thanks for looking at my card.  Have Happy Stamping Day!


Ready to get going on this year's Christmas cards? There are plenty of great Christmas stamps and die cuts left in the Classy Cards shop for a great price!

Thanks for stopping by!!!  Until next time...


Pin It

Monday, February 15, 2016

Patterns stitching colors

Hello, it is Shirley posting today.  I have made a card for the new Classy Cards 'n Such challenge for this week.   We have an inspiration picture with stuffed puppy dogs on it.  We are suppose to use the Colors, Stitches or Patterns on our cards.  We can use them all if we like.  I went with the colors.  Here is my card.


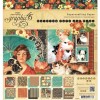
All of the patterned paper that I used in my card including the image came from the Graphic 45 Raining Cats And Dogs Paper Pad.  This paper does all the work and takes the guess out of what papers to put together for a card.

The circle was cut using the Spellbinders Teardrop Circles die.  This set comes with four dies.  I used the Spellbinders Tool 'n One to clean my die.  Here is a video on how well it works.  It sure saves a lot of time.

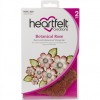
I made my flower using Heartfelt Creations Botanical Rose stamps.  I sponged them with ink.   I shaped them using the Paper Blossoms Tool Kit.   I added stickles to the center of the flowers.  I colored the leaves and scrunched the tips.

I hope you will join us for the challenge.

Do be sure to take advantage of our store closing sale!   Details and coupon code are here.

Thanks for stopping by!!!  Until next time...


Pin It

Thursday, February 11, 2016

Poppy Fence

Greetings, friends. Mindy with you today to share a card I really love. I have always loved poppy flowers, and when I saw this framed Poppy by Stacy Stamps, I knew I had to purchase it.


To start my card, I stamped the design on watercolor paper and colored and shaded the design with watercolor markers.  While it was drying, I embossed a rectangle of metallic bronze card stock with the Daisy and Swirl Embossing Folder by Crafts Too! for the background. I then adhered a doily die before adhering the framed poppy picture on top, raised up with foam adhesive to give dimension.

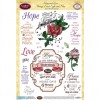
To complete my card, I stamped a sentiment from the Hope and Love Vintage Labels Eight and Nine by JustRite Stamps, a Medium Butterfly by Impression Obsession and a few sequins cut from the Sequins Die-Namics die from My Favorite Things.

Enjoy your week, and be sure to join us for our weekly card challenge on our blog.
Thanks for stopping by!!!  Until next time...


Pin It

Wednesday, February 10, 2016

Blossoms Birthday

Our challenge this week at Classy Cards 'n Such is Lilacs and Lace.  Mindy here, with my interpretation of th e inspirational photos from our blog.  I die cut a few tiny flowers and formed them into what I think a lilac blossom would look like, I have never seen one in person.  They don't grow well here where I live in Texas. 


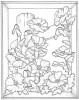
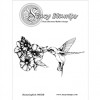
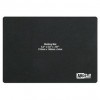
I found an intricate lace doily that I had die cut previously, and adhered it to a background paper that fit my card base.  Then using the Hummingbird by Stacy Stamps, I stamped the bird and flower bunch on some watercolor paper and colored in with watercolor markers. While the watercolor was drying, I die cut two passes of the Tiny Flowers die cut by Impression Obsession and cupped them on my Paper Blossoms Craft Molding Mat available in the Classy Cards Online Store.  I hand-cut three shapes that look like a cluster of lilac, and then used my Art Institute Dries Clear Adhesive to adhere each flower. While the clusters were drying, I die cut around my stamping with a Labels Eighteen by Spellbinders then attached the three lilac blossoms.

Some lace, pearls, and rhinestones were added for bling, and the sentiment from Hope and Love Vintage Labels Eight and Nine from JustRite Stamps were added to complete the card.  I hope you have enjoyed my card, and will visit with us again for more card inspiration.


Thanks for stopping by!!!   Until next time...


Pin It