Tuesday, September 30, 2014

Vintage Christmas

Hello! It's Gracie today, welcoming you to a new post for Classy Cards 'n Such challenge: Christmas Die Cuts. I absolutely love to work with dies, and Christmas dies in particular are often so pretty and dainty.That means this challenge was so much fun to me!

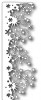
I went ahead and created my Christmas card in vintage style. To make it, first I die cut all the decorative elements with PoppyStamps dies. Starting with a Mini Madison Window, I cut from light brown card stock. Then I die cut four Small Blooming Poinsettias from red card stock. I made two poinsettias, each of them layered twice, to make them look fuller. I also die cut a Pine Garland from pearlized and embossed olive green paper.


I made a small tag with the help of A2 Matting Basics A (third die). I dry embossed it with a Cuttlebug folder. I used a technique called Colored Dry Embossing. I basically used a blender marker from Spectrum Noir to lift and apply Chromium Oxide Green from PanPastels Flower Coloring Kit-Landscape starter set. I love PanPastels, and I love this technique, it's easy and it gives a nice touch to your dry embossing. I also added a bit of Inka Gold - Yellow Gold, very roughly, to the dry embossing. I punched a hole to the tag and decorated it with a little hole protector I cut with a die and a paper chord bow.

I added the die cut elements to the tag, but first I embellished the bottom of the tag with a piece of red ribbon and a mini bow. Before adding the Mini Madison Window, I adhered the image of a little girl as it's background. I decorated the window with the Small Blooming Poinsettias and the Pine Garland. The poinsettias and the garland were also roughly painted with Inka Gold - Yellow Gold. Finally I embellished the poinsettias with Baby Pearls - LeCreme.


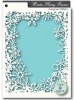
I used A2 Matting Basics A to create my card base. I layered the front of the card with Spellbinders Diamond Effects' largest frame. I added a piece of gold ribbon vertically to this layer. Next, I mounted the embellished tag on a coordinating smaller frame and added it to the center of the card.

I hope you like my Vintage Christmas card, and that I have inspired you to join our challenge this week!

If you'd like to check out the supplies I used to make my card, please click on the links below, or click here to be directed to the Classy Cards 'n Such store. If you do purchase some crafty goodies, remember to use my code Gracie-10 during checkout to get 10% off your entire order.

Thanks so much for visiting today!

  
We appreciate your sharing our cards and ideas on Facebook, Pinterest, Goggle+, Instagram...anywhere your crafty friends can be found. The icons below my signature make it easy to share.

Thanks for stopping by!!! Until next time...


Pin It

It's Never Too Early

Hello my Classy Friends! Diane here with you today. Can you believe Christmas is just a mere few months away?? If you are like me, you are so busy during the month of December, that it is nice to be a few months ahead on making your Christmas cards - It's Never Too Early!!

I started with the background of my card using a
Memory Box Winter Flurry Frame stencil. I used a silver ink and basically just sponged around the stencil!


I have been having a "fondness" for the ornament dies available and when I saw this intricate Impression Obsession Fancy Ornament die, well, I just had to have it!! But take a peek at the online store, as there are many new ornament dies available, just type "ornament" into the search and you will be amazed at how many to choose from!

I cut it out of some glitter paper and a tip is to peel off some of the backing of your glitter paper to get a nice smooth and clean cut!

The ornament hanger, as well as the Merry Christmas, were cut using Spellbinders Precious Metals Premium Craft Foil. I don't know if you have ever tried this metal foil, but if not, you need to, as it is stunning when cut!

The red bow is part of the ornament die which I cut from
Stardream Jupiter Metallic 105# paper, finishing off the card with a bit of color.

I have lots of ideas for this die, so I am sure you will be seeing me using it over and over!!

Thanks for visiting, and don't forget to join in our current challenge which is Christmas Die Cuts. Hope to see you there!

Classy Cards 'n Such online store has added new products. Click here to find all the new items that have been added!

Click on the Weekly Deals label found in the right hand column of the blog. You'll love the special sales!  

Thanks for stopping by!!! Until next time...


Pin It

Monday, September 29, 2014

Trimming The Tree

Hello, it's Diana today! A neighbor once told me she trimmed the trees with her kids at Christmas.  Not being a native here, I thought that was really weird.

If you're trimming the tree, won't it make a big mess? Why would you want to have your kids help you with cutting the branches?  And why would you want to trim it in the first place?  They have such a lovely shape naturally.

So that was when I learned that "trimming the tree" actually meant decorating the tree.  But I still rather do it without the kids, because I'm like Monica from "Friends" when I decorate for Christmas! :)


So here is my first ornament of the year. I kept it very simple and clean because it's such a beautiful delicate die. I die-cut my Memory Box Cabrini Ornament once each, from gold card stock, red card stock, and green card stock and four times from white card stock.  I stacked up the 4 white and then gold on top to make a thick outline.  The golden ornament was sponged with orange ink to give an illusion of a sphere and I used the negatives from the red and green stock for my holly branch. The thick outline really gives the card a feeling of depth and luxury in real life.

The branch is the Impression Obsession Pine Branch which has been on my wish list for quite a while!  The double frame is made from nesting two Spellbinders A2 Matting Basics A and popped up with some Joy! Small foam pads. Lastly, I added some Star Dust Stickles to my Pine Branch.

Thank you for looking and hope you can play along with our 52nd Challenge to use Christmas die cuts!


If you would like to view the challenge for the week and the rules, click on the Current Challenge label, located on the right side of the page.

Want to plan ahead and join our weekly challenges? Just click on the Challenge Calendar tab, located on the right side of the page. We would love to have you share your creative ideas! You could be our next Classy Cards 'n Such prize winner! 

Thanks for stopping by!!! Until next time...


Pin It

Our House To Yours

Hello, Stamping Friends! It is Shirley posting today. Time is sure flying and not only will the snow be upon us soon, so will Christmas. Luckily the challenge this week is to make a Christmas card with Christmas dies. Now I have one more Christmas card to add to my stash.


I started off with the white card base, I cut a piece of red glitter paper to layer on top of it. I used white card stock to layer over the glitter paper.

I used adhesive to adhere these layers to the card stock. I used a scrap piece of white card stock and used the Memory Box Frostyville Border, to make the snowflake border for the top of the  card. I used glue to adhere it to the card. I put glue over the snow flakes and added Crystal Ice glitter. I love how it sparkles!

Next I took silver paper and used the Poppy Stamps Village Lamp Post die to cut the lamp post. I cut the glass for the lamps from light blue glitter paper to give the lamps a frosty look.

I decided the lamp post needed to be decorated for Christmas. I used a branch punch and green paper to make the greenery. I used the Memory Box Precious Mittens die to  cut the bow from red glitter paper.  I saved the mittens to use on another project.

I used Glue Dots to adhere the lamp post and the greenery, with the ribbon, to the card.

For the finishing touch, I used a stamp from my collection and red ink to stamp the sentiment.

Be sure to join us for the challenge this week and you will have another Christmas card for your stash. We have a Christmas inspiration picture for you and the challenge is to use Christmas dies.

Thank you for visiting to take a peek at  my card. Tune in tomorrow for another great Christmas card!


The NEW Memory Box 2014 Collection dies and stencils are in at Classy Cards 'n Such store! Cute new Christmas stamps from Wild Rose Studio, Distress Sprays, Glimmer Mists, and more! Check it all out here today!

Join the Classy Cards blog email list in the upper left column of this blog and receive exclusive weekly deals not available elsewhere! A one-time 20% discount on an order of your choice! Subsequent orders receive a 10% discount. Don't miss out, join today!

Thanks for stopping by!!! Until next time...


Pin It

Sunday, September 28, 2014

CCNS Challenge Winner #51

Hi everyone,

Thanks for playing along with our Cozy Plaid's challenge! Unfortunately the minimum of seven entries was not reached so no prize will be awarded this week.

However, Kathy Bradley (Entering Kathyville) for entry #2, is the winner of this week's Classiest Card award! Kathy, please email me at beverly@classycardsnsuch.com and I will send you the badge to proudly display on your blog!


Our next challenge is fun and super easy! Click here for the Christmas Die Cuts #52 challenge!!

Please encourage your friends to play along with us too, and be sure to read and follow ALL the requirements! 

Thanks for stopping by!!! Until next time...


  Pin It

Saturday, September 27, 2014

CCNS Challenge 52 Christmas Die Cuts

Welcome to Classy Cards 'n Such Challenge #52.

This week our challenge is Christmas Die Cuts!


Make a paper crafting project in good taste....using the Inspiration photo and...using Christmas Die Cuts...be creative...and of course using a product sold at Classy Cards 'n Such!

That's it...very simple, but please read the requirements below....looking forward to your entries!
We have a few requirements to play: 
1.  Make a classy card, tag, or other paper crafting project
using the theme Christmas Die Cuts.
2.  Theme must be followed.
3.  Must include an item currently stocked in the ClassyCards 'n Such online store.  However, it does not have to have been purchased there.
4.   Must be a follower of the CCNS blog either by email or reader and/or be a  CCNS newsletter subscriber. If a follower via reader, must email beverly@classycardsnsuch.com with name used in the reader.  If you aren't a follower or newsletter subscriber, sign up now!
5.   Direct link your entry post (not blog), to the InLinkz tool below.
6.   If using a gallery, such as Splitcoast Stampers, use code CCNS52.
7.   Only new entries please.  No back posting allowed.
8.  You may enter up to 3 projects....and combine with as many challenges as you want.
9.   New challenges begin on Mondays and end on Saturdays at midnight central time.  Winners are announced on Sundays.
10. CCNS has the right to remove any entries not following the guidelines and/or entries deemed inappropriate.
11. Most of all, have FUN!!!

The Prize:
1.   While we cannot ship prizes internationally due to increasing shipping costs, international entries are encouraged. We can only ship prizes to US addresses at this time.
2.   A prize will be offered to the winner based on meritOccasionally, a guest designer spot may be offered!
3.  A Classiest Card badge may be awarded when entries are exceptionally good.
4.  Winner must claim their prize by Wednesday of each week or the prize will be forfeited. 
5. Prizes are limited to one win per month.
6. Prizes will be awarded only when there are seven or more entrants.


Here are a few samples from
the Classy Cards Design Team to get you started.

Shirley

Diana

Diane

Gracie

Joy

Jenny


Mindy
 
We'll have the full posts on these 
beautiful cards later this week!

You're invited to Classy Cards 'n Such to see all the amazing products available.

Join the Classy Cards blog email list in the upper left column of this blog and receive exclusive weekly deals not available elsewhere! A one-time 20% discount on an order of your choice! Subsequent orders receive a 10% discount. Don't miss out, join today!

Thanks for stopping by!!! Until next time...


Pin It