Showing posts with label Stencil. Show all posts

Thursday, January 28, 2016

Faith

Hello!  Diana here today to share a monochromatic card.  I needed a green card today because I'm so ready for spring to come!  

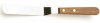
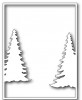
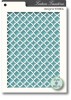
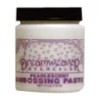
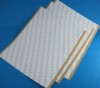
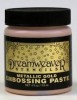
I started by trimming a piece of white card stock with Spellbinders A2 Matting Basics A.  I then sponged some Mowed Lawn in a small area.  After it dried, I taped my layer to the Memory Box Textured Mesh stencil and added Dreamweaver's white embossing paste with a palette knife. I then set that aside to dry and started die cutting Memory Box Bamboo Shoots and the Faith word die out of green card stock.  


When I tested in on the card, it was a little plain so I added ultra thick embossing powder to my die cuts and it instantly gave it more polish and oomph. Much better, don't you think?


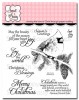
For the inside of my card, I added another bamboo shoot die cut as well as a sentiment from Sweet 'n Sassy Stamps The Future set.

Thanks for looking!
Did you see how many new categories were added to the store closing sale today???  Click here to check it all out.

Thanks for stopping by!!!  Until next time...


Pin It

Thursday, December 24, 2015

Winterberries tag

Hello!  Diana here today wishing you a very Merry Christmas.  I hope you have all your gifts wrapped and ready, that you arrive at your destination safely, or if you're hosting - you're done cleaning and prepping so that you can enjoy Christmas with family and friends.  One last tag to share with you today - it would work well as a Christmas tag (if you're in need of one in these last moments) or you can stick in on a card and send it anytime during the winter.

The tag has lots of pretty details but it didn't take long to put together.  I used a My Favorite Things cross-stitch die for the base of the tag, a circle punch and the stitched circle from My Favorite Things Blueprints 13 for the tag element where I could attach the ribbons.  I sponged all of it along the edges with Broken China and then stenciled some snowflakes using  Memory Box Winter Tiny Snowflakes Stencil,  Dreamweaver's white embossing paste, and a palette knife. It's hard to see in the photograph but it adds some lovely and subtle texture.

While the paste was drying, I die cut the new PoppyStamps Holiday Winterberries out of watercolor paper and colored it with watercolor brush pens. I then it adhered it to the tag
with Art Institute glue, added some ribbon, and I was done!


Merry Christmas!
And a very Merry Christmas from all of us at Classy Cards 'n Such!!!

Thanks for stopping by!!!  Until next time...


Pin It

Tuesday, December 22, 2015

A Christmas Wand

Good Morning, Joy here today with a card for the Classy Cards 'n Such Weekly Challenge. Today, we were to use this photo as inspiration.


and here is my card:


The trees are a die-cut frame called Cascade Evergreen Frame by Memory Box.  The sentiment is from Christmas Joy by Sweet 'n Sassy Stamps stamped on some Heavy Weight Vellum.  I used a stencil called Texture Tessatina by Memory Box with some Dreamweaver Pearlescent Embossing Paste.  Before it dried, I sprinkled on Sparkle 'n Sprinkle Crystal Ice Glitter.  Two green trees were die cut from the Evergreen Frame and layered on top of the white card stock making sure some of the white card stock was showing. Some of the embossing paste was added using a small brush being sure to make some peaks.  Lastly, I sprinkled some glitter on the trees before the paste dried.

Today would be a great day to join in the Silent Night, Holy Night Challenge. Just go here and look at the details for the challenge. Be sure to check out what the other design team members did. They did an awesome job this week. Make your project and link it here. You could be the winner of a nice prize!

Thanks for looking at my card. Have a Happy Stamping Day!


Want to purchase some or all of the products used in today's card?   Classy Cards carries those that are in gold above and underlined.   Click those or the pictures below.  Happy shopping!!

Thanks for stopping by!!!  Until next time...


Pin It

Wednesday, December 16, 2015

My Lucky Stars

I thank my lucky stars for you everyday! Hi friends, Mindy with you today sharing my card for the Starry, Starry Night Weekly Challenge this week at Classy Cards 'n Such.  I love making a night sky with lots of stars on my card fronts, and hope you will take the time to submit a starry card to our challenge this week.


I started my card by using Regular Embossing Paste by Dreamweaver to emboss through my Stars, Starry Nights stencil by Memory Box.  After the paste was dry, I die cut the Santa die cut set from Impression Obsession and adhered it using Double sided adhesive SCOR-TAPE to the back of my paper before die cutting.  After the die went through the machine, all I had to do was peel the design from the card stock and all the little details including the antlers and legs were ready to paste down.

For the bottom of my card, I formed two snow banks to overlap on the base, then adhered several Evergreen Trees die cuts from Impression Obsession to layer with Scor-tape and Joy! Foam Pads - Small to give depth and dimension.  To complete my card, I added a few star shaped sequins and an applicable sentiment.

I hope you have enjoyed my card, and thank you for visiting today.

When shopping the wonderful deals at Classy Cards 'n Such, be sure to enter your blog discount (coupon code BLOG10) for a great savings!

Thanks for stopping by!!!  Until next time...


Pin It

Tuesday, December 15, 2015

Ornament Tag

Hi there, Diane with you on the blog today!  This weeks' challenge is Starry Starry Night. Using the inspiration photo, we were to use stars on our projects.  I have a large family, which means I have a large need for tags, so I thought I would make a tag this week!


I started with two very basic Spellbinders dies, the original circle die and the scallop circle die.

I cut the scallop circle from Luminized Curious Metallic card stock. I used Memory Box Star Dust stencil to stencil
silver stars on the plain white circle.

An ornament was cut using Memory Box Classic Ornamentwhich was cut from an embossed, metallic paper from my supplies. A silver glitter star was added using a star punch.

To make the ornament more authentic looking, I used just the top piece (ornament hanger) from Impression Obsession Fancy Ornament.

I added ribbon/bows, twine and jingle bells to finish.
I love how this will make a cute and pretty tie on for a package. Thank you for visiting with me today!


Are you ready for Christmas yet?   If you still need supplies to make gift tags or even last minute cards, we can get in-stock items in the mail to you next day at the latest!  And...you can use coupon code BLOG10 to get 10% off your order!

Thanks for stopping by!!!   Until next time...


Pin It

Saturday, November 28, 2015

Nativity Scene

Hi, Diane with you today!

For my card today, I started with a pretty blue background
using Stardream Lapis Pearlized Metallic paper.  I used white card stock and cut a center out with Spellbinders Nested Medallion Label Dies.


I then used a Memory Box Stars, Stardust Stencil with Dreamweavers Metallic Gold Embossing Paste.

The scene was cut from Die Versions Nativity Border.
Cutting it once from white card stock and a second time
from a black craft foam.

To finish, I simply added Aztec Gold Glitter and a pretty sheer ribbon/bow.

Thank you for visiting with me today!


Come back tomorrow, and we will have a new CCNS challenge for you. It will be Challenge #113 - O' Christmas Tree. There are beautiful cards just waiting to inspire you by the CCNS Design Team.

Thanks for stopping by!!!   Until next time...


Pin It

Friday, November 20, 2015

Birthday Cuppa Love

Good Morning, it is Shirley posting today. I have a cute birthday card to share with you today. I have a lot of friends that are coffee and tea drinkers so this will be a great card to have on hand.

I started with a white card base and added a layer of pink and white.  The next layer is one that I made a while back when I was playing with my Ken Oliver Color Bursts.   I made them using different colors so now I have one ready for this card.  I like to make extras when I have the supplies out.  They really come in handy to help you make a quick card for an occasion you may have forgotten about.  The color bursts also are good to have for a card or project when you do not have the color of paper you need.  You just make your own.   For this background, I used the Memory Box Texture Drip Rings stencil along with Ken Oliver Color Bursts in Alazarin Crimson, Orange and just a little dab of the Ultramarine Blue, which made the hint of green on my card.

I used the PoppyStamps Teacup Stack die that just arrived from the Classy Cards store.  I put some pink and yellow card stock behind the cups.   I popped the cups up on the background with Joy Foam Pads Large

The sentiment was stamped using the Sweet n' Sassy stamps called Keep In Touch.  I like this set because it has almost every sentiment one needs in card making.

For the finishing touch, I added sequins and attached them with Art Institute Dries Clear Adhesive.  I think the sequins just help to give the card a more festive look.   

Thanks so much for coming by today.  Have a great weekend!

Color Bursts - just like Shirley used in her pretty card above - are on sale through Saturday, November 21st!   Use coupon code CW17 at checkout and receive 17% off either the single colors or color sets -  your choice!  Click here to shop all available Color Bursts!

Until next time...


Pin It