Hi! Diana here with a very CAS Christmas card.
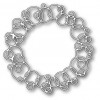
The Memory Box Loopy Loop wreath in silver foil (cut from the backside of any of the SB Precious Metals Craft Foil)
was just too pretty to cover up. So I opted to really highlight it by
making a square card with a thin red matting around the silver wreath.
I then added several flowers made using PoppyStamps Small Blooming Poinsettia dies, with the edges sponged with Seedless Preserves, and the center filled with Champagne Stickles.
I also added a few leaves from Memory Box Fresh Foliage where the edges were sponged with Distress Ink Pine Needles.
Finally, I added a spattering of White Baby Pearls. A very quick card if you make a bunch of the poinsettias beforehand - they are so easy to use for Christmas!
Click
any of the links below to be taken to the products from the Classy Cards 'n Such shop.
Thanks for stopping by!!! Until next time...
Pin It
Showing posts with label Spellbinders paper. Show all posts
Thursday, October 15, 2015
Thursday, June 18, 2015
Burst of Color
Hello!
Diana here with another butterfly card. I just love these dies and I
couldn't resist something really colorful. Foiling is very trendy now
but if you don't have the materials, foil papers are a great
alternative.
Here I used a combination of Jewel Tones foil paper, as well as Precious Metal foil papers from Spellbinders, with the PoppyStamps Delaney Butterfly. I wanted the butterflies to have a backing but not too solid, so I used the PoppyStamps Cheviot Butterfly with Vellum. I sponged the Vellum to match the foil - going darker along the edges.
The background was made with Open Scroll Leaf, by Impression Obsession, cut twice from a green watercolor wash. The white panel behind was embossed with a Darice Chevron embossing folder. I also added some Clear Dew Drops.
*Here is a bit more information of creating the butterflies:
You're invited to Classy Cards 'n Such to see all the amazing products available.
Thanks for stopping by!!! Until next time...
Pin It
Here I used a combination of Jewel Tones foil paper, as well as Precious Metal foil papers from Spellbinders, with the PoppyStamps Delaney Butterfly. I wanted the butterflies to have a backing but not too solid, so I used the PoppyStamps Cheviot Butterfly with Vellum. I sponged the Vellum to match the foil - going darker along the edges.
The background was made with Open Scroll Leaf, by Impression Obsession, cut twice from a green watercolor wash. The white panel behind was embossed with a Darice Chevron embossing folder. I also added some Clear Dew Drops.
*Here is a bit more information of creating the butterflies:
To
create the double butterflies, cut the top layer as you would out of
regular card stock. If you have trouble removing your cut from the die, a
sheet of wax paper between the die and the paper helps. This is always
a great trick when your die is intricate or has tiny skinny parts. The
bottom layer of the butterfly is the complementary solid die (most
Memory Box and Poppystamps complementary butterflies are sold
separately.) After die-cutting the butterfly out of vellum, use a sponge
dabber to sponge the bottom side of the vellum. This helps create a
softer and more blended background. I then adhere the two butterflies
together by gluing just the body of the butterfly together and letting
the wings stick up a bit.
I
apologize that I was not aware that the Delaney Butterfly is out of
stock and will not be restocked. However, Memory Box and Poppystamps
have many other small butterfly dies that would work just as well. Below is a listing of butterflies and their matching dies:
Rhone and the Effera
Swirl and Darla
Theo and Whidbey
Willoughby and Asti
You're invited to Classy Cards 'n Such to see all the amazing products available.
Thanks for stopping by!!! Until next time...
Thursday, May 14, 2015
Poppy Sympathy
Hello, Diana here today! There are two types of cards that are hard for me - sympathy cards and masculine cards.
When I saw the Memory Box Row of Poppies, I thought it would make a perfect sympathy card.
I started with a stitched rectangle die cut from MFT Blueprints 13. I used the Memory Box Textured Mesh stencil, and sponged some Broken China over just a small section of the layer.
Next was to die-cut the Row of Poppies out of watercolor paper, and use markers to color them.
Adding a PoppyStamps Delaney Butterfly cut from gold SB Precious Metals Craft Foil.
Last, I added a double bow made with the Bow-Easy, and added a sympathy tag using ODBD Mini Tag Sentiments and Dies as well as a gold cross.
The card was still a little flat to me, so I die cut and colored some of the poppies and popped up three of the blooms with small Joy! Foam Pads. A little dimension can go a long way!
If you are unable to find an item in the store, or would like something special ordered, please email me at beverly@classycardsnsuch.com.
Thank you for stopping by!!! Until next time...
Pin It
When I saw the Memory Box Row of Poppies, I thought it would make a perfect sympathy card.
I started with a stitched rectangle die cut from MFT Blueprints 13. I used the Memory Box Textured Mesh stencil, and sponged some Broken China over just a small section of the layer.
Next was to die-cut the Row of Poppies out of watercolor paper, and use markers to color them.
Adding a PoppyStamps Delaney Butterfly cut from gold SB Precious Metals Craft Foil.
Last, I added a double bow made with the Bow-Easy, and added a sympathy tag using ODBD Mini Tag Sentiments and Dies as well as a gold cross.
The card was still a little flat to me, so I die cut and colored some of the poppies and popped up three of the blooms with small Joy! Foam Pads. A little dimension can go a long way!
If you are unable to find an item in the store, or would like something special ordered, please email me at beverly@classycardsnsuch.com.
Thank you for stopping by!!! Until next time...
Friday, March 27, 2015
Gold Thanks
Hello, Joy here today, showing you a card I made with supplies from the Classy Cards 'n Such online store.
You're invited to Classy Cards 'n Such to see all the amazing products available.
Thanks for stopping by!!! Until next time...
Pin It
I used an image from Our Daily Bread Designs.
The paper is from Graphic 45 called Botanical Tea.
The "Thanks" is one of ten words from a die set by Impression Obsession called Greeting Set. The sentiment was cut out of a piece of gold from the Spellbinders Precious Metal Sheets.
The matted image was mounted with some of the Large Joy Foam Pads. I added some brads and a little gold twine.
The paper is from Graphic 45 called Botanical Tea.
The "Thanks" is one of ten words from a die set by Impression Obsession called Greeting Set. The sentiment was cut out of a piece of gold from the Spellbinders Precious Metal Sheets.
The matted image was mounted with some of the Large Joy Foam Pads. I added some brads and a little gold twine.
You're invited to Classy Cards 'n Such to see all the amazing products available.
Thanks for stopping by!!! Until next time...
Wednesday, January 7, 2015
Snowflake Shaker Card
Hi,
it's Diana again with another shaker card. They are just so fun to
make (and receive!) I did something a little different and stamped on
my background a sentiment from a stamp set, and embossed with Silver Detail embossing powder on some teal card stock.
I centered it and then die cut it out using the largest rectangle from Spellbinders A2 Matting Basics A. I then cut a piece of white card stock with the largest stitched die from MFT Blueprint 13 and an opening with a medium sized die from Spellbinders Label Eighteen. I love the thin line of matting by combining those dies.
After adhering the acetate to the back of the front layer with Scor-tape and large foam tabs, I added an assortment of glass beads as well as a couple of the smallest snowflakes from the Impression Obsession Small Snowflakes set out of silver SB Precious Metals Craft Foil.
We appreciate your sharing our cards and ideas on Facebook, Pinterest, Goggle+, Instagram...anywhere your crafty friends can be found. The icons below my signature make it easy to share.
Thanks for stopping by!!! Until next time...
Pin It
I centered it and then die cut it out using the largest rectangle from Spellbinders A2 Matting Basics A. I then cut a piece of white card stock with the largest stitched die from MFT Blueprint 13 and an opening with a medium sized die from Spellbinders Label Eighteen. I love the thin line of matting by combining those dies.
After adhering the acetate to the back of the front layer with Scor-tape and large foam tabs, I added an assortment of glass beads as well as a couple of the smallest snowflakes from the Impression Obsession Small Snowflakes set out of silver SB Precious Metals Craft Foil.
Thank you so much for looking and hope you can play along with this week's challenge!
We appreciate your sharing our cards and ideas on Facebook, Pinterest, Goggle+, Instagram...anywhere your crafty friends can be found. The icons below my signature make it easy to share.
Thanks for stopping by!!! Until next time...
Subscribe to:
Posts (Atom)