Showing posts with label Santa. Show all posts

Thursday, September 18, 2014

Reindeer Rendezvous

Mindy visiting with you today, featuring a card that might be used for the holidays, but could also be used for a masculine birthday.

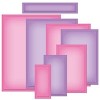
My Reindeer Rendezvous is made from some of the beautiful metallic papers sold in the Classy Cards 'n Such online store.


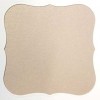
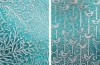
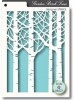
I started with an A2 size Nude Curious Metallic card front, and embossed it with a Spellbinders M-Bossabilities Tweets and Twig embossing folder. I also cut a card base from Pink Lemonade card stock and die cut it with the A2 Filigree Delight card creator by Spellbinders, with the center oval removed.

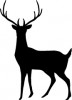
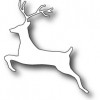
I then stamped the Majestic Deer stamp from Memory Box, twice, with Color Box Chalk ink - Sea Crystal, and fussy cut around both.

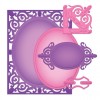
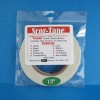
Assembly was quite simple, the embossed rectangle was adhered with 1/2" Scor-Tape, then using the Joy! Small Foam Pads, I attached the filigree frame. The deer were adhered with sticky dots, and they can be positioned inside the frame to your liking. 

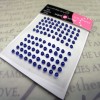
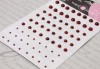
The oval frame was then embellished with Steel Blue Baby Pearls and Glitter. I added two Red Pearls for reindeer noses. Two small bows were tied from twill tape and adhered to the front of the card.

I hope you have enjoyed today's card!


Classy Cards 'n Such online store has added new products. Click here to find all the new items that have been added!

Click on the Weekly Deals label found in the right hand column of the blog. You'll love the special sales! 
  
Thanks for stopping by!!! Until next time...


Pin It

Wednesday, September 17, 2014

Peace On Earth

Hi there! Diana here to share with you my deer inspired card.  This was a lot of fun to make.


For my background, I mixed a little bit of Tim Holtz Broken China with my Dreamweaver's White Embossing Paste. I started at the top of my Memory Box Garden Birch Trees stencil, and spread the paste downward. When I ran out of the colored paste, I used the unmixed white and started from the bottom and moved upwards. Where they met, I just mixed them on the stencil. You can't really see it but underneath the Vellum, it is mostly white to mimic snow.

After the paste was dried, I trimmed down my background using Spellbinders A2 Matting Basics A. I cut two sheets of my Vellum with a wavy top, and wrapped that around my Garden Birch Trees background. I used Stickles to edge the top of the Vellum, and embossed using Silver Detail embossing powder for my sentiment.

I then die cut 8 Leaping Deer by Memory Box. Each deer is stacked 4 high. To make the doe, I cut off the antlers.

Thanks so much for looking!


There is still time to join our Classy Cards 'n Such challenge. Click on the Weekly Challenge label on the right side of the blog!

Join the Classy Cards blog email list in the upper left column of this blog and receive exclusive weekly deals not available elsewhere! A one-time 20% discount on an order of your choice! Subsequent orders receive a 10% discount. Don't miss out, join today!

Thanks for stopping by!!! Until next time...


Pin It

Oh, Deer!

Hi, it's Jenny posting today.  I made this card for the newest Classy Cards 'n Such Santa's Reindeer challenge. 

This is a shaker card and was very simple to create.  I started with a 5.5"x5.5" square gray card and then cut each of the white and pink patterned paper layers a quarter of an inch smaller than the previous layer.


I cut the beautiful delicate frame from the PoppyStamps Claudette Frame die. I then glued the white die cut to the soft pink patterned paper, from the Trimcraft Love Letters paper pad, and then cut out the center using a Spellbinders Classic Squares Small die.

I cut another square out of white card stock using the same Spellbinders square die, and then embossed the square with the Anna Griffin Cherry Blossom embossing folder. The flower burst embossed pattern reminds me of snowflakes. I glued the white embossed square to the center of the large white layer so the embossing would show through the window.

I glued the gray Impression Obsession deer off-center to the embossed square, and then sprinkled loose clear iridescent snowflakes over him. The edges of the deer's antlers and feet were brushed with Tea Dye Distress Ink.

I glued a clear plastic square (left over from packaging) to the reverse of the Love Letters pink paper, then formed a square around the underside of the central opening with foam tape. I turned the panel right side up, and pressed down on the foam tape to get a nice seal around the interior shaker box.

Thanks for looking and I can't wait to see your reindeer creations!


This would be a great time to join in the challenge. Click on the Current Challenge label on the right side of the blog and check out the details. Challenge a friend to join you!

Classy Cards 'n Such online store has added new products. Click here to find all the new items that have been added!

Thanks for stopping by!!! Until next time...


Pin It

Tuesday, September 16, 2014

Joyful Snowy Day

Hi, Shirley posting today!  Our challenge for this week is all about Santa's Reindeer. We were provided a picture of a snowy reindeer scene.

Snow always looks much prettier in a picture than it does in my front yard and on my walkways. I don't know about you, but I am not ready for winter or the snow that goes with it.


I started my card by cutting the white card base. I layered it with Bluebell Stardream Metallic paper. I cut white card stock for the snow and applied glue over the front, then sprinkled Crystal Ice glitter over it. I attached the  layers of snow to the blue paper.

I used the Impression Obsession Small Deer die to cut the deer out of white card stock, and adhered them to the blue paper.

Next I used the Impression Obsession Pine Branch die to cut branches from white card stock. I cut two of them and tore the top of the branches off. I used glue dots to adhere them to the blue card stock.

I used white sheer ribbon to make the bow with the Bow Easy. I found the Joy sticker in my stash that was purchased many years ago.

Thank you, for taking a look at my card! Come back tomorrow for more card inspiration from our design team. 


Click on the Weekly Deals label found in the right hand column of the blog. You'll love the special sales! 

Classy Cards 'n Such online store has added new products. New Our Daily Bread Designs, Joy Crafts, Sue Wilson have been added and more! Click here to find all the new items that have been added!

Thanks for stopping by!!! Until next time...


Pin It