Showing posts with label Doodlebug. Show all posts

Tuesday, February 23, 2016

Little Pillow Box

Hi, Diane with you today.Before I share the details of my project I just wanted to say that this is my last creation
for Classy Cards 'n Such as a Design Team member and want to thank Beverly for having me on the team for the last few years!  Also to say that I loved working with the girls on the team and I hope to see you all around 'blogland'!

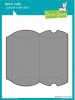
For my last project I thought it would be fun to create a cute little pillow box using Lawn Fawn Pillow Box die.
This was so simple to make, I could sit and make dozens of these!


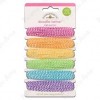
I cut it from On Trend paper by My Minds Eye.  I simply finished it by tying a twine bow from Doodle Twine Bright Assortment.  

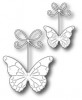
A butterfly was added using Memory Box Precious Butterflies die. I simply snipped off the bow part and added just the butterfly.


I added a few little resin 3D flowers to finish.
A very easy and simple project that is sure to please
whomever receives it!

Thank you for visiting with me today!

Have you found something you need yet at the Classy Cards closing sale?   There are still lots of great craft items to be had!   Take a peek here.

Thanks for stopping by!!!  Until next time...


Pin It
Friday, February 19, 2016

Caught a Bug

Hello, it is Shirley posting today.  I have made a Get Well card to share with you.   I decided to keep it in monochromatic colors.


I started my card with a green card base and followed with a layer of vanilla.  I used Graphic 45 Botanical Tea designer paper for the top layer.  

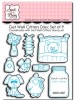
I cut the little jar  from vanilla paper using the Sweet 'n Sassy Get Well Critters Dies.  I stamped the bug and colored him with markers.  For fun, I added some googly eyes hoping it will bring a smile to the recipient.

The sentiment was stamped on vanilla card stock that I  cut using the Spellbinders A2 Divine Eloquence dies.  I sponged around it with green ink.  I added a twine bow at the top  for the finishing touch.

Thank you for looking at my card!


The CCNS inventory is quickly shrinking, so if there is something you have your eye on, I would recommend ordering it right away.  Many items have only one or two left.   When they are gone, they are gone!

Thanks for stopping by!!!  Until next time...


Pin It
Tuesday, January 19, 2016

Thinking of You

Hello, Diane with you today.  This week on the blog the challenge is Buttons.  What fun!  I think buttons are so interesting with so many colors, shapes, and sizes to choose from!

I made a rather large card, 6 x 6. I first started by embossing a Mason Jar onto Heartfelt Creations' Clear Card Stock.

Next, I cut a piece of plain white card stock to fit the
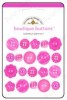
embossed mason jar. I laid it on top so I could get the placement of my buttons.  Then I removed it and adhered each button down.  Here are some beautiful buttons for you to make your own jar and both are on sale!  Boutique Bubblegum and Boutique Cupcake.

I then ran adhesive down each side to attach the jar to the background. To cover up the adhesive, I cut two Impression Obsession Border Duo 1 edges and adhered over the edges.

To finish, I simply adhered the entire piece to a designer paper, added lace trim and bow to the top, and a sentiment.

Thank you for visiting with me today.`

We've made it easy for you to find our future challenges!  Click  on the Challenge Calendar tab on the right side of the blog. All of the challenges are listed through February 2016!

Thanks for stopping by!!! Until next time...


Pin It
Tuesday, November 10, 2015

Christmas Joy

Hi, Diane with you today, with my card for this weeks challenge Mittens and/or Stockings with a touch of green.


I started my card with a round white card stock base, topped with a Spellbinders Heart Circle die cut from Stardream Jupiter Metallic paper. I thought this die would work cute with the little hearts in the mittens!

A few Impression Obsession Pine Branches were added to the top, along with a bow, and a jingle bell tied with Doodle Red Twine.

For the mittens I used PoppyStamps Stacked Mittens die,
cut from Pearlized Esse White Metallic paper. I cut the die twice and paper pieced red in here and there. I also cut the die from a white craft foam to give dimension.

Tiny Red Pearls were added to the flowers on two of the mittens.

A little die cut "Joy" was added for the sentiment!

Thank you for visiting with me today!


If you are unable to find an item in the store, or would like something special ordered, please email me at beverly@classycardsnsuch.com.

We made it easy for you to find our future challenges! Just click on the Challenge Calendar tab on the right side of the blog. All of the challenges are listed for the rest of the 2015 year! 

Thanks for stopping by!!! Until next time... 


Pin It

Saturday, October 17, 2015

Ho Ho Sparkle

Good morning to you, Diane with you today on the blog.

I don't know about you, but it seems the holidays are certainly creeping up on us! From Thanksgiving on, I am super busy, and like to get my Christmas cards made way in advance if I can!


One of my newest dies purchased from the Classy Cards 'n Such online store, is one of the new Memory Box Distressed dies. This one is called Distressed Snowdrift Collage. Look at all the pretty and intricate details. A tiny White Pearl was added to each full snowflake.

I stamped an image from Stampavie called Tobi's Dearest Deer, and colored it with my Tim Holtz Distressed Water Color Markers. A bit of Diamond Stickles was added to the image.

Once dry, I popped the image up using Joy! Large Foam Pads. To finish, I added a Ribbon, a tag tied with Doodle Twine from the Sweet Cakes Valentine Assortment, and a snowflake button that I topped with Silver Rock Candy.

Thank you for visiting with me today!


If you are unable to find an item in the store, or would like something special ordered, please email me at beverly@classycardsnsuch.com.

Don't forget to check back tomorrow for our next challenge! We have an inspirational photo for you, for our CCNS #107 Pretty Pink Christmas challenge!

Thanks for stopping by!!! Until next time...


Pin It