Showing posts with label Embossing folders. Masculine. Show all posts

Monday, September 7, 2015

It Looks Like Love

Good Morning crafters, it is Shirley posting today. I have made a card for the #101 Autumn Wedding Inspiration challenge. I think you can look at the inspiration pictures
for this week, and see which one I drew my inspiration from.


I started my card with a card base cut from Poison Ivory Curious Metallic paper, using the Sue Wilson Spanish Collection - Seville die. I followed with  a layer of ribbed gold card stock, cutting it with the same Sue Wilson die collection.

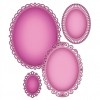
For the next layer,  I used Poison Ivory Curious Metallic paper that had been embossed, using the Anna Griffin Matelasse embossing folder. I chose the Spellbinder Romantic Rectangles die to cut this layer.

I stamped Love on a piece of Poison Ivory Curious Metallic paper with Versamark, and used Gold Detail embossing powder. I cut the words out with my scissors to place it over a decorative piece of Poison Ivory Curious Metallic, cut with a Spellbinders die from my collection. I popped the words up using Joy Crafts Large Foam Pads.

My finishing touch was to place White Pearls on the layers of my card.

Thank you for stopping by, I do hope you will join us for the challenge. Have a great day!


Join the Classy Cards newsletter list in the upper left column of this blog and receive exclusive weekly deals not available elsewhere! A one-time 20% discount on an order of your choice! Subsequent orders receive a 10% discount. Don't miss out, join today!

Thanks for stopping by!!! Until next time...


Pin It

Friday, October 10, 2014

Sun-Shiny Bouquet

Hello, Shirley here today!  Sometimes when the weather is gloomy and the sun is not shining, it is nice to have a little pick me up whether you receive a cheerful card or just sit down and make one.

Just making a card and thinking of who I will send it to makes my gloomy days brighter. Cheerfulness was on my mind today as I picked the sun-shiny colors of my card.


I started out with my white card base that is cut at 4 3/4 X 5. I added the next layer Bluebell Stardream Metallic paper cut at 4 1/2 X 4 3/4, which I adhered to my card base. Next I cut a piece of white card stock 4 X 4 1/2.  I embossed it with Swiss Dots embossing folder, (but you could use the Dots folder by Crafts Too). I added my yellow checked ribbon and adhered this layer to my Bluebell Stardream Metallic mat.

Now we get to the part I like, that is where we get to decorate the card front and make it pretty. Some days I like a clean card, but today I wanted to gussy it up a little.

I used the Our Daily Bread Designs Beautiful Borders die to cut the border from the Bluebell Stardream Metallic  paper. I attached it to the left side of my card.

I then took another piece of the Bluebell Stardream Metallic paper and cut a decorative oval with the Spellbinders Elegant Ovals die. I used the JustRite Botanical Medallions and Banners stamp set to stamp the image on white card stock. I colored my image with Copic markers, used an oval die to cut out the image. I adhered the image to the elegant oval frame which I attached on the card with Joy Small Foam Pads.

Thank you for taking a look at my card today!


There is still time to join our Classy Cards 'n Such challenge. Click on the Weekly Challenge label on the right side of the blog!

Join the Classy Cards blog email list in the upper left column of this blog and receive exclusive weekly deals not available elsewhere! A one-time 20% discount on an order of your choice! Subsequent orders receive a 10% discount. Don't miss out, join today!

Thanks for stopping by!!! Until next time... 


Pin It

Thursday, June 19, 2014

Daisy Note

Hi, it's Misti with a card for the sticker challenge.  I made this waaaay harder than it needed to be.  I used Beautiful Dreamer Epoxy Words by Glitz as my words.  I loved the fact that I could reposition them a little.  Love that!


My image is the Daisy with Ladybug from Impression Obsession. I used Tim Holtz Distress markers to color it: Peeled Paint, Barn Door and Mustard Seed.

I used red ink with the Texture Mini Dots stencil by Memory Box on a white piece of cardstock. I'm so glad the ink doesn't have to be even!

I used the Stripe Background embossing folder by Darice,  with my red cardstock.

I backed every panel with black cardstock and layered them on my white base layer.  I used Small Joy Foam Pads  to pop up my daisy panel.

I hope you'll dig through your sticker stash and join us this week!


Your card is so cute and cheerful! Thanks Misti!

Click any of the product photos below for more info or to purchase any of the products used.

If you like Misti's card, please share it on Facebook, Pinterest, Google+, Instagram...anywhere your crafty friends can be found!

The icons below my signature make it easy to share.

Thanks for stopping by!!! Until next time...


Pin It

Friday, June 6, 2014

A Wedding Wish

Hello Classy Friends, Diane here with you today to show case my card I did for this weeks Classy Cards 'n Such Wedding challenge.

I love the look of "white on white" cards and though they are a bit hard to photograph, I decided to go with it!


I started my card with a base of Shimmery White card stock, in fact the entire card is made from this paper.

I embossed the card front using the Crafts Too Mini Fans Embossing Folder. Isn't it pretty..a gorgeous all over design!

I next cut the beautiful Spellbinders Floral Ovals. On top of that, I first layered the Memory Box Tall Chloe Stem. I just snipped the end off so it wouldn't show!

Next I made my roses and leaves using Spellbinders Bitty Blossoms. I used all three sizes and added the leaves from the same die set.

The sentiment is a Heartfelt Creations, Bella Rosebud from my own stash. I stamped it on a Spellbinders Ornamental Tag One.
  
The butterfly is a Joy! Crafts Fantasy Butterflies die 6002/0245. I normally use Joy Crafts Butterflies trio, but wanted a smaller one. I am sure Beverly would be happy to order this die for you.

I added a few Baby White Pearls to complete my card.

I encourage you to join us this week for our wedding challenge. We would love to see your creation!

Your card is so pretty for a wedding card. Thanks Diane!

Click any of the gold links above for more info or to purchase any of the products used. If you like Diane's card, please share it on Facebook, Pinterest, Google+, Instagram...anywhere your crafty friends can be found!

The icons below my signature make it easy to share.

Thanks for stopping by!!! Until next time...
 
Pin It

Thursday, June 5, 2014

Wedding Wishes

Hi, it's Misti sharing a card for the Classy Cards 'n Such Wedding challenge.  Wedding season is in full force, I hope you'll join us this week.


I chose Wedding Squirrels by Stampavie as my image.  I think it's a super cute image!  I colored it in with these Tim Holtz Distress Markers:  Peeled Paint, Vintage Photo, Black Soot, Spun Sugar and the Detail Water Brush. I added Wink of Stella glitter pen to the bride's veil and dress.

I used the Dots embossing folder with white cardstock.  I used  a piece of the Key to My Heart paper back for the bottom part of that layer.  I'm amazed at how far this pack has gone! I used the black cardstock from the Layering Swatches to back my image.

I added some Black/White polka dot sheer ribbon, then put some Small Joy Foam Pads on the back of my image panel and layered it on top of the background layers. For a bit of bling, added some Black Pearls in the corners to finish it off.


What a cute card for a happy couple! Thanks Misti!

Click any of the gold links above for more info or to purchase any of the products used. If you like Misti's card, please share it on Facebook, Pinterest, Google+, Instagram...anywhere your crafty friends can be found!

The icons below my signature make it easy to share.
There are lots of new products, including new stamps, dies  and papers, in the Classy Cards 'n Such shop over the past week or so!  Be sure to check them all out here.

Thanks for stopping by!!! Until next time...

Pin It