Showing posts with label Scor-Pal products. Show all posts

Thursday, January 21, 2016

Morning Glory

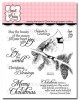
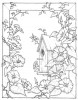
Welcome friends, Mindy with you sharing a watercolor card using one of the New Framed Flowers stamps by Stacy Stamps.


I stamped the image Morning Glory by Stacy Stamps on watercolor paper and colored the image with some Copic and some watercolor markers.  I then embossed accent lines around the image with my Scor-Buddy scoring tool and bone folder, accenting the edges of my watercolor paper. I then adhered a background paper embossed with the Mini Fans Embossing Folder by Crafts Too to my card base, then my Morning Glory image as the top layer.  A single layer bow and tag with sentiment from God's Purpose Stamp Set by Sweet 'n Sassy Stamps completed the card.

I love these little watercolor images, they make great accents for classy cards and there are several to choose from.  Have a great week, and create a card to join in our weekly challenge.
There is still time to join our Classy Cards 'n Such challenge. Click on the Current Challenge tab on the right side of the blog for all the details. Come and join the fun!

Thanks for stopping by!!!  Until next time...


Pin It
Saturday, December 19, 2015

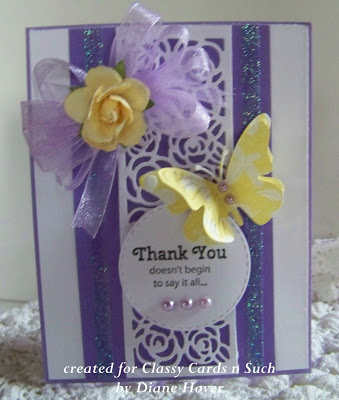
Thank You

Hi Diane with you today and guess what?  I have something besides a Christmas card to share..lol!


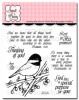
I have always loved the colors of lavender and yellow together. I started the base of my card with a lavender card stock. I added a white panel to that. I used another piece of lavender card stock under a die cut from Sue Wilson's Mini Striplet Rose Garden.

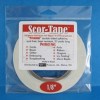
I ran two strips of Scor-Tape 1/4" down each side, then sprinkled Sparkle 'n Sprinkle Lacey Lilac Glitter on each strip. Next, I made a bow using the Bow Easy tool, and adhered a Rose to the center.

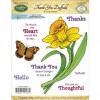
The stamped sentiment is from the JustRite Thank You Daffodil stamp set. A butterfly was added using Joy! Crafts Butterfly Trio. To finish, I added a few pretty Lavender Pearls.

Thank you for visiting with me today and have a Merry Christmas!!

Come back tomorrow, and we will have a new CCNS challenge for you. It will be Challenge #116 - Silent Night, Holy Night. There are beautiful cards just waiting to inspire you by the CCNS Design Team.

Thanks for stopping by!!!  Until next time...


Pin It
Wednesday, December 9, 2015

Angel Wishes

Hello friends, Mindy here with my weekly card for the Classy Cards 'n Such Weekly Challenge # 114- Angels. After studying the inspirational photo, I decided to create a shaker card using my Angel die as the focal point.


I stamped the card background with a snowflake stamp from my stash in Spun Sugar Distressed Ink from Tim Holtz, then began building my shaker element.  I used the Square Claudette Frame by PoppyStamps to cut one from white and one from a pastel print.  The pastel print was adhered to the card front, and the white frame was used for the shaker element. I enclosed my sequins cut from the Sequins Die-Namics from My Favorite Things in two layers of clear cellophane packaging from a recent die purchase. I used 1/4" Scor-Tape to close the package and adhere it to the Claudette Frame.  Joy! Foam Pads - Small were used to then adhere my shaker element to the card front.

I also cut two corners from a third Claudette Frame that didn't cut completely, and used those to add points to the top and bottom of my square shaker. I also cut a Bamboo Shoots die from Memory Box to add between the shaker and card base for texture. My focal image, the Angel Die from Impression Obsession is no longer available from the Classy Cards Online Store, but there is a beautiful one from Sue Wilson- 2015 Christmas Angel- Festive Collection available that would work just as well.

To complete my card, I cut a banner and added a sentiment, then added Baby Pearls - White around the frame.  I hope you have enjoyed my card, and find it inspiring when making your own cards.


Join the Classy Cards newsletter and get the best deals on our products! It's easy...the sign-up form is on this blog in the black box on the left side. Get 20% off an order of your choice as a newsletter subscriber. What a deal!!

Thanks for stopping by!!!  Until next time...


Pin It
Monday, November 30, 2015

White Christmas Shaker Card

Has it started snowing where you are yet? Diana here today.  We've yet to see flurries but this year I'm a little more eager than usual. We got a new puppy - a Samoyed - and I know he will just love the snow. So between my sleepless nights with a two month old pup and this week's inspiration photo, I made a shaker card with glass glitter for snow.


I used PoppyStamps Grand Madison Window for my shaker front. The tree is done by clear embossing the stamped image on white card stock and then sponging Broken China and Chipped Sapphire for the nighttime sky. I also masked off a moon and added white stars with a white gel pen. To keep the glitter inside the two layers, I used clear cardstock, 1/8 Scor-tape, and foam tape.

I then adhered the window to a layer of kraft card stock cut down to size with Spellbinders A2 Matting Basics A. I couldn't help but add a touch of red using the PoppyStamps Small Blooming Poinsettia against a silver spray of Memory Box Bamboo Shoots. The sentiment is from Sweet 'n Sassy Christmas Joy.

Stay warm!


We've made it easy for you to find our future challenges!  Click  on the Challenge Calendar tab on the right side of the blog. All of the challenges are listed for the rest of the 2015 year!

Thanks for stopping by!!!  Until next time...


Pin It
Christmas Box Card

Good Morning, Crafty Friends.   It is Shirley posting today.  The card I made for today is matching some of the weather many of you probably have right now.    The challenge this week is to make a card with a Christmas Tree with colors, blue, white, and/or kraft, silver.


I made a box card today.  I started my card using a silver base and the top silver panel was cut at this time, also.  I cut blue layers using Starburst Lichen Aspire Petallic Metallic card stock.   I adhered the card together using 1/4 inch Scor-Tape. 

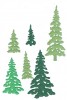
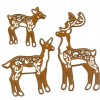
I cut the snow using a cutter.  The Winter Trees are by Sue Wilson.  Next, I cut a deer from the Sue Wilson Deer Family - Festive Collection.   I attached the trees and the deer by using Joy Foam Pads Small.  

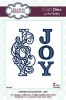
The final step to my card was cutting this beautiful Joy sentiment that is also from the Sue Wilson Festive Collection.

This card folds flat to fit an A2 Envelope for mailing.   Yay, no extra postage is needed.    If you would like to make one of these cards you can find a tutorial HERE in post #1.

Thanks for stopping by today and I hope you liked my card.  

If you are unable to find an item in the store, or would like something special ordered, please email me at beverly@classycardsnsuch.com. 

Until next time...

Pin It
Thursday, November 12, 2015

Brrr.. it's cold outside

Hello friends! It's Diana today. Is it chilly where you are yet?


I made another card with the adorable PoppyStamps Stacked Mittens die. 

I started with a red and Kraft color scheme, and the MFT Blueprints 13 die set.

After I die cut the Stacked Mittens out of the watercolor sheet used for the fishtail banner, I carefully removed the mittens with all the little pieces.

I then sponged Broken China on the fishtail banner. I also splattered some more stain around the banner. Once that was dried, I glued the mittens back in with all the pieces. I then used a watercolor brush to color the little pieces.

I added a bit of twine to a double row hole strip from MFT Blueprints 15, and added some strong 1/2" Scor-Tape to make sure it would stay. Because that made it a bit bulky, I popped up the top banner with some Large Foam Tabs.


If you are unable to find an item in the store, or would like something special ordered, please email me at beverly@classycardsnsuch.com.

Don't forget to check out the NEW section at Classy Cards 'n Such. Release from 2015 collections and other goodies are being added every day! When you check out, don't forget to enter your discount for a great savings!

Thanks for stopping by!!! Until next time...


Pin It