Showing posts with label Embossing powder. Show all posts

Tuesday, February 2, 2016

Valentine Love

Good morning!  Are you getting ready for Valentine's Day?  Thanks to the Classy Cards 'n Such on line store, I'm on the home stretch for making all of mine.


For this one, a stencil was cut and ink was sponged on using an ombre techniques with a Ranger Mini Ink Blending Tool.  The die cut flower is Cecilia Flower Outline by PoppyStamps.  The sentiments is from JustRite's Hugs & Kisses Sentiments and was heat embossed using Sparkle 'n Sprinkle's Black Detail Embossing Powder.  The head of the flower and the sentiment tag were popped up using some small Joy Foam Pads.

Why don't you join in this challenge?  It's time for a Valentine!! Use pink/and or red, white and a heart. Check out the guidelines at Classy Cards 'n Such, get some inspiration from the designers and at the Classy Cards 'n Such blog. Classy Cards 'n Such link has some super bargains on right now.

Thanks for looking at my card.  Have Happy Stamping Day!


Thanks for stopping by!!!  Until next time...


Pin It

Friday, January 29, 2016

You're the Best

Good morning!  Joy here today showing you a card that I made this week using supplies from the Classy Cards 'n Such on line store.  


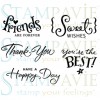
First was to emboss a piece of cardstock using the folder called Quilt Blocks by Darice.  Then I sponged on a little color using a Ranger Mini Ink Blending Tool.  The stitched khaki color rectangle base was die cut using My Favorite Thing's Blueprints 13.  The sentiment  from Stampavie called Sweet Wishes was heat embossed using Sparkle 'n Sprinkle's Brown Fizz Embossing powder - it has a pretty sparkle and shine that I tried to capture with my camera.  The sentiment was popped up using Small Joy Foam Pads.   You might take the opportunity to check out the sale at the Classy Cards 'n Such on line store.

Thanks for looking at my card.  Have a Happy Stamping day!
There is still time to join our Classy Cards 'n Such challenge. Click on the Current Challenge tab on the right side of the blog for all the details. Come and join the fun!

Thanks for stopping by!!!   Until next time...


Pin It

Friday, January 22, 2016

Another Valentine!

Good morning! Joy here with another Valentine Card - going to one of my grandkids.  The supplies for this card can be found at the Classy Cards 'n Such online store.


The sentiment and circle frame is from JustRite's Hugs & Kisses.  The sentiment was heat embossed with Sparkle 'n Sprinkle's Fine Gold Detail Embossing Powder.   The circle and last rectangle layer were cut out using Gold Mirricard.  The rectangle layer was dry embossed with Anna Griffin's Juliet Damask folder.  Last of all I popped up the circle sentiment using some Large Joy Foam Pads.

I have just a few more Valentine cards to make - I'll post them soon.  Thanks for looking at my card - have a Happy Stamping Day.
Want to purchase some or all of the products used in today's card?   Classy Cards carries those that are in gold and underlined.   Click those or the pictures below.  Happy shopping!!

Thanks for stopping by!!!  Until next time...


Pin It

Tuesday, January 19, 2016

Hearts and Buttons

Hello, Joy here this morning.  The challenge for this week at Classy Cards 'n Such is to make a project with a button or buttons.  Here is my card:


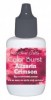
This card starts with a stencil and some Dreamweaver Pearlescent Embossing Paste colored with Ken Oliver's Alizarin Crimson Color Bursts.  The first row is colored with a small amount, then I gradually added more color so that it took on an ombre look.  I allowed the hearts to dry and then stamped the sentiment from Hugs & Kisses by JustRite and heat embossed it with Sparkle 'n Sprinkle's Black Detail Embossing Powder.  Then I added the button and a few sequins to the card.

Now it's time to join all the others in the Button, Button challenge. First go to the Classy Cards 'n Such blog, get some inspiration from the Design Team members and make your project using a button or buttons - be sure to look at the details on the blog and then link your project at the Classy Cards'n Such blog.  You could be the winner of a nice prize. 

Thanks for looking at my card and have a Happy Stamping Day!

Don't forget to check out the NEW section at Classy Cards 'n Such. Lots of new products! When you check out, don't forget to enter your blog discount (coupon code BLOG10) for a great savings! 

Thanks for stopping by!!!  Until next time...


Pin It

Thursday, January 14, 2016

Which one...

...do you like better?  I've been admiring many of the cards I've seen with these very softly sponged (perhaps air brushed) backgrounds and I just love how subtle and pretty they are.  So I tried to do it but my hand was too heavy - and then I went ahead and added more color and ink (Distress colors Peacock Feathers, Chipped Sapphire, and Broken China) until I had a nice deep background.  I then splattered some water on there.  I trimmed it using Spellbinders A2 Matting Basics A and then adhered my new die cuts Memory Box Diving Dolphins and Oceana Corner.  On the bottom, I added a verse from Our Daily Bread Designs Under the Sea with white detail embossing powder.


I tried again with a slightly lighter hand and came up with this second card. It's still a little darker than what I've seen but I wanted the white die cuts to pop more. And since everything was on the lighter side, my verse was done in silver detail embossing powder this time.

So... which one do you like more?


There is still time to join our Classy Cards 'n Such challenge. Click on the Current Challenge tab on the right side of the blog for all the details. Come and join the fun!

Thanks for stopping by!!!  Until next time...


Pin It

Friday, January 8, 2016

Valentine's Day

Joy here today with a Valentine's card made with supplies from the Classy Cards 'n Such online store. This is called Herringbone paper technique. The strips are from left over pieces of paper colored with Ken Oliver's Pthalo Green and Indigo Blue.


The sentiment is from a great set called Hugs & Kisses by JustRite, and embossed using Sparkle 'n Sprinkle's White Detail Embossing Powder. The sentiment panel was popped up using Large Joy Foam Pads.

I have 8 grandchildren and want to make them each a special Valentine's Day card. This is the first one - I'll post each one as I make them. Thanks for looking at my card. Have a HAPPY stamping day!


There is still time to join our Classy Cards 'n Such challenge. Click on the Current Challenge tab on the right side of the blog for all the details. Come and join the fun!

Thanks for stopping by!!!   Until next time...


Pin It

Thursday, January 7, 2016

Snow and Winterberries

I think one of the prettiest winter images is fallen snow - especially  on tree branches.  Even more amazing is how they can clump on the tiniest of things like the little red berries.  I tried to recreate that here with some things from the Classy Cards 'n Such store.  
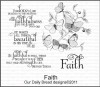
I wanted my card to be shimmery white and red so I started with a white card base and added the Our Daily Bread Designs Vintage Flourish Pattern in Shimmering White. The Poppystamps Holiday Winterberries was cut out of water color paper twice and colored with the red and green colors from the Twinkling H2O's Thankful set. After I adhered the two branches of the winterberries using Art Institute glue to a popped up frame, I added "snow" with the Ice White Viva Decor Pearl Pen and some sparkling Stickles. The verse from ODBD Faith is stamped in black and then clear embossed.


Thank you so much for looking!

We've made it easy for you to find our future challenges!  Click  on the Challenge Calendar tab on the right side of the blog. All of the challenges are listed through February 2016!

Thanks for stopping by!!! Until next time...


Pin It