Sunday, June 30, 2013

A Cute Country Birthday

Hi!  It's Karen posting today.   Well, if you haven't guessed by now, I might as well tell you all that I am a HUGE fan of Simple Stories. I don't think it's possible to make a card that's not cute when you use the adorable Simple Stories 6x6 Summer Fresh Paper Pad.  


The base of my card is one patterned paper from the Summer Fresh 6x6 Paper Pad, and so is the patterned paper used inside the chipboard square.  The chipboard square is painted cream with acrylic paint, and then coated in the beautiful Crystal Ice Glitter.  I printed a sentiment on the computer that I placed across the chipboard frame, and also added a rub-on and chipboard letters (also coated in Crystal Ice Glitter at the bottom of the card.  

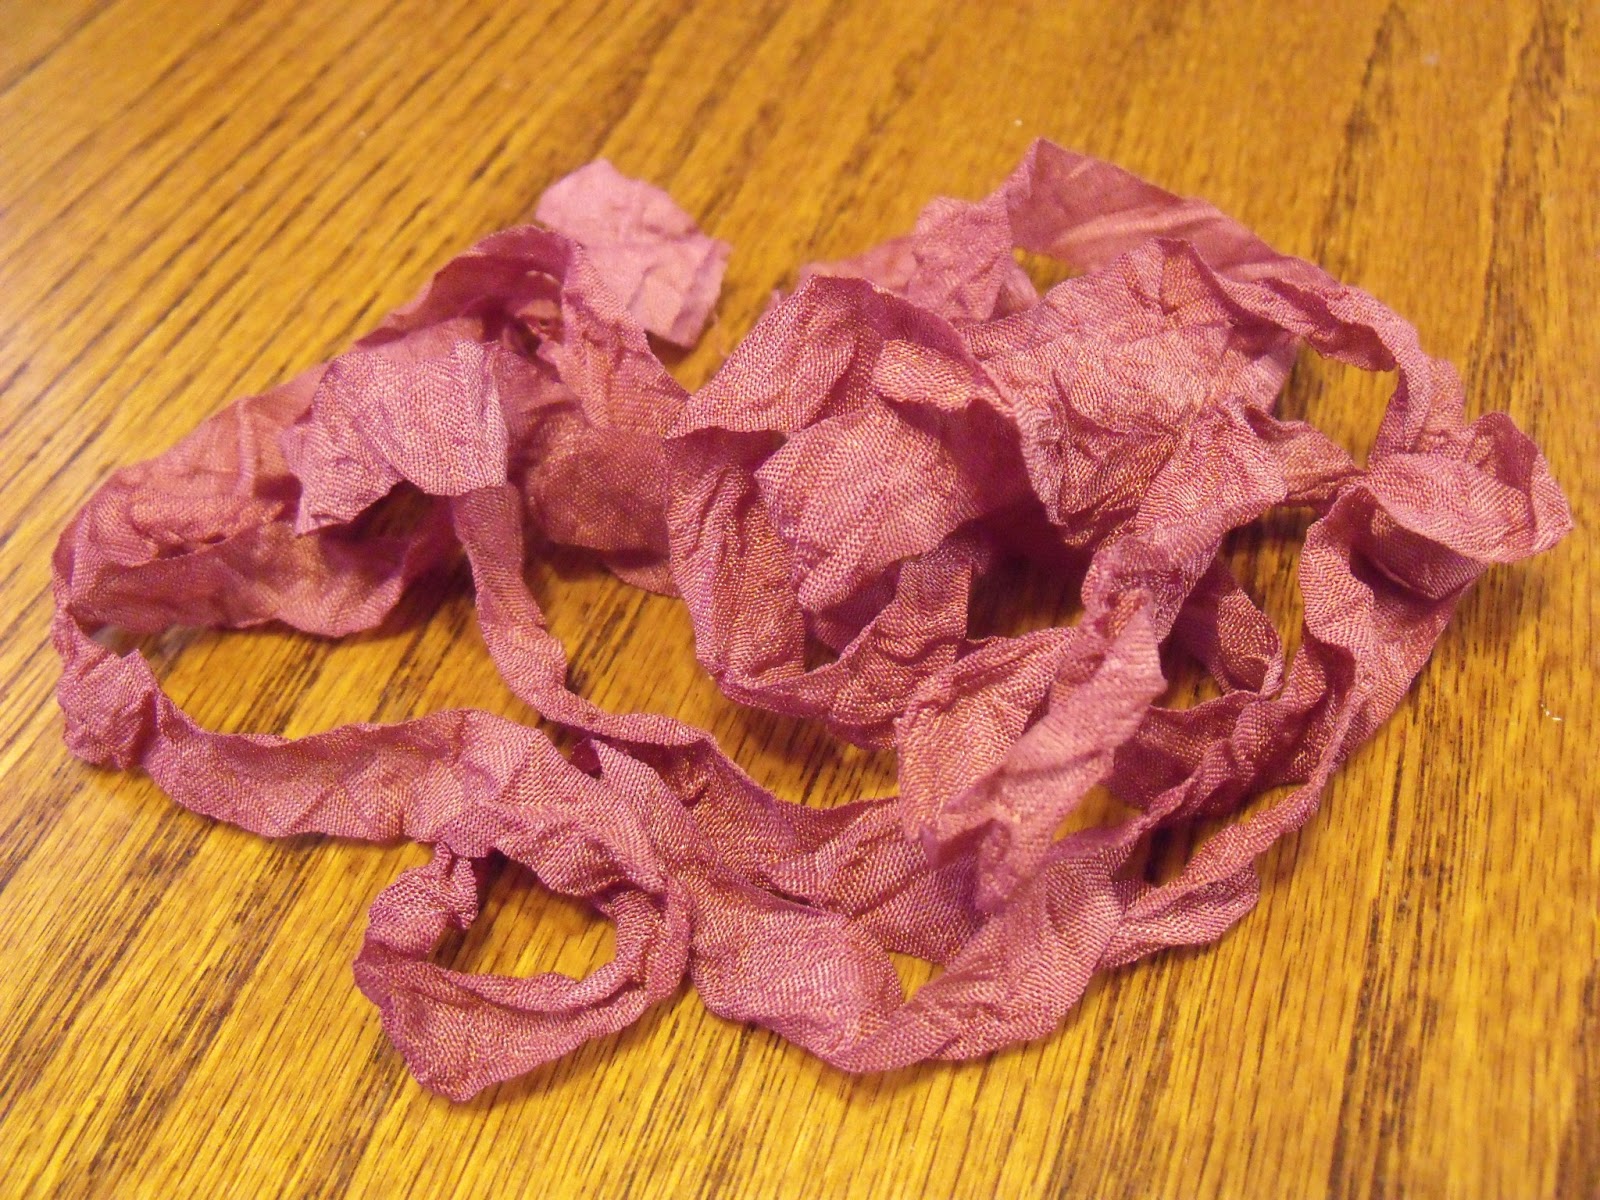
I used a short length of the lovely Natural Trim and adored it with mini paper flowers from Zva Creative in both Classic Red and Soft Olive Transition.  There are SO MANY soft, sweet embellishments available in the Classy Cards 'n Such Store to help you create all kinds of sweet cards and scrapbook layouts.  Take a look!
Cute card, Karen!   I love the glitter on the mat!!

McGill tools are on sale!!  These tools are great for shaping handmade flowers, transferring Rubz and more!!  Details are here

Click any of the gold links for more info.

Thanks for stopping by!!!   Until next time...


Pin It

Saturday, June 29, 2013

Henry - A Great Card for a Man!


Hi!  It's Misti again.  I have a cute card to share with you today... at least I think it's cute!  I wasn't familiar with Sparkle 'n Sprinkle stamps before I started my guest time with Classy Cards 'n Such.  I was very curious & ordered 2 different sets.  In case you are new to them also, let me tell you a little bit about them.  They are unmounted, on a nice thick gray cushion. Each set is packaged in a clear package that opens from the bottom & it is resealable.  The stamps are on a sturdy piece of laminated paper.  From the front you see the color version of the stamps.  They stamp up nicely!  I didn't have to stamp them several times to get the image completely on my paper, it worked the very first time!  

I took a picture of the front & the back of the stamp set I used for you to be able to see what I'm talking about.  These are super nice & I know I'll be adding more stamps from this company to my collection very soon. *grin*


It was super fun to color the car.  The detail nib of the Tim Holtz brush was able to reach the smaller places very easily.  I tore part of one corner off & added a little marker color to it, to add to the feel of the card.  

Supplies used on my card:
Tim Holtz Distress Markers -- Peeled Paint, Black Soot, Vintage Photo, Barn Door

Cute card, Misti!  The Cars-Henry set is so perfect for the men in your life!  Great images and great sentiments...can't beat that!   Get your set today!

Thanks for stopping by!!!  Until next time...


Pin It

Thursday, June 27, 2013

Red, White & Blue Thank You

Hello again my crafty friends!  Karen Letchworth here with another cute and easy Simple Stories "Thank You" card using several awesome supplies found at Classy Cards 'n Such that I'd like to share with you.  


The base of this darling card is made from two different patterned papers from the Simple Stories 6x6 Summer Fresh Paper Pad as is the cute little "Details" journaling card you see where I placed a rub-on sentiment.  I hope that by now, I've made you realize that this Simple Stories 6x6 Summer Fresh Paper Pad is a "must-have" item from the Classy Cards 'n Such Store.  It's just FILLED with darling prints and journaling spots for card-making and scrapbook layouts.  

I embellished this lovely little card with some machine stitching, a Frilly Flourish White Pearl Swirl, a snippet of Queen & Co. Trendy Tape in Polka Dot Red that I machine stitched to the patterned paper, a bow made from the sweet Chalk White Seam Binding; some of which is hand-dyed. In the center of the bow, you will find a navy blue button tied with baker's twine.


I'd be happy to answer any questions you might have about how the card was made, or the supplies I used on it.  Just leave a comment on this post. I would LOVE to see what creations you make with some new supplies from Classy Cards 'n Such.   Happy scrapping - I'm always here to help!
Here's the link to Karen's tutorial about how to hand dye your seam binding.   If you purchase seam binding from Classy Cards by Tuesday, July 2nd, Karen will put your name into a drawing for a bottle of Glimmer Mist!

Thanks for stopping by!!!  Until next time...


Pin It

Wednesday, June 26, 2013

Outer Stair Step with Texture

Hello Everyone. It's Jenn and today I am sharing an outer-stair step card with you.

I love all the "fun folds" card styles that are out there but, I am not a fold and score kind of girl. To be honest, I am intimidated by it. So when I saw that Classy Cards 'n Such had these pre-made Outer Stair Step Cards, I was so excited and just had to give them a try. 

I began my card by folding the mountains and valleys using the pre-scored lines on the card. Once I had the card folded, I wanted to add some texture to the entire card. So leaving it in it's folded state, I inserted it in the
Spellbinders Lovely Lattice M-Bossabilities and ran through my Cuttlebug. One side of this folder has swirls and lattice and the other has flowers and lattice. I went with the flowers and lattice. With this great design on the entire card base, I felt it was complete and set about adding my focal points and embellishments. 
I die-cut a Lacy Square to stamp my bird on; colored him up with Copics; distressed the edges with ink and adhered him diagonally onto the front panel using foam pads. I knew I wanted my sentiment peaking out from the center mountain so, I went ahead and die-cut another Lacy Square and stamped my sentiment on it and adhered to the center mountain also using foam pads. Now that my focal point and sentiment are done, it's time to embellish. My favorite part!

Using the yellow gingham patterned paper from Graphic 45's Secret Garden and the Exotic Butterfly Small #2 from Cheery Lynn Designs, I die-cut a butterfly to embellish the top right corner.

For finishing touches, I added a Sugar Bloom by Prima on the front panel. 
 
Jenn, I love that you embossed the stair step card!   Cute card!!

Click any of the gold links to purchase the products that Jenn used!

Thanks for stopping by!!!  Until next time...

Pin It

Tuesday, June 25, 2013

Prayers

Did you see Karen's tutorial on hand dyeing seam binding?   She will be giving away a bottle of Glimmer Mist by drawing a name from everyone who orders seam binding from Classy Cards through Tuesday, July 2nd.  Get those orders in now to be eligible to win!
Hi!  It's Misti here again.  I have a super simple, 3 hour card to share with you today.  You know the kind that is a simple layout & has pretty simple components, but takes waaaaaaaay longer to put together than it looks.  Oh, you've made that kind before??!!   *grin*  Watercoloring the image didn't take very long at all, it was putting it together.    I think my mistake was thinking the house was quiet & now is the "perfect" time to make a card.  I think that did it!  *wink*  Anyway, all that matters is I finished it in time to take to the PO to get it mailed.  Yay!


Supplies used:
Botanical Medallions & Banners from JustRite for the flower & the sentiment.  The embossing folder is the Flower Flourish from Crafts Too.  Love, love, love the Baby red pearls, Scalloped Oval Nestabilities, Black Polka Dot Sheer ribbon.  Tim Holtz Distress Markers used: Peeled Paint, Barn DoorTumbled Glass, Black Soot, & the Detailer Brush.


My challenge for you today is to make a card to send to someone in the mail & hopefully, yours won't take 3 hours to complete!
My mom was the delighted recipient of Misti's beautiful card!   Thanks, Misti!!!

Click any of the gold links to purchase any of the above products.

Thanks for stopping by!!!  Until next time...


Pin It

Sunday, June 23, 2013

Hand Dye Your Seam Binding using Glimmer Mist

Hello friends!  Karen here with a VERY simple tutorial on how to make your own hand-dyed scrunched seam binding.  I like the "scrunched" or "crumpled up" look.  But if you prefer the smooth style, you can skip the "scrunching" step, or you can iron it out for a straighter look.  I will try to go step-by-step, but if there is anything that's unclear to you, please feel free to leave me a message here, or on my personal blog, My Cup Runneth Over, and I will be more than happy to answer all your questions.  OK, here we go!

You will start out with some white seam binding.  I used the Chalk White Seam Binding from Classy Cards 'n Such which is a GREAT value.  Here is what it looks like:


Next, you will use just enough tap water to moisten the Seam Binding.  You don't want it sopping wet, just moist.  While it is moist, crumple and roll it in your wet hands to make it "scrunchy".  Once this is done, lay it down on a safe surface.


For this process, I like to use an inexpensive rubber placemat.  I have this lovely watermelon one that I picked up at the Dollar Store.  (LOL)  I use it for crafts.  You just don't want to do this directly on your table or counter top.  I use the placemat for this reason.  You are working with dye, after all, and for this reason you may wish to use rubber gloves.  Either that, or be sure to wash your hands right away when you're finished.


Now, you have your moist Chalk White Seam Binding and your Tattered Angels Glimmer Mist.  I chose to use Cranberry Zing.  You start the process by simply spraying the Seam Binding generously with the Glimmer Mist.  You will see in the next photo that the Glimmer Mist kind of "puddles up" on the placemat.  I don't waste a drop!  I sop it all up by rolling the Seam Binding in every last luscious drop of Glimmer Mist.


Once you've covered the Seam Binding so that no white is left showing through, and you've sopped up ALL the Glimmer Mist, you're almost finished!


The next step is to wad up your Seam Binding and scrunch it into a little ball and then tuck it in the corner of a plastic baggie.   Then, twist the baggie so that the little wad of Seam Binding is tightly secured in the corner of your plastic baggie.  I like to just set it somewhere safe for several hours (even overnight if you have time).  This gives it a chance to get good and "scrunchy". 


Now that the Seam Binding has had a chance to set in the baggie for several hours, you simply take it out and hang it somewhere safe to dry.  I like to hang mine outside over the back of a lawn chair.  Just let it hang somewhere to dry completely.  Again, because it is still slightly wet, DO NOT put it on a surface that is valuable (like your counter tops or wood furniture as it may stain).  Once it's fully dried, you are completely finished.


Now you're ready to use your hand-dyed scrunched seam binding on your projects.  To make a bow, the method I use is to cut a length long enough for a bow.  I cut one more just a tad bit longer; creating two bows where one is slightly bigger than the other.  Then, I hot glue them to my card by placing the larger bow on the bottom and the small bow on top of it in a different direction so that the loops of the bows don't overlap.


This card is not anything special.  I just threw it together to demonstrate how I use the seam binding.  You will see that I covered the card with a length of the seam binding, and then added my two bows; one on top of the other.  They make such pretty bows.


There are obviously MANY different ways to create your own hand-dyed scrunched seam binding.  This is just one way to do it, and in my opinion, one of the easiest ways.  You will find several lovely colors of the Tattered Angels Glimmer Mist at Classy Cards 'n Such, and I'm sure that you will absolutely LOVE them all.  You can spray flowers, chipboard, and many different embellishments with this lovely Glimmer Mist.  It's a wonderful product, and this tutorial shows just one of the many useful ways to use it.

I hope that this little tutorial was helpful to you.  Why not stop by Classy Cards 'n Such and pick up some Seam Binding and Glimmer Mist of your own and give this a try.  You will absolutely LOVE having every sweet color of this hand-dyed seam binding, and will really enjoy playing with it and adding these sweet bows to your cards, mini albums and crafty projects.  Remember, you can save 10% on all your orders by using Coupon Code KAREN-10 for your purchases.  Happy crafting, friends!
Head on over to the Classy Cards shop where you can pick up some Glimmer Mist and seam binding to customize for your own cards and projects!

Thanks for stopping by!!!  Until next time...


Pin It

Wednesday, June 19, 2013

Hedgie

Thursday, June 20th is the last day of the Stampavie sale!!!  Click here to find out how to get 15% off Stampavie stamps.


Hi!  It's Misti again!  As I sit here typing this up, we are receiving rain.  Normally, that isn't a big deal, but we are under severe drought conditions.  It's cause for a celebration around here!!    I decided to pull out this Stampavie Hedgie & make a card .  I'm going to send it to a girl who is undergoing some medical procedures.


Supplies used:
Don't forget to check out the Stampavie sale!!   There are some great stamps to choose from!!

Thanks for stopping by!!!  Until next time...


Pin It

Sunday, June 16, 2013

Dream Big

Hello crafty friends!  I wanted to share a little project with you to show you all some of the creative ways you can use the wonderful trims and patterned papers available at Classy Cards 'n Such. 


For this project, I used a wooden spool that I had left over from some twine I had purchased.  I covered it with a strip of patterned paper from the Simple Stories Summer Fresh 6x6 Paper Pad.  I adhered everything to the spool using the 1/8" Scor-Tape which is a wonderful adhesive for all types of projects because it holds everything in place perfectly and permanently!  

Next, I used two of the DARLING trims from Classy Cards 'n Such including the Yellow Floral Trim at the top, and the Natural Trim at the bottom of the spool.  I used a toothpick to make my banner coming out of the spool by hot gluing it in.  The actual tag itself is also cut from the Simple Stories Summer Fresh 6x6 Paper Pad. I added some baker's twine, a felt heart, a Simple Stories flower sticker, a rub-on sentiment, and a mini pearl accent.  The edges of the tag are touched lightly with Tim Holtz Bundled Sage Distress Ink. 

Aren't these trims from Classy Cards 'n Such just lovely?  You won't be disappointed with any of them - they're SO versatile.  Feel free to stop by my blog, My Cup Runneth Over, to read more about this project and to pick up a Coupon Code to save 10% on all your orders at Classy Cards 'n Such.  Happy crafting!
Cute project, Karen!!

Have you joined the Classy Cards newsletter yet?   Subscribers get the best deals!!  Be in the know and sign up today using the form under the pink envelope on the top left of this blog!

Click any of the gold links above for more info.

Thanks for stopping by!!!  Until next time...


Pin It

Saturday, June 15, 2013

Stampavie SALE!!!! All My Love


Stampavie has lots of cute stamps for every occasion!  

Beautiful stamps from Sarah Kay, Penny Johnson, 

Tena Wenke and more! 


Click here to see all of the Stampavie choices!   

Enter coupon code STV-15 for 15% all Stampavie stamps!
  
Stock up now!   

Good morning, Steph here with a bright and cheery card to brighten your day.

I chose some gorgeous pattern papers from the Simple Stories Vintage Bliss collection and matched them with some Banana Split Pop Tones cardstock, Stardream Rose Quartz cardstock and Gold Leaf Curious Metallic cardstock.  The cardstock is heavy enough for a card base yet easy enough to  die cut and emboss.


I used Spellbinders Labels Eighteen dies and die cut Banana Split Pop Tones and Stardream Rose Quartz cardstock.


For the flower, I used Memory Box's Dogwood Blossom die and Dogwood Blossom Outline die. These two dies perfectly coordinate.  I first cut them both from Wausau Index Green  cardstock then cut the Dogwood Blossom Outline die again from Stardream Rose Quartz.  Love the details.  The stamp is from JustRite Stampers With Sympathy set.
Thanks, Steph!!

Be sure to take advantage of the Stampavie sale above!  Click any of the gold links for more info!

Thanks for stopping by!!!  Until next time...


Pin It

Tuesday, June 11, 2013

A Dare Card

Hi, It's Misti here & today I have a dare card to show you.  What's a dare card, you ask?  (You did wonder that, right?)  Grab a cup of tea & I'll tell you all about how this dare card came to be....

This morning, I was on the phone with a friend & she made the comment that she needed a "thinking of you" card to mail out.  She hadn't had time to make one because her kids were home for the summer.  (Now, let me insert something here... I homeschool my kids so I WANTED to say, welcome to my world!  *grin* )  INSTEAD... I said that we all had the same 24 hours & this was her season to have her kids at home.  She said, I bet you already have one made, don'tcha?  (I do,but I wasn't going to tell her that.)  I said it really doesn't take that much time to make a card when you get with it.  Here it is.... she DARED me to make a card while we were on the phone.  I asked what the "rules" were & she said no rules other than it had to be started & finished within 28 min.  Ready, set, go!!!  YIKES!!!  

Here's what I did...
I pulled out a panel that I used the Scor-Buddy & had made an OOPS on the other night.  I didn't throw it away, but kept it for a time when I could cover up my oops, good thing!  I saw that the JustRite With Sympathy set had a "thinking of you" sentiment in it, so I stamped it in black.  Then, I stamped the flower from JustRite's Botanical Medallions & Banners.    I grabbed the stamp package & used it as my palette.  Sorry for the glare on this, you can use any plastic surface, it doesn't have to be fancy. 


Color onto the plastic with your markers, making a spot for each separate color.   I used the following Tim Holtz Distress Markers: Peeled PaintMustard SeedVintage Photo, & Black Soot with the Tim Holtz Watercolor Brush.  It was super quick to pick up color from my palette & color in my image.  Cut the image down, add a couple of pieces of cardstock to mat it & then add the ribbon.   How long do you think it took me????  Drum roll, please... 26 minutes!!!!  No, it isn't the most elaborate card I've ever made, but I think it will make someone's day when they open their mailbox to an actual card & not more junk mail.  


That's all from me for today.  
So cute, Misti!  Thanks!!

Click any of the gold links above for more info or to purchase the products Misti used.

Thanks for stopping by!!!  Until next time...


Pin It

Sunday, June 9, 2013

Gatefold Tutorial

Good morning, Steph here with a tutorial using some yummy products from the Classy Cards 'n Such shop.

I began with a sheet of white cardstock that was cut to 5 1/2" x 11".  Placing the long edge at the top of your Scor-Buddy, score it at 2 3/4".  Flip the paper around and score the other end, again at 2 3/4". 


Fold on the scored lines to create the flaps of the card.

Using Graphic 45's Secret Garden Paper Pad, pull 2 sheets of the lavender printed paper.  This paper pad is gorgeous with its double sided prints on one side and coordinating solid paper on the other side.  Cut 2 pieces of the print, each 2 1/2" x 5 1/4".  Then cut 2 pieces of the solid, each 2 5/8" x 5 3/8".  Adhere these two pieces together and place on the front flaps.  Just a slight edge of the white card shows.


I used Spellbinders Nested Oval Medallion Dies to cut the brown and green cardstock medallions onto which I planned to add my roses.   Placing adhesive only behind the left half of the brown medallion allows the card to open.   The roses are from the JustRite Stampers With Sympathy Stamp Set  and were colored  with Copic Markers in shades of purple to coordinate with the card. 

The banner stamp is from JustRite Stampers Botanical Medallions & Banners and I used the coordinating Spellbinders die from the Vintage Label and Banner Die set.   I first die cut and embossed the die, then stamped the sentiment on top.  I find I get a more precise stamped image this way.


For the interior, I used pattern paper from the Love Letters Paper Pad, cutting it into a 5" square and then matting it with brown cardstock before adhering to the interior.

The roses were added to the medallion with Joy Foam Adhesives for dimension. The banner was placed on top with two layers of Joy Foam Adhesives to help set it apart from the roses.


As you can see, I've mixed stamp sets and dies to create this card, so don't be afraid to mix and match your products to get different looks for your cards.
Thanks, Steph, for such a great tutorial!

If you enjoyed Steph's tutorial, please share it with the links just below my signature.

Be sure to click any of the gold links above to get more info and purchase the wonderful products Jenn used on her card!

Thanks for stopping by!!!  Until next time...


Pin It