Showing posts with label Glitter. Show all posts

Tuesday, December 29, 2015

Inside Looking Out

Hi, Diane with you today!  After all the holiday rush and activities it sure feels good to be back in the creative room again.

My card was made for our current challenge "Let It Snow"
and I hope you will join in with us.


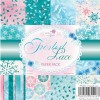
I did a somewhat simple window winter scene which I am calling Inside Looking Out.  I started with a pretty snowflake paper from Wild Rose Frosted Lace 6 x 6 paper pad.

I cut two windows using PoppyStamps Small Madison Window.  
I cut one from the Frosted Lace Paper and used the negative, then the second one from a scrap of white card stock and popped it up over the negative using Joy! Foam Pads Small.


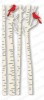
However, before adhering it down, I cut a few snow banks, and a few birch trees using Impression Obsession Birch Trees and arranged both behind the window for my outside scene.

Snowflakes were cut from Impression Small Snowflake Set.  Each snowflake then was brushed with glue and coated with Sparkle 'n Sprinkle Crystal Ice Glitter.

I finished with a winter wonderland sentiment I had on hand, but you could use Walking in a Winter Wonderland stamp, which I wish I had to use, it's so pretty!

A few sequins were also added for a bit of balance.


Thank you for visiting with me today!

Be sure to take advantage of our current sale for 25% off site wide! Some exceptions apply.  Details are here.

Thanks for stopping by!!!  Until next time...


Pin It

Tuesday, December 22, 2015

A Christmas Wand

Good Morning, Joy here today with a card for the Classy Cards 'n Such Weekly Challenge. Today, we were to use this photo as inspiration.


and here is my card:


The trees are a die-cut frame called Cascade Evergreen Frame by Memory Box.  The sentiment is from Christmas Joy by Sweet 'n Sassy Stamps stamped on some Heavy Weight Vellum.  I used a stencil called Texture Tessatina by Memory Box with some Dreamweaver Pearlescent Embossing Paste.  Before it dried, I sprinkled on Sparkle 'n Sprinkle Crystal Ice Glitter.  Two green trees were die cut from the Evergreen Frame and layered on top of the white card stock making sure some of the white card stock was showing. Some of the embossing paste was added using a small brush being sure to make some peaks.  Lastly, I sprinkled some glitter on the trees before the paste dried.

Today would be a great day to join in the Silent Night, Holy Night Challenge. Just go here and look at the details for the challenge. Be sure to check out what the other design team members did. They did an awesome job this week. Make your project and link it here. You could be the winner of a nice prize!

Thanks for looking at my card. Have a Happy Stamping Day!


Want to purchase some or all of the products used in today's card?   Classy Cards carries those that are in gold above and underlined.   Click those or the pictures below.  Happy shopping!!

Thanks for stopping by!!!  Until next time...


Pin It

Saturday, December 19, 2015

Thank You

Hi Diane with you today and guess what?  I have something besides a Christmas card to share..lol!


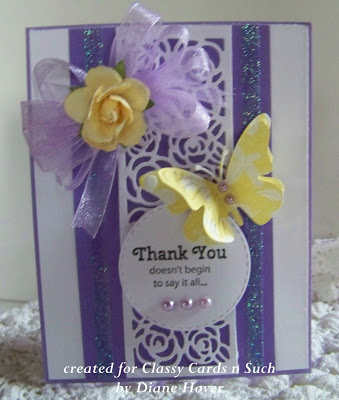
I have always loved the colors of lavender and yellow together. I started the base of my card with a lavender card stock. I added a white panel to that. I used another piece of lavender card stock under a die cut from Sue Wilson's Mini Striplet Rose Garden.

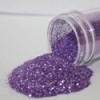
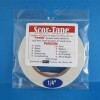
I ran two strips of Scor-Tape 1/4" down each side, then sprinkled Sparkle 'n Sprinkle Lacey Lilac Glitter on each strip. Next, I made a bow using the Bow Easy tool, and adhered a Rose to the center.

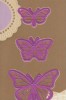
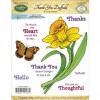
The stamped sentiment is from the JustRite Thank You Daffodil stamp set. A butterfly was added using Joy! Crafts Butterfly Trio. To finish, I added a few pretty Lavender Pearls.

Thank you for visiting with me today and have a Merry Christmas!!

Come back tomorrow, and we will have a new CCNS challenge for you. It will be Challenge #116 - Silent Night, Holy Night. There are beautiful cards just waiting to inspire you by the CCNS Design Team.

Thanks for stopping by!!!  Until next time...


Pin It

Tuesday, December 1, 2015

Frosty Tree

Hi, Diane with you today!  We had our first big snowfall last week and the trees were covered with fresh fallen snow.  We also had a couple of deer visit, almost to the front door.  A very inspiring scene to create with, so that is what I did!


I used a gorgeous Starburst Lichen Aspire Petallic Metalic paper for my background.  I cut a Memory Box Medium Forest Archway from Luminized Curious Metallic paper.

Next is the gorgeous snow covered and glittery tree.  I cut Memory Box Frosted Christmas Tree from Pearlized Esse White Metallic paper.  I left the tree in the die, then coated it very heavily with Dreamweavers Regular Embossing Paste.  I used my Palette Knife to swirl the paste around a bit, then carefully took the die cut out, being careful not to touch the paste.  I then sprinkled Crystal Ice Glitter on and once dry, attached Baby Rhinestones - Turquoise.


Just make sure to quickly wash out your die and spatula when done.  You will find the paste dries very quickly.

I cut the deer using Impression Obsession Small Deer
from Champaign Neenah Pearlized Metallic paper.
I also cut the deer from a black craft foam to add height
and a bit of shadow behind them.

I hope you will give this card a try as it is very quick
to put together but looks beautiful when done.

Thank you for visiting with me today!


Don't forget to check out the NEW section at Classy Cards 'n Such. Lots of new products! When you check out, don't forget to enter your blog discount (coupon code BLOG10) for a great savings! 


Pin It

Saturday, November 28, 2015

Nativity Scene

Hi, Diane with you today!

For my card today, I started with a pretty blue background
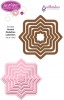
using Stardream Lapis Pearlized Metallic paper.  I used white card stock and cut a center out with Spellbinders Nested Medallion Label Dies.


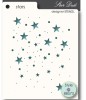
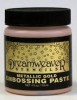
I then used a Memory Box Stars, Stardust Stencil with Dreamweavers Metallic Gold Embossing Paste.

The scene was cut from Die Versions Nativity Border.
Cutting it once from white card stock and a second time
from a black craft foam.

To finish, I simply added Aztec Gold Glitter and a pretty sheer ribbon/bow.

Thank you for visiting with me today!


Come back tomorrow, and we will have a new CCNS challenge for you. It will be Challenge #113 - O' Christmas Tree. There are beautiful cards just waiting to inspire you by the CCNS Design Team.

Thanks for stopping by!!!   Until next time...


Pin It