Showing posts with label Sue Wilson dies. Show all posts

Monday, January 25, 2016

Elegant Thanks

Hello!  It's Diana with you today.  For the neutrals challenge this month, I made a thank you card using Sue Wilson Spanish Collection - Seville DieThanks die by Elizabeth Craft Designs, and a trimmed butterfly from the Memory Box Fairyland butterflies.  I kept my palette neutral using white and gray cardstock.  The flowers are white and ivory.  I did use ultra thick embossing powder on my Thanks to add dimension and shine.  The Sue Wilson Dies were also popped up with small Joy! foam pads to emphasize the lacy cutouts.

We've made it easy for you to find our future challenges!  Click  on the Challenge Calendar tab on the right side of the blog. All of the challenges are listed through February 2016!

Thanks for stopping by!!!   Until next time...


Pin It

Monday, January 18, 2016

With Love

Hello, it is Shirley posting today.  I have a card to share with you that I made for the Classy Cards 'n Such brand new challenge.  For this challenge we are to use buttons on our cards.  I hope you will come over to play the challenge and show us how you use your buttons.

I started my card with a navy card base and added a gold layer of card stock.  My next step was to cut a white layer and use the Sue Wilson Lyra - Gemini die on the bottom edge of it.

I added gold corners to the top of the card using the Impression Obsession Brick House die set.   I cut the With Love die cut using one of the  Spellbinders Sentiments Three dies.   I then adhered it to the white decorative piece using Art Institute Dries Clear Adhesive.

I added some navy blooms and placed faux gold buttons in the centers.  For the final touch to my card, I added pearls.

Thank you for stopping by today.  I hope you are having a great Monday.
When shopping the wonderful deals at Classy Cards 'n Such, be sure to enter your blog discount (coupon code BLOG10) for a great savings!

Until next time...


Pin It

Sunday, December 27, 2015

The Joy of Snowflakes

Hello, stamping friends. It is Shirley posting and I have a snowflake card to share with you for challenge #117-Let It Snow.

I started with a white base. I used the Memory Box Distressed Baptisia Collage die on the lower corner of the card. I cut a piece of Stardream Rose Quartz card stock to use for the layer on the inside of the card so it shows through the top part of the card.

I also used Stardream Rose Quartz to use with the Sue Wilson Joy - Festive Collection die. I put a layer of gray card stock behind it to make it stand out. I really like the pink and gray color combination.

I cut a gray snowflake using the Memory Box Rizza Snowflake die. I cut another one from pink to make the pink center of the snowflake.

I wanted to add a couple of small snowflakes to my card in the pink Stardream Rose Quartz card stock. They were cut using the Impression Obsession Small Snowflake set die.

The finishing step to my card was adding silver sequins. I adhered the sequins and all the card parts using
Art Institute Dries Clear Adhesive.

Thank you for joining us today. I hope you are ready to get started on your snowflake card and join us for the challenge.

When shopping the wonderful deals at Classy Cards 'n Such, be sure to enter your blog discount (coupon code BLOG10) for a great savings!

Thanks for stopping by!!! Until next time...


Pin It

Monday, December 21, 2015

A Cold Winter Night

Good Morning. It is Shirley posting today with a card for the #116 Silent Night challenge. The inspiration picture has such a peaceful look to it , but it has way more snow than I am wanting to see.

I started my card with a white card base. I added red and black layers.  I used a snowy night designer paper and added some snowbanks with glitter.    After cutting the pieces for the Impression Obsession Brick House die, I attached all the pieces using Art Institute Dries Clear Adhesive. The window panes were made using a scrap piece of silver card stock.

I used the PoppyStamps Bundled Snowman die to make the two snowmen.  I placed trees on the snow banks using the Sue Wilson Winter Trees-Festive Collection.

The final step of my card was making the Christmas Star by Art Impressions and placing a dot of Stickles in the center of it.

I hope to see your card for the Silent Night challenge uploaded in the challenge gallery.  Not only will you have another card made, but you will have a chance to win a prize.

Thanks for coming by today.
When shopping the wonderful deals at Classy Cards 'n Such, be sure to enter your blog discount (coupon code BLOG10) for a great savings!

Thanks for stopping by!!!   Until next time...


Pin It

Saturday, December 19, 2015

Thank You

Hi Diane with you today and guess what?  I have something besides a Christmas card to share..lol!


I have always loved the colors of lavender and yellow together. I started the base of my card with a lavender card stock. I added a white panel to that. I used another piece of lavender card stock under a die cut from Sue Wilson's Mini Striplet Rose Garden.

I ran two strips of Scor-Tape 1/4" down each side, then sprinkled Sparkle 'n Sprinkle Lacey Lilac Glitter on each strip. Next, I made a bow using the Bow Easy tool, and adhered a Rose to the center.

The stamped sentiment is from the JustRite Thank You Daffodil stamp set. A butterfly was added using Joy! Crafts Butterfly Trio. To finish, I added a few pretty Lavender Pearls.

Thank you for visiting with me today and have a Merry Christmas!!

Come back tomorrow, and we will have a new CCNS challenge for you. It will be Challenge #116 - Silent Night, Holy Night. There are beautiful cards just waiting to inspire you by the CCNS Design Team.

Thanks for stopping by!!!  Until next time...


Pin It

Friday, December 18, 2015

Gatefold Latch Card

Good morning, Crafters.    It is Shirley posting today.   I have made a gatefold latch card to share with you.  I've seen a few of these on some of the blogs I follow and decided it was time for me to do some measuring and come up with a plan to make one.


I started with a white piece of card stock 4 1/4" by 11" for the card base.  I scored in from each side at 2 3/4 inches.
I cut the layers for the front using brown card stock and designer paper from my stash.  

Now I am going to get started on the latch for my card.  Here is a picture of the card partially open so you can see how the latch works.


The outer brown decorative piece of brown card stock was cut using the Sue Wilson California Collection - Beverly Hills die. I used the inside of this die to cut the white decorative piece.  The next brown decorative piece was cut using one of the Spellbinders Oval Regalia dies.  The center oval was made using an oval punch.

I used gold card stock to cut the Memory Box Willoughby Butterfly Wings.   

My Impression Obsession Brick House dies arrived this week.  I was really excited to get it because I wanted to used the decorative pieces for the eaves of the house for the corners of my card.  Not only can you make a cute little house with this set, you have two dies that can be used for corners.  I love dies that can be used for more than one purpose.  I am going to be using this one a lot.  I love the corner pieces.  

To construct the card, I used Art Institute Dries Clear Adhesive to attach the pieces of my card.  When gluing the latch, you will want to glue half of the brown decorative piece to one side of the card and the white piece on the other side so your latch will open properly.

I added a few LeCreme Pearls for the finishing touch to my card.

I hope you enjoyed seeing my card.  Come back soon and we will have another great card for you to see.  If you haven't joined us for our Starry Night challenge this week, you still have time to  make your card and link it up to our blog.  The challenge ends tomorrow night.   We would love to see your card.

Have a great weekend!

Thanks for stopping by!!!  Until next time...


Pin It

Friday, December 11, 2015

Cabrini Ornament

It is Shirley posting today.    It sure is starting to look a lot like Christmas.  I see Christmas lights everywhere I go and there is so much hustle and bustle going on in the stores with everyone doing their shopping.  

I have another Christmas card to share with you today.   I really like how it turned out, but I was not real pleased with the photograph.  I have a hard time getting a good picture when I use foil paper/card stock.  I have fluorescent lights in my craft area and it really creates a shine.   I went out on the sun porch to take the picture and it really helped.  I still have just a touch of shine on the reindeer, but it was the best I could do.  If you have any tips that might help me with this,  please let me know.


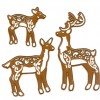
I used a black card base and added a layer of shiny gold sticker paper that had stars on it.  I added white card stock and then a layer of gold snowflake vellum.  I cut the reindeer with the same gold paper using the Sue Wilson Deer Family Festive Collection.  

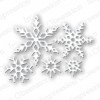
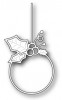
I cut the ornament using the Memory Box Cabrini Ornament.  I used black, silver and gold paper to give my card an elegant look.  I added the snowflake using the Impression Obsession Small Snowflake Set.

The sentiment was gold embossed using the Impression Obsession Christmas Sentiments Stamp set.  I added black poinsettias using the PoppyStamps Small Blooming Poinsettia die.

I added the elements to my card using the Art Institute Dries Clear Adhesive.   I honestly love this adhesive.

For the finishing touch, I added Silver Rhinestones to the ornament and the poinsettias.  I added a Brown Rhinestone for the reindeer eye.

I am happy you dropped by to see us today.  I hope you enjoyed the card.  Come back and visit again, soon.


Join the Classy Cards newsletter and get the best deals on our products!  It's easy...the sign-up form is on this blog in the black box on the left side. Get 20% off an order of your choice as a newsletter subscriber.  What a deal!!

Thanks for stopping by!!!  Until next time...


Pin It