Hi there! Diana here to share with you my deer inspired card. This was a lot of fun to make.
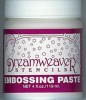
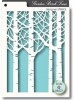
For my background, I mixed a little bit of Tim Holtz Broken China with my Dreamweaver's White Embossing Paste. I started at the top of my Memory Box Garden Birch Trees stencil, and
spread the paste downward. When I ran out of the colored paste, I
used the unmixed white and started from the bottom and moved upwards. Where they met, I just mixed them on the stencil. You can't really see
it but underneath the Vellum, it is mostly white to mimic snow.
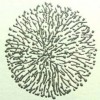
After the paste was dried, I trimmed down my background using Spellbinders A2 Matting Basics A. I cut two sheets of my Vellum with a wavy top, and wrapped that around my Garden Birch Trees background. I used Stickles to edge the top of the Vellum, and embossed using Silver Detail embossing powder for my sentiment.
I then die cut 8 Leaping Deer by Memory Box. Each deer is stacked 4 high. To make the doe, I cut off the antlers.
Thanks so much for looking!
There
is still time to join our Classy Cards 'n Such challenge. Click on the
Weekly Challenge label on the right side of the blog!
Join
the Classy Cards blog email list in the upper left column of this blog
and receive exclusive weekly deals not available elsewhere! A one-time 20% discount on an order of your choice! Subsequent orders receive a 10% discount. Don't miss out, join today!
Thanks for stopping by!!! Until next time...
Pin It
Showing posts with label Trees. Show all posts
Wednesday, September 17, 2014
Monday, September 15, 2014
Natures Window
Hello Classy friends! Diane here today with my latest project for this weeks challenge which is Santa's Reindeer. Using the inspiration photo, I chose to make window scene.
I started out with Spellbinders Decorative Labels Eight die and using not the beautiful die cut, but the negative for my window! I will save the other piece for a later project.
I stamped Stacy Stamps, The Woods pine trees, in two different green inks on a piece of white card stock and then used Joy Small Foam Pads to attach it to the window frame.
I die cut Memory Box Deer Trio, and then stamped Versamark on, and coated
them with Stampendous Frantage embossing powder, using the colors Aged Gold for the large deer, and Shabby White for the fawn. Did you know you can sprinkle Frantage on your project without any kind of adhesive, and move it around where you want with your finger, then heat set it from below? Just a little tip on using this product!
I did add a bit of Clear Rock Candy Stickles to my trees for sparkle and a bow to finish it off.
I invite you to join us in our challenge this week. We would love to see YOUR Project!
If you would like to view the challenge for the week and the rules, click on the Current Challenge label, located on the right side of the page.
Want to plan ahead and join our weekly challenges? Just click on the Challenge Calendar tab, located on the right side of the page. We would love to have you share your creative ideas! You could be our next Classy Cards 'n Such prize winner!
Thanks for stopping by!!! Until next time...
If you would like to view the challenge for the week and the rules, click on the Current Challenge label, located on the right side of the page.
Want to plan ahead and join our weekly challenges? Just click on the Challenge Calendar tab, located on the right side of the page. We would love to have you share your creative ideas! You could be our next Classy Cards 'n Such prize winner!
Thanks for stopping by!!! Until next time...
Subscribe to:
Posts (Atom)

.jpg)