Showing posts with label Art Impressions. Show all posts

Monday, December 21, 2015

A Cold Winter Night

Good Morning. It is Shirley posting today with a card for the #116 Silent Night challenge. The inspiration picture has such a peaceful look to it , but it has way more snow than I am wanting to see.

I started my card with a white card base. I added red and black layers.  I used a snowy night designer paper and added some snowbanks with glitter.    After cutting the pieces for the Impression Obsession Brick House die, I attached all the pieces using Art Institute Dries Clear Adhesive. The window panes were made using a scrap piece of silver card stock.

I used the PoppyStamps Bundled Snowman die to make the two snowmen.  I placed trees on the snow banks using the Sue Wilson Winter Trees-Festive Collection.

The final step of my card was making the Christmas Star by Art Impressions and placing a dot of Stickles in the center of it.

I hope to see your card for the Silent Night challenge uploaded in the challenge gallery.  Not only will you have another card made, but you will have a chance to win a prize.

Thanks for coming by today.
When shopping the wonderful deals at Classy Cards 'n Such, be sure to enter your blog discount (coupon code BLOG10) for a great savings!

Thanks for stopping by!!!   Until next time...


Pin It

Monday, July 13, 2015

Picnic Today

It's summer time, and a great day for a picnic. Our challenge this week on the blog is #93 Summer Picnic Color, featuring the colors of Kraft, Red, and White.

When I heard the theme was picnic, I knew immediately the stamp I wanted to use. Mindy with you today, sharing my picnic themed card.


I ordered the Gazebo 'Try' Fold card by Art Impressions last year, and have only used it a few times. Although it can be used for weddings, anniversaries, and birthdays, I thought it would be great promoting a summer picnic. The instructions included with the stamp, are to make a card that has three sections of stamping, that when folded together, makes a wonderful interactive card. This time I only wanted to make a one-layer card, to show the entire scene on the front of the card.

After coloring with my markers, I trimmed around the entire image, added a border of red card stock and trimmed again. I added dimension to the sign on the easel with Joy! Large Foam Pads, and even more dimension with some clear adhesive on the sign, balloons, and flower pot. 

I embossed a rectangle of Kraft colored stock with the Bricks and Bark M-Bossabilities by Spellbinders, and attached it to the front of my card. I then adhered the picnic scene to the card front to complete my card. 

I hope you enjoy our sample cards this week, and will enter one of your own creations to our challenge. Happy Stamping!

Want to plan ahead and join our weekly challenges? Just click on the Challenge Calendar label, located on the right side of the page. We would love to have you share your creative ideas! Invite your friends to play along! You could be our next Classy Cards 'n Such prize winner!

Thanks for stopping by!!! Until next time...


Pin It

Thursday, February 26, 2015

Birthday Posies

Birthday Wishes shared today by Mindy, who created this wreath which is suitable for birthdays, get well, and thinking of you. 


The card was begun by selecting three colors of card stock that complimented the colors I chose for my flowers.  The flower used is the single flower from the Floral Basket Clear Stamps by JustRight Stamps. On a sheet of eggshell card stock, I drew a circle using a circular die as a template.  I stamped the flower stamp around the circle alternating the direction of the stamp to give it a different but balanced appearance. The flowers were colored with Copic markers and left to dry. When the Copics were dry, I highlighted each leaf and flower with a Gelly Roll Stardust Clear Pen by Sakura. I also stamped five extra flowers and colored them the same as the wreath, then fussy cut around each one.

I assembled my three layers of card stock for the background. The layer where the wreath was placed is embossed with the Vintage Flowers Folder by Crafts Too!  I adhered the wreath with Joy! Foam Pads Large, and cut a few of the pads in quarters for the smaller single flowers.  They were placed around the wreath to fill in empty spaces. 

The sentiments were from the Floral Basket set and the Happy Birthday stamp from Art Impressions. The stamps were embossed with embossing powder on Heavyweight Vellum then attached with brads. After all the layers were attached, I adhered the card front to an eggshell card base.

Thank you for visiting with us today. Please join us again soon!

Be sure to sign up to get the Classy Cards blog by email or by reader on the left side of this blog.  You don't want to miss any of the beautiful cards waiting to be posted!

Thanks for stopping by!!!  Until next time...


Pin It

Saturday, October 25, 2014

Bath Time

I have been playing with some of my New die-cuts received from the Classy Cards n' Such online store.

Mindy, with you today, to share a card made with a handful of dies.


I started with the Woodland Tree Silhouette from Memory Box, cutting it from a sheet of brown card stock. I found a sheet of  patterned paper with clouds on it and knew this would work well behind the tree. These were then both adhered to the card front.

Now comes the decorating. I used Small Leaf Set and Small Grass Border both from Impression Obsession. The Flock of Birds and Small Kittens dies from Memory Box to cut the many small figures. *NOTE - Subtitute the MBC Small Kittens dies with the PoppyStamps Baby Kittens*.

The bird bath/watering can/potted plant cluster is a rubber stamp from the Garden Try-Folds Set from Art Impressions. The Why Do Birds stamp is by Impression Obsession. The wooden Bath sign was handwritten on a scrap of wood-grain paper to complete the card.

I had so much fun piecing this card together like a puzzle. I hope you enjoyed it as much as I did. Thanks for visiting!


Don't forget to check back with us tomorrow, for our new weekly challenge, Candy Cane Christmas! Our design team has fabulous cards to inspire you join the challenge, invite your friends too! There is always a classy prize to win!

Details and requirements for the challenge will also be posted, so please read them carefully! Let's have some fun together next week!
 
Thanks for stopping by today!!! Until next time...


Pin It

Saturday, August 9, 2014

Happy Poppy Fields

Hello, friends, Mindy here to share with you a special card of remembrance and thoughts of you.

Poppies are one of my favorite flowers, and according to Wikipedia poppy flowers are a symbol of remembrance.


One of the new Stacy Stamps Poppieshas a single flower stamp, and a cluster of flowers corner edge stamp in the same package. Here where I live in So. Texas the bright red poppies are one of our wildflowers that start to bloom in late April in fields and along the roadways. I stamped the single flower on a sheet of white card stock, and using my  markers, colored in the flower and leaves. I fussy cut around the image, and highlighted the edges with a Wink of Stella gold glitter marker. 

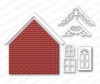
To prepare the background, I stamped the Wood Texture Cover-a-Card stamp on a sheet of white card stock using Antique Linen Distress Ink. I then took the Claudette Frame from PoppyStamps, and ran the die and stamped paper through my Cuttlebug machine to get my wood look frame. 

I adhered it to the card front with 1/4" Scor-Tape, and used Large Joy! Foam Pads to add dimension to the poppy flower. 

I the tied a strip of twine around the card twice, and tied the ends in a square knot. Then using a Spellbinder's A2 Matting Basics A die, I stamped the Thinking of You sentiment and colored it in with the Wink of Stella gold glitter pen. There is a Wink of Stella clear glitter pen available at Classy Cards 'n Such online store.

I added some of the Black Pearl Pen from Viva Decor, in the center of the flower, and White Baby Pearls around the frame and sentiment strip for a little more bling.

Why not remember a friend by making them a hand-stamped card, and sending it today?  They will really appreciate the thought!

Thanks for visiting and taking a look at my card!

Classy Cards 'n Such online store has added new products. Click here to find all the new items that have been added!

Join the Classy Cards blog email list in the upper left column of this blog and receive exclusive weekly deals not available elsewhere! A one-time 20% discount on an order of your choice! Subsequent orders receive a 10% discount. Don't miss out, join today!

Thanks for stopping by!!! Until next time...


Pin It