Showing posts with label Memory Box. Show all posts

Friday, February 26, 2016

Beautiful Sunflowers

It is Shirley with you today.  I have made a card with my favorite flowers on it.  I love sunflowers, I think they are the most beautiful flowers ever. 

I started my card with a brown card base.  I layered it with red card stock and added a layer of designer paper.    I really think these colors compliment each other and they are perfect for a card with a country feel.

I used red card stock to cut the Fleur De Lis decorative square.   I used a square die to cut out a window to fit the Heartfelt Creations Sunflower Bouquet behind.   I stamped two of the images so I could fussy cut the sunflowers from  one to place in the corner.  I shaped the flowers using the Paper Blossoms Tool Kit.  I colored the images with Copics.  I adhered the three sunflowers on the corner of the first image and popped one of them up using a foam square.  I used green card stock to cut the Marianne Anja Leaves 2 to place under the sunflowers.  I used my trusty Memory Box Willoughby Butterfly Wings to cut the butterflies in the upper corner.  This is the butterfly image that I use the most.  I used Tear Drop Pearls to place on the butterfly and in the corners as the finishing touch to my card.

I hope you liked my card.  Thank you for dropping in to see us today.
I added four new items to the shop today.  Three of the four items have only one available, so shop now while they are available.  You can see them all here.

Thanks for stopping by!!!  Until next time...


Pin It
Tuesday, February 23, 2016

Little Pillow Box

Hi, Diane with you today.Before I share the details of my project I just wanted to say that this is my last creation
for Classy Cards 'n Such as a Design Team member and want to thank Beverly for having me on the team for the last few years!  Also to say that I loved working with the girls on the team and I hope to see you all around 'blogland'!

For my last project I thought it would be fun to create a cute little pillow box using Lawn Fawn Pillow Box die.
This was so simple to make, I could sit and make dozens of these!


I cut it from On Trend paper by My Minds Eye.  I simply finished it by tying a twine bow from Doodle Twine Bright Assortment.  

A butterfly was added using Memory Box Precious Butterflies die. I simply snipped off the bow part and added just the butterfly.


I added a few little resin 3D flowers to finish.
A very easy and simple project that is sure to please
whomever receives it!

Thank you for visiting with me today!

Have you found something you need yet at the Classy Cards closing sale?   There are still lots of great craft items to be had!   Take a peek here.

Thanks for stopping by!!!  Until next time...


Pin It
Monday, February 22, 2016

Thanks Tag

Diana here today.  I can't believe this is the last challenge for CCNS!  It's been such great fun - I've been stretched creatively and have gotten to play with some wonderful craft supplies!  Thank you so much, Beverly, for making me a part of this wonderful team.

It's only appropriate then for this last challenge of aqua and coral that I make something along the lines of "Thanks!"


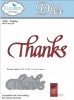
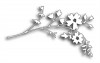
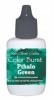
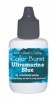
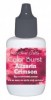
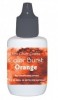
I made a tag with Tags and More 2 and Thanks by Elizabeth Craft Designs. To make my aqua and coral colors, I mixed Ken Oliver's color bursts Pthalo Green with Ultramarine Blue and Alizarin Crimson and Orange. I used the mixed colors to paint a die cut of Memory Box Honey Blossom Sprig out of watercolor paper as well as the Thanks die. Once everything was dried, I adhered all the die cuts with Art Institute glue.


Thanks to everyone for all of the support you have given us during our closing sale!   There are still many great items to be had at a great price, so be sure to take a look through the Classy Cards shop!   Things are selling out very quickly!

Thanks for stopping by!!!  Until next time...


Pin It
A New Baby Carriage

Hi, it is Shirley here posting today.    This week we are to make a Aqua and Coral card.  The colors look great together and I thought they would be perfect for a baby card.


I started with a white card base and added some floral designer paper for the next layer.  I used one of my Spellbinders, Floral Ovals, die to cut the white decorative oval.  I added a coral oval that I embossed using the Crafts Too Dots Embossing Folder.  I popped the oval up on the designer paper with Joy Foam Pads Small.

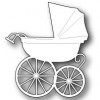
I used light aqua paper to cut the Memory Box Baby Carriage. I also used foam pads to pop the carriage up on the dotted oval to add to the dimension.  I added three white pearls and a punched coral heart for the final touch.

Thank you for joining us today.  I hope you will join us for our last challenge.

Thanks for stopping by!!!  Until next time...


Pin It
Wednesday, February 17, 2016

Puppies Galore

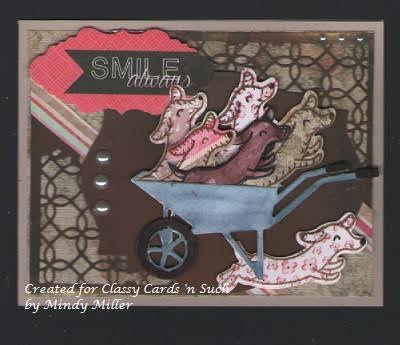
There is nothing cuter than a load of puppies. Hi friends, Mindy here to share with you my sample card for this week's challenge #124 Colors, Stitching, and Pattern.  The inspiration photo for this challenge is so cute, I was inspired to use the colors and pattern of the puppies to create my own passel of pups.


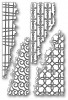
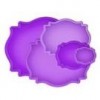
I decided to try and use up some leftover paper scraps I had on my work desk for this card. I started by cutting two of the Distressed Addington Collage Dies by Memory Box and anchoring them to opposite corners of my card.  From the same paper, I cut a label die from the Labels Eighteen Dies by Spellbinders and adhered it to the card front.  From watercolor paper, I die cut the Wheelbarrow by Impression Obsession and used watercolor markers to color it. While it was drying, I used a weenie dog die, to cut lots of pups from various papers inspired by the color photo.  I then inserted them into the wheelbarrow and adhered it to the label die.
To complete this card, I added a pre-printed sentiment label from the Say Aloha paper pad by Kaisercraft and a few decorative pearls. I hope you can join us for this challenge, there are so many possibilities for inspiration in the wonderful photo.


Thanks for stopping by!!!   Until next time...


Pin It

Wednesday, February 10, 2016

Silver Hearts

Hi, everyone, it is Shirley posting today.  I have made a wedding card to share with you.  It is made with neutral colors just like the one I made for last week's challenge. 


I used layers of silver and white on my card.  The top layer was embossed using the Crafts Too Dots embossing folder.    I cut two white hearts using the Spellbinders Classic Scalloped Hearts.  I took a silver and white invitation that I had in my stash to cut the top hearts.  I popped them up on my card using Joy Foam Pads Small.

I took silver card stock and used the Memory Box Madera Corner die to cut two of the corners.  I placed them behind the hearts and used Art Institute Dries Clear Adhesive to adhere them to the card.  

I used the Spellbinders Sentiments Three to cut the Love with silver card stock.  The silver heart at the top of my card was cut using the Impression Obsession Heart Flourish.

I hope you enjoyed my card today. 

Our store closing sale is going great!   Have you picked up your fabulous deals yet?   Sale details are here.   Hurry!!!  

Thanks for stopping by!!!  Until next time...


Pin It

Monday, February 8, 2016

Pretty Flowers

Hi, Diane with you today. This week's challenge is Lilacs and Lace.

I started with a gorgeous new embossing folder from We R Memory Keep Next Level - Quilted.


Next, a lacy heart was die cut using two of the dies from Spellbinders Lace Hearts. 

Flowers were cut using Memory Box Blushing Bouquet.  The flowers were painted with a Tim Holtz Water Brush and using colors from Twinkling H2Os Holiday Sparkle and 
Autumn Brillance.  It gives them a watercolor effect, but they are actually a bit shimmery from the H2Os.

To finish, I simply added a bow!  Thank you for visiting with me today!


Be sure to get in on this week's challenge!   All of the details are here.

Thanks for stopping by!!!  Until next time...


Pin It