Showing posts with label Embossing folders. Show all posts

Friday, February 26, 2016

Thanks a Bunch

This is the last card posting for my time on the Classy Cards 'n Such Design Team. Mindy here, and I thought a Thank You card would be appropriate for my final card.


I started by stamping the Coneflowers from Impression Obsession on a piece of watercolor paper and coloring with watercolor markers.  When it was dry, I ran it through my embossing machine with the Daisy Flourish Embossing Folder from Crafts Too!  I layered it on my card front, and then die cut the sentiment, Thanks by Elizabeth Crafts Designs along with a layer of thin craft foam to give the card some dimension.

I have really enjoyed my time with Beverly and the design team, working with the products she carried in the Classy Cards 'n Such Online Store.  The store is closing on Monday, February 29th, so click on the link to see the wonderful sale prices available on the remaining product.  Thank you for your comments and support during our many challenges.

Only four more days until Classy Cards closes, so take advantage of the wonderful sale going on!

Thanks for stopping by!!!  Until next time...


Pin It

Monday, February 22, 2016

A New Baby Carriage

Hi, it is Shirley here posting today.    This week we are to make a Aqua and Coral card.  The colors look great together and I thought they would be perfect for a baby card.


I started with a white card base and added some floral designer paper for the next layer.  I used one of my Spellbinders, Floral Ovals, die to cut the white decorative oval.  I added a coral oval that I embossed using the Crafts Too Dots Embossing Folder.  I popped the oval up on the designer paper with Joy Foam Pads Small.

I used light aqua paper to cut the Memory Box Baby Carriage. I also used foam pads to pop the carriage up on the dotted oval to add to the dimension.  I added three white pearls and a punched coral heart for the final touch.

Thank you for joining us today.  I hope you will join us for our last challenge.

Thanks for stopping by!!!  Until next time...


Pin It

Thursday, February 18, 2016

Respect

Mindy with you today to share an inspirational card that is quick and easy to make for many occasions.  I started by dry embossing the background with the Lattice Embossing Folder by Crafts Too!  I then die cut several layers of oval dies, Oval Regalia and Fleur de Elegance both by Spellbinders, and layered them to make a background and sentiment spot.  

An angel die was also added, along with the sentiment stamped using the Just the Right Words Stamp by JustRite Stamps.  A few Water Dew Drops from The Robin's Nest were added for the finishing touch.


Cards need not be extensive and expensive to look elegant and classy.  With just a few die cuts and embellishment you can create a lovely card. 

Want to purchase some or all of the products used in today's card?   Classy Cards carries those that are in gold and underlined.   Click those or the pictures below.  Happy shopping!!

Thanks for stopping by!!!  Until next time...


Pin It

Thursday, February 11, 2016

Poppy Fence

Greetings, friends. Mindy with you today to share a card I really love. I have always loved poppy flowers, and when I saw this framed Poppy by Stacy Stamps, I knew I had to purchase it.


To start my card, I stamped the design on watercolor paper and colored and shaded the design with watercolor markers.  While it was drying, I embossed a rectangle of metallic bronze card stock with the Daisy and Swirl Embossing Folder by Crafts Too! for the background. I then adhered a doily die before adhering the framed poppy picture on top, raised up with foam adhesive to give dimension.

To complete my card, I stamped a sentiment from the Hope and Love Vintage Labels Eight and Nine by JustRite Stamps, a Medium Butterfly by Impression Obsession and a few sequins cut from the Sequins Die-Namics die from My Favorite Things.

Enjoy your week, and be sure to join us for our weekly card challenge on our blog.
Thanks for stopping by!!!  Until next time...


Pin It

Wednesday, February 10, 2016

Silver Hearts

Hi, everyone, it is Shirley posting today.  I have made a wedding card to share with you.  It is made with neutral colors just like the one I made for last week's challenge. 


I used layers of silver and white on my card.  The top layer was embossed using the Crafts Too Dots embossing folder.    I cut two white hearts using the Spellbinders Classic Scalloped Hearts.  I took a silver and white invitation that I had in my stash to cut the top hearts.  I popped them up on my card using Joy Foam Pads Small.

I took silver card stock and used the Memory Box Madera Corner die to cut two of the corners.  I placed them behind the hearts and used Art Institute Dries Clear Adhesive to adhere them to the card.  

I used the Spellbinders Sentiments Three to cut the Love with silver card stock.  The silver heart at the top of my card was cut using the Impression Obsession Heart Flourish.

I hope you enjoyed my card today. 

Our store closing sale is going great!   Have you picked up your fabulous deals yet?   Sale details are here.   Hurry!!!  

Thanks for stopping by!!!  Until next time...


Pin It

Monday, February 8, 2016

Pretty Flowers

Hi, Diane with you today. This week's challenge is Lilacs and Lace.

I started with a gorgeous new embossing folder from We R Memory Keep Next Level - Quilted.


Next, a lacy heart was die cut using two of the dies from Spellbinders Lace Hearts. 

Flowers were cut using Memory Box Blushing Bouquet.  The flowers were painted with a Tim Holtz Water Brush and using colors from Twinkling H2Os Holiday Sparkle and 
Autumn Brillance.  It gives them a watercolor effect, but they are actually a bit shimmery from the H2Os.

To finish, I simply added a bow!  Thank you for visiting with me today!


Be sure to get in on this week's challenge!   All of the details are here.

Thanks for stopping by!!!  Until next time...


Pin It

Thursday, February 4, 2016

February Birthday

Good afternoon, and welcome to another sample card from Classy Cards 'n Such. Mindy with you to share a birthday card suitable for a February Birthday. I hope you will enjoy it, and leave me a note. I enjoy comments from everyone.


My card background started with a sheet of watercolor paper that I lightly misted with water then embossed with the Smitten Embossing Folder by Anna Griffin. I then misted it again so it was wet all over, and tapped some of the Alizarin Crimson Color Burst and Merlot Color Burst from Ken Oliver Crafts.  When the card was dry, I accented the hearts on it with the Pearl Pen - Glitter Pink by Viva Decor and let it dry before adhering it to my card front.

I then die cut the amazing calligraphy die, Happy Birthday by Elizabeth Crafts Designs along with a thin sheet of craft foam to give the die stability and strength before adhering it to the card front. A fabric bow and small hearts, along with a butterfly die cut from Medium Butterflies by Impression Obsession were added to complete the card.

You still have time to join our weekly challenge over at the Classy Cards 'n Such blog.  I hope you will join our fun!

Want to purchase some or all of the products used in today's card?   Classy Cards carries those that are in gold and underlined.   Click those or the pictures below.  Happy shopping!!

Thanks for stopping by!!!   Until next time...


Pin It

Wednesday, February 3, 2016

Love Is

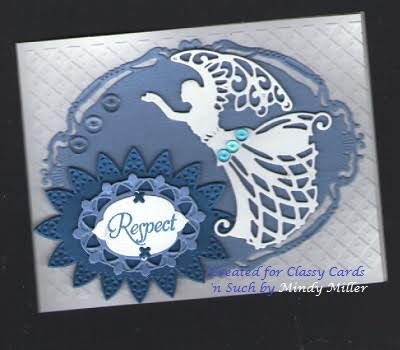
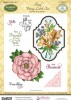
Hi friends, Mindy here with a sample card of our challenge here at Classy Cards 'n Such.  The challenge is Love Makes the World Go Round,  using pink and/or red, with white and hearts. My card uses all of the above and I hope you like it.


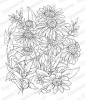
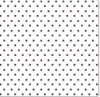
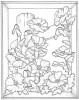
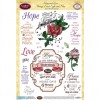
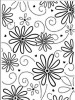
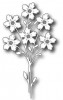
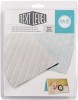
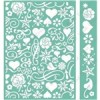
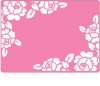
I started with a white card base and embossed it with the Dots Embossing Folder by Crafts Too!  I embossed another white stock sheet with the Roses Embossing Folder by Brenda Walton and Sizzix and fussy cut around the flowers before attaching to the card borders with foam tape. These roses were colored with the Clear Glitter Pen by Wink of Stella to give them a bit of sparkle. I then stamped and colored the large flower from Floral Vintage Labels Two by JustRite Stampers, fussy cut around and adhered to card front with foam tape.

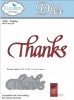
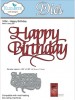
The sentiment was die cut along with a piece of thin craft foam to give it stability and strength before adhering it to the card front, along with heart stamping here and there.  I hope you will take the time while creating your Valentine cards to enter our weekly challenge.  There is a nice prize for the winner, and great prices on many of our supplies.

Won't you join our challenge this week?  It's super easy!

Thanks for stopping by!!!   Until next time...


Pin It