Showing posts with label Tombow. Show all posts

Thursday, September 17, 2015

Monogrammed Box

Hello, Diana here to share with you, a gift box I made for a sweet lady at church.

I gathered up some cards I had made, and wanted to give them as as gift, so I made this box to put the cards in. However, I think the design would work just as well for a set of personalized note cards. Monogramming is always so lovely and elegant.


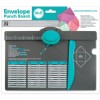
To make my box card, I used a 9" x 9" sheet of paper, and used the We are Memory Keepers Envelope Punch Board at 3.5" and 4.5". There are lots of videos out there so I won't go into details, but this (click here for video), is where I learned how to do my box.

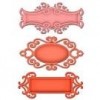
To decorate the front of my box, I really layered up the dies: Spellbinders A2 Filigree Delight, Standard Ovals, and then a tag from Fancy Tags Two. All popped up with Large Foam Pads. The center letter 'E' was cut out using my dusty electronic cutting machine, and then I added a Memory Box die, Pennington Rose to the side.


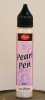
Finally, lots and lots of pearls were made using the Ice White Viva Decor Pearl Pen. There is just a hint of an oval embossing line from the A2 Filigree Delight die, which really helped the placements of the liquid pearls. 

Instead of using the ribbon as suggested in the video, I added a Fastener Adhesive Tab by Tombow. It opens and closes so easily! The tabs are not in the store, but you can send an email to Beverly at beverly@classycardsnsuch.com, and ask her if she would be able to order the tabs. The same goes for other items you may be looking for. 

Thanks for looking!


Click any of the links below to be taken to the products from the Classy Cards 'n Such shop. Don't forget to check out the NEW section. It is loaded with new goodies! 

Thanks for stopping by!!! Until next time...


Pin It
Wednesday, October 22, 2014

Kitties Fall Picnic

Hello! It's Gracie posting today, and I'm excited to share a Fall card I made for this week's challenge at Classy Cards 'n Such Fall Picnic. Of course, I used many crafty goodies from Classy Cards 'n Such store to create my card, some lovely supplies I must add!


To make this card, first I die cut my card base with Our Daily Bread Designs Vintage Flourish Pattern, and then I die cut a window on it's front, with the coordinating frame from the same set. I cut an inner layer that matched the size of the card base from White Pearl Linen.

I printed a piece of plaid patterned digital paper on White Pearl Linen also, and adhered it covering one third of the inner layer, to work as a picnic blanket. I aligned the inner layer with the card base, marked the window outline on it and die cut it with the coordinating frame die. The frame that resulted was attached to the inside of the card, after I aged it with Distress Ink in Old Paper, with a Mini Ink Blending Tool. The other remaining part of the inner layer was attached to the card front, from the inside.

Once the card base was entirely ready, I started working on all the elements I needed to complete my card. I stamped Wild Rose Studio's Kitty Picnic on White Pearl Linen and colored it with Spectrum Noir markers. I fuzzy cut it and adhered the images to the card front with Tombow Mono Multi Glue. 

I then die cut lots of leaves from Precious Metals Craft Foil by Spellbinders, with Impression Obsession's Small Leaf Set. I applied some Graphite Inka Gold to the craft foil leaves, to make them look a bit organic. I added the leaves on the bottom of the card front around the images, arranging them to look like a bed of leaves. I adhered them with UHU all purpose adhesive (silicone gel glue).


I also used other die cuts as tree branches that I cut from olive green paper with PoppyStamps Pine Garland. I cut around four or five of them and adhered them with Tombow Mono Multi Glue to the card front from the inside, so they'd appear to be coming out of the window.


Finally I heat embossed a sentiment, from Sweet 'n Sassy's Autumn Mum Greetings stamp set, with Gold detail embossing powder on a little banner that was die cut with the smallest die from A2 Matting Basics A. I distressed the die cut's edges, and applied Distress ink in Old Paper to it, and next I cut it's right end with a scissor to create the classic banner shape. I mounted it with foam tape on the left side of the card, and cut the remainder piece to fit the card's width perfectly.

I hope you enjoyed seeing my card! I invite you to join our challenge this week for a chance to win a prize from the store and the Classiest Card Award too.

To check out the supplies I used for today's project click on the supply links below or visit Classy Cards 'n Such store to see all what's been added recently! If you do purchase, don't forget to use my code Gracie-10 during checkout to get 10% off your order!

Thanks so very much for visiting today. 


You're invited to Classy Cards 'n Such to see all the amazing products available.

We appreciate your sharing our cards and ideas on Facebook, Pinterest, Goggle+, Instagram...anywhere your crafty friends can be found. The icons below my signature make it easy to share.

Thanks for stopping by!!! Until next time...


Pin It