Good morning friends, Joy here showing you a card I made using supplies from the Classy Cards 'n Such online store. I've got butterflies on the brain!! Classy Cards 'n Such selection of butterflies is amazing! I had a hard time deciding what to buy! Here is what I made!
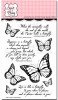
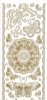
The butterfly is an outline sticker from Gold Pearlized Lacy Butterfly Sticker Sheet that
I put on some blue glitter paper and cut out using the outline as a
guide. You really need to check out some of those outline stickers -
they are BEAUTIFUL!
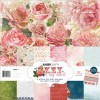
The paper for this card is from a 12x12 pad by
Kaisercraft called Key to My Heart. I just adore the script in this pad.
The sentiment is from Majestic Monarchs by Sweet 'n Sassy Stamps. I added a few little sequins and card was finished. Quick, quick, quick card. Note: There is an sequin die from My Favorite Things in the store. You can make your own metal foil, metallic or other materials to die cut and color them to match your project. Check out the supply list below for the die.
Thanks for looking at my card. Have a happy stamping day!
Don't forget to check back tomorrow for our next challenge! We have an inspirational photo for you, for our CCNS #83 Mother's Day challenge!
Thank you for stopping by!!! Until next time...
Pin It
Showing posts with label Stickers. Show all posts
Saturday, May 2, 2015
Tuesday, March 24, 2015
You Are Beautiful
Joy here, today for the Classy Cards 'n Such Challenge we are to use pearls - which I love, love, love. So, here's my card!
Pin It
The coral stripe is from Lady Rose, by Kaisercraft, on which I stamped words from the Just The Right Words stamp set, by JustRite.
The brown banners were heat embossed with Sparkle 'n Sprinkle's Gold Detail Embossing Powder, using the "You are" and "inside and out" sentiments, from Impression Obsession's You are Beautiful stamp set. Snowflake Pearls, from Queen and Co., were added to the end of each banner.
The brown/beige dot paper is from Graphic 45 Botanical Tea. I added a tiny sliver of gold to the edge of the coral stripe to coordinate with the gold embossed words. (it looks brown on my computer, but it is gold). You could use Assorted Lines stickers. Use the link below to look at this type of sticker. There are beautiful different patterns on the gold and silver sticker sheets.
Now - it's your turn to have a go at this challenge. Classy Cards 'n Such and see has all the details listed there under the Current Challenge label.
After you make your card, you can link it on the CCNS blog or here on mine. You could be the winner of a nice prize. To make it more fun why don't you challenge one of your stamping friends? I'm challenging my sister to make a project.
Thanks for visiting. We can't wait to see your cards!
After you make your card, you can link it on the CCNS blog or here on mine. You could be the winner of a nice prize. To make it more fun why don't you challenge one of your stamping friends? I'm challenging my sister to make a project.
Thanks for visiting. We can't wait to see your cards!
Please check out all of the NEW items in the Classy Cards shop! There are some great finds so get yours now!!
Thanks for stopping by!!! Until next time...
Wednesday, October 15, 2014
Glittering Christmas
Hi, Diana here, and today I'm showing you a different way I used the Memory Box Cabrini ornament.
A couple of weeks ago I did a bit of paper piecing. This week I broke out the glitter for a totally different look and feel.
I went with the classic Christmas glitter colors for my card: Aztec Gold, Elegant Emerald, Fire Engine Red, and Silver Glitter.
Scor-tape is essential to this project - both the 6x6 Double Sided Adhesive Sheets for the ornament and, 1/4" Scor-Tape for
the border. I fussy cut my ornament out after glittering it up.
The
background panel was made by embossing a sheet of white cardstock in my
Swiss Dots embossing folder and adding a trim of the 1/4" Scor-Tape right up against the edge. I burnished my Fire Engine Red glitter
to make the border. The glitter has such a neat feel, it's like
velvet once you've rubbed it on. *Note - substitute embossing folder with the Dots embossing folder by Crafts Too*.
Lastly, I found some stickers for my JOY.
Thank you for visiting! See you soon!
Classy Cards 'n Such online store has added new products. New Wild Rose Studio stamps, Distressed Spray Stain, Memory Box dies have been added and more! Click here to find all the new items that have been added!
Join the Classy Cards blog email list in the upper left column of this blog and receive exclusive weekly deals not available elsewhere! A one-time 20% discount on an order of your choice! Subsequent orders receive a 10% discount. Don't miss out, join today!
Thanks for stopping by!!! Until next time...
Thursday, June 19, 2014
Daisy Note
Hi, it's Misti with a card for the sticker challenge. I made this waaaay harder than it needed to be. I used Beautiful Dreamer Epoxy Words by Glitz as my words. I loved the fact that I could reposition them a little. Love that!
My image is the Daisy with Ladybug from Impression Obsession. I used Tim Holtz Distress markers to color it: Peeled Paint, Barn Door and Mustard Seed.
I used red ink with the Texture Mini Dots stencil by Memory Box on a white piece of cardstock. I'm so glad the ink doesn't have to be even!
I used the Stripe Background embossing folder by Darice, with my red cardstock.
I backed every panel with black cardstock and layered them on my white base layer. I used Small Joy Foam Pads to pop up my daisy panel.
I hope you'll dig through your sticker stash and join us this week!
Your card is so cute and cheerful! Thanks Misti!
Click any of the product photos below for more info or to purchase any of the products used.
If you like Misti's card, please share it on Facebook, Pinterest, Google+, Instagram...anywhere your crafty friends can be found!
The icons below my signature make it easy to share.
Thanks for stopping by!!! Until next time...
Pin It
My image is the Daisy with Ladybug from Impression Obsession. I used Tim Holtz Distress markers to color it: Peeled Paint, Barn Door and Mustard Seed.
I used red ink with the Texture Mini Dots stencil by Memory Box on a white piece of cardstock. I'm so glad the ink doesn't have to be even!
I used the Stripe Background embossing folder by Darice, with my red cardstock.
I backed every panel with black cardstock and layered them on my white base layer. I used Small Joy Foam Pads to pop up my daisy panel.
I hope you'll dig through your sticker stash and join us this week!
Your card is so cute and cheerful! Thanks Misti!
Click any of the product photos below for more info or to purchase any of the products used.
If you like Misti's card, please share it on Facebook, Pinterest, Google+, Instagram...anywhere your crafty friends can be found!
The icons below my signature make it easy to share.
Thanks for stopping by!!! Until next time...
Subscribe to:
Comments (Atom)


.jpg)