Showing posts with label Cardstock. Show all posts

Tuesday, January 5, 2016

Winter Wishes

Hello, Diane with you today!  Our challenge this week is winter blues, make it blue and white and to use the inspiration board.  Well, you can also see I was inspired a bit by the kraft color in the bottom photo.


I started my card by embossing with the Darice embossing folder Doily Lace.  Using a Kraft paper, I die cut Marianne Anja's Large Oval.  The green flourish you see is also from the same set.


The image and the snow verse you see are both from the
gorgeous Graphic 45 Time To Flourish paper pack.  This paper pack is so beautiful that I had to purchase two pads, as I knew one I would hoard!


I added a bit of sparkle by using Wink of Stella Glitter Pen on the image.  I finished up with a few Le Creme pearls.

Thank you for visiting with me today!


Thanks for stopping by!!!  Until next time...


Pin It

Tuesday, June 9, 2015

Happiness Always

Good Morning! Joy here, and this week's challenge at Classy Cards 'n Such for a June Bride/Wedding Card. I made this for my sweet friends, Bob and Sharon - their wedding was 50 years ago this week!

I started out with one of the frames from the Birds and Blooms 12 x 12 paper pad for the first layer. The second layer is a piece of cream sparkle cardstock that was embossed with the Crowned Medallion embossing folder by Anna Griffin.  The 3rd layer is another one of the pretty pieces of paper from Birds and Blooms.

The final layer was cut using Floral Ovals Nestabilities by Spellbinders, and stamped with a sentiment from Botanical Medallions and Banners by JustRite.  All of these supplies are on the Classy Cards 'n Such on line store.

We would love for you to join in this challenge.  Just make a project using the guidelines on the Classy Cards 'n Such blog and link it. You could be the winner of a nice prize. 


Did you know that blog readers can have 10% off any order from the Classy Cards shop anytime?  Enter coupon code BLOG10 at checkout. Only one coupon code per order.

Thank you for stopping by!!! Until next time...


Pin It

Friday, April 17, 2015

Masculine Birthday

It is Shirley here! I have a masculine birthday card to share with you today. I find that  masculine cards are little more difficult to come up with sometimes and my stash is running very low on masculine cards, I thought that a masculine card would be the perfect choice for today.


I start my card by cutting a black card base The second layer is Graphic 45 French Country 6" X 6" paper Pad.  I then added another black layer and then another piece of Graphic 45 paper for the top layer.

I used my Memory Box Party Music die and the Impression Obsession Greeting Set, the 'Happy Birthday' die, with black card stock. I also used silver glitter paper with the Party Music die.

As my final step to my card, I cut out  the silver notes that I wanted to layer over the black ones and added a few more around the frame. I used Art Institute Dries Clear Adhesive to attach the music and sentiment to my card. 

Thank you for looking at my card today!


We appreciate your sharing our cards and ideas on Facebook, Pinterest, Goggle+, Instagram...anywhere your crafty friends can be found. The icons below my signature make it easy to share.

Thanks for stopping by!!! Until next time...


Pin It

Thursday, April 16, 2015

Joyful Bouquet

A Joyful Bouquet just for you! This is Mindy, with a water colored card that's made just for you.


I love making these wonderful cards suitable for many techniques, including watercolor. I die cut the outline image from the Joyful Bouquet die, from Memory Box, out of watercolor paper, pale yellow card stock, and popped out all of the insides of the die-cut. Then using several of the Tim Holtz Distress Markers from Ranger, including Spiced Marmalade, Fired Brick, and Seedless Preserves, colored each of the flower petals cut from watercolor paper, and blended them out with my Tim Holtz Water Brush.  I then attached a strip of Scor-Tape sheet to the back of the flower frame, and placed the colored sections back inside the frame, like a puzzle.

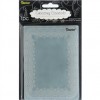
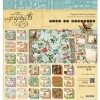
I then fussy cut around the flowers, removed the paper backing and adhered them to a layer of patterned paper from the Romance paper bloc by Joy! Crafts. I framed this background paper with a layer of black card, before attaching it to a gold embossed Kraft card base. I also die-cut one Tremaine Square by Memory Box from watercolor paper, and colored it with my Distress Markers before adding some bling for sparkle.

My vase is one of the Wooden Flourish Vases by Kaisercraft. I used a bit of lavender wax paste and sparkle paint to color the vase before finishing it in a clear gloss coating. I adhered it to my flower stems and then attached the flower's leaves using Art Institute Dries Clear Adhesive.

A banner with my thoughtful phrase was then added to complete the card.  Enjoy!


Click any of the links below to be taken to the products from the Classy Cards shop used on this adorable card for more information or to purchase the items!

Thanks for stopping by!!! Until next time...


Pin It

Monday, April 6, 2015

Thinking Of You

It is Shirley posting today. I am going to share with you the card I made for the Simply Yellow challenge this week.  I like yellow, it is a cheerful and soothing color. I thought it would be the perfect color for a "Thinking of You" card that I needed to make.


I chose a black card base to start my card with.  I cut a piece of white card stock for the next layer and used a dotted embossing folder to give it texture.

I used my Sue Wilson Auvergne die to cut the yellow piece of card stock and the two layers of white card stock. I adhered  these pieces together using Art Institute Dries Clear Adhesive. It dries fast and it dries clear.

I used the Spellbinders A2 Devine Eloquence die to cut the center piece of white card stock that I had stamped the sentiment on. The sentiment is from the Our Daily Bread Designs Ornate Frame Sentiments stamp set. I decided to give it a little added pizzazz by using the Spellbinders Fancy Label Tags One with white card stock to cut the smallest tag in this set. I cut the tag in half and adhered a piece on each side of the Devine Eloquence die cut.

Now for the finishing touch, I added White Pearls and flowers. I used punches to make the yellow and black flowers.

Thank you for joining us today.


Did you know that blog readers can have 10% off any order from the Classy Cards shop anytime?  Enter coupon code BLOG10 at checkout.   Only one coupon code per order please.

Thanks for stopping by!!! Until next time...


Pin It

Wednesday, March 18, 2015

St. Patrick's Day

Hi, it's Jenny posting today with a card for this week's Going Green challenge. The challenge is a simple one - use only shades of green and neutrals on your card. I know I'm a little late for St. Patrick's Day, but I hope you enjoyed the day.


I cut the Couture Creations Tied Together die with Kraft card stock, and adhered it to a green polka dot paper from the Vintage Bliss paper pad. I popped the designer paper up with Joy Crafts Foam Pads for dimension.


I cut the large flowers from Heartfelt Creations Botanical Wings die, using a piece of green dotted paper from my stash. Yellow distress ink was added to the edges using a Mini Ink Blending Tool. The petals were shaped with tools and molding mat from my Paper Shapers Tool Kit.  After assembly I glued green rimmed rhinestones from my stash to the centers.

The Cheery Lynn Designs Cutie Fringe IV flowers are wonderful as accent flowers, and roll so easily with the Rolling Tool from the Paper Blossoms Tool Kits. Before rolling, I colored the fringe flowers using a green spray mist from my stash for sparkle.


The sentiment is from an old stamp from my stash.  I centered the Spellbinders Labels Eighteen die around the words before cutting. Using the die as a stencil ,I then sponged peeled paint distress ink over the sentiment with my blending tool.

Last, I arranged the flowers and adhered them with Joy Crafts Foam Pads to the card front. I added some green leaves and mini flourishes from dies in my stash to complete the arrangement.

I hope you like the result and can join us this week for a chance to win a great prize!


Want to plan ahead and join our weekly challenges? Just click on the Challenge Calendar label, located on the right side of the page. We would love to have you share your creative ideas! Invite your friends to play along! You could be our next Classy Cards 'n Such prize winner! 

Thanks for stopping by!!! Until next time...


Pin It