Showing posts with label Tim Holtz Distress Sprays. Show all posts

Thursday, November 12, 2015

Brrr.. it's cold outside

Hello friends! It's Diana today. Is it chilly where you are yet?


I made another card with the adorable PoppyStamps Stacked Mittens die. 

I started with a red and Kraft color scheme, and the MFT Blueprints 13 die set.

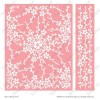
After I die cut the Stacked Mittens out of the watercolor sheet used for the fishtail banner, I carefully removed the mittens with all the little pieces.

I then sponged Broken China on the fishtail banner. I also splattered some more stain around the banner. Once that was dried, I glued the mittens back in with all the pieces. I then used a watercolor brush to color the little pieces.

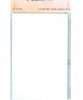
I added a bit of twine to a double row hole strip from MFT Blueprints 15, and added some strong 1/2" Scor-Tape to make sure it would stay. Because that made it a bit bulky, I popped up the top banner with some Large Foam Tabs.


If you are unable to find an item in the store, or would like something special ordered, please email me at beverly@classycardsnsuch.com.

Don't forget to check out the NEW section at Classy Cards 'n Such. Release from 2015 collections and other goodies are being added every day! When you check out, don't forget to enter your discount for a great savings!

Thanks for stopping by!!! Until next time...


Pin It

Wednesday, August 5, 2015

Joyful Birthday

Hello and welcome to the blog today!  Jenny, here with you, sharing a card I created. This for the current challenge #96 Adding Texture.


The base is a white A2 card that I embossed with Anna Griffin's Cheery Blossom embossing folder. I cut a rectangle in black using Impression Obsession's Rectangles 6-in-1 Frame, and glued it on top.The flowers were made by cutting the flowers from Heartfelt Creations, Botanical Wings dies, using white card stock.

Before coloring the petals I scrunched them up, accordion folding the edges. Then I spritzed the petals with Picked Raspberry Distress Spray, and then again with Pearl Glimmer Mist. I scrunched the petals even more and let them dry.

The banner is an Impression Obsession die from my stash that I popped up using Joy! Large Foam Pads. Once the flowers were dry, I glued Pearls in the centers and adhered them to the card front with Scor-Tape. I added some white leaves around from a die from my stash.

Thanks for visiting, and I hope you can join in the fun challenge this week, for a chance to win a great prize!


Click any of the links below to be taken to the products from the Classy Cards 'n Such shop.

Thanks for stopping by!!! Until next time...


Pin It

Saturday, July 4, 2015

Rose Red

Hi, it's Jenny here today with a new card I made using the Heartfelt Creations Botanical Wings die.


I started by stamping the Heartfelt Creations Botanical Rose Stamps, and then cut them with the matching Botanical Wings die. I sprayed the flowers with water and scrunched them up. I also used a stylus from the Paper Blossoms Tool Kit to help shape, while gluing the flower layers together.

I used Spray Stain and Glimmer Mists to color the roses and while they were drying I assembled the rest.

The A2 card has a layer of Kraft card stock, and then a layer of Graphic 45 Botanical Tea.

I cut and colored the frilly Joy! Crafts Circle, using distress ink and a Mini Ink Blending Tool. Next, I stamped the JustRite Floral Vintage Labels 2 sentiment, on a Spellbinders circle from my stash. The circle was popped up higher using Joy Foam Pads to adhere it to the card.

I added the black centers, (from a die in my stash), and pearls to the flowers, and arranged them around the circle. After gluing them down I added foliage from the Memory Box Fresh Foliage die.

Thanks for looking!


Don't forget to check back tomorrow for our next challenge! We have an inspirational photo for you, for our CCNS #92 Splatters challenge!

Thank you for stopping by!!! Until next time...


Pin It

Saturday, June 20, 2015

Happy Retirement

Hi, Diane with you today! Don't you just love it when you can take a bit of ink, a few dies, some card stock, and have a quick card in no time? I know I do and this card was fast and perfect for the occasion.


I first started by inking up a blue card stock panel with Distress Broken China ink and the Mini Ink Blending Tool,
to represent a swirling ocean. The waves are Joy! Crafts  Waves die. I popped up my waves with Joy! Small Foam Pads. I slightly bent the waves for a bit more of a 3D effect!


The Impression Obsession Sailboats was cut from white card stock, then I colored the bottom with a red marker. This set of dies has 3 different sailboats, I used the largest one.


I wanted a pattern for the Impression Obsession Sea Birds, so I used a gray ink on white card stock, using Impression Obsession Cracked Paint Cover a Card stamp, (as shown above), then die cut them out.

I finished by adding a sentiment and a  bit of twine!

Thank you for visiting with me today!


GREAT DEALS!!!
All orders which total $30.00 or more after all discounts and prior to shipping charges will receive a FREE GIFT valued at approximately $10.00!!! 
 
All orders which total $60.00 or more after all discounts and prior to shipping charges will receive a FREE GIFT valued at approximately $20.00!!! 
 
Enter FREE GIFT in comment section of order.
No coupon code needed!!

All Cheery Lynn Die Cuts 50% off

Enter coupon code CLD at check out

Only one coupon code per order


All TOOLS are 14% off

Enter coupon code TOOLS14

Only one coupon code per order

Sale ends Wednesday, June 24
 

Thanks for stopping by!!! Until next time...


Pin It

Monday, June 15, 2015

Deer at Sunset

Hi, it is Diana here this afternoon! When I saw this week's inspiration photo for this week's CCNS Father's Day challenge, knew I wanted to use the Memory Box Leaping Deer against a sunset background.


To make a wooded sunset background, I used the Memory Box Garden Birch Trees stencil, and Dreamweaver Regular Embossing Paste, mixed with Wild Honey Distress Stain. I started from the top of my taped stencil and dragged the paste down using a Palette Knife. Since I only mixed a little bit, (didn't want to waste any since I don't want to put the mixed stain back into the container), I only had enough to go down 3/4 of the way. I then started from the bottom with some unmixed white paste. As I blended it with the stained paste, I got a lovely gradation of yellow. I removed the stencil and after it dried, I used Spellbinders A2 Matting Basics A to trim it down. I then placed the stencil back on and sponged Spiced Marmalade at the top to deepen the sunset effect.

To finish my scene, I added more die-cuts, using the Impression Obsession's Grass Border die and Rabbit Set. I added some shading to the deer with markers and popped him and the front bunny up with Joy Small Foam Pads.


Want to plan ahead and join our weekly challenges? Just click on the Challenge Calendar label, located on the right side of the page. We would love to have you share your creative ideas! Invite your friends to play along! You could be our next Classy Cards 'n Such prize winner!

Thank you for stopping by!!! Until next time...


Pin It