Showing posts with label Cheery Lynn Designs. Show all posts

Thursday, November 12, 2015

Holly Greetings

While busy in my studio creating Christmas cards, I decided to try out a few new dies I ordered from the Classy Cards 'n Such Online Store. Mindy here with you, to share one of the new holly dies I recently received.


The Holly Flourish, by Memory Box, was cut from dark green stock. The larger holly leaves cut an outline, and the inner portion of the leaf could be added back in like a puzzle piece. After adhering the die to the card front with Art Institute Dries Clear Adhesive  with the Metal Tip, I lifted the holly leaf outline to give the card some dimension.

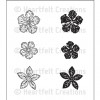
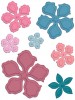
I also used a Cheery Lynn Designs tiny flower die to cut tiny white flowers, that I adhered to the flower shapes on the holly die to add yet more dimension.

I added a sentiment from Elizabeth Crafts Designs from my stash, and then decorated the background with some shadow stamping and tiny dots in red.

To complete my card, I adhered some of the Allure Swirls in White Pearls to the stamping, to give the card even more dimension.

I thank you for visiting and viewing my card, and hope you will share a card or two with our challenge this week.


There is still time to join our Classy Cards 'n Such challenge. Click on the Current Challenge tab on the right side of the blog for all the details. Come and join the fun! 

Thanks for stopping by!!! Until next time...


Pin It

Saturday, August 15, 2015

Baby Mobile

Hello friends!  It's Jenny here today sharing a new baby card I made. It was pretty quick to create and could be duplicated easily for shower invitations or thank you cards.


I began by using a Pearlescent Embossing Paste similar to the Dreamweaver one sold in the store. I used the Memory Box Stars, Starry Night stencil, and a Palette Knife to apply the paste. I used a bit of painters tape to adhere the stencil to the card front before applying the paste. If you are going to try using this embossing paste, make sure to keep a bin of water close to drop your tools in right after, or keep a baby wipe on hand. The embossing paste dries very fast, and you'll want to make sure to clean it off your stencil before it dries.

After the paste was dry I added the blue circle die cut that's from a die in my stash and then glued the Memory Box Precious Mobile to the top.The blue circle was adhered to the card front using Joy Large Foam Pads.

To finish up I added the Baby die from Cheery Lynn. It's no longer in stock at Classy Cards, but check out the other Cheery Lynn dies because they are all 50% off with coupon code CLD50.

Thanks for visting today and make sure to check out our latest challenge!


Don't forget to check back tomorrow for our next challenge! We have an inspirational photo for you, for our CCNS #98 Color Inspiration challenge!

Thanks for stopping by!!! Until next time...


Pin It

Thursday, July 9, 2015

Birthday Butterfly

A fresh and fun card to celebrate a birthday. Mindy with you today, with a casual and simple card, that only looks difficult and fancy.


The die cut used is the Fancy Floral Butterfly Corner by Cottage Cutz and the Faiery Queen Butterfly by Cheery Lynn Designs. The Faiery Queen is no longer available in the Classy Cards Store, but there are so many beautiful butterflies from other companies that can be substituted. I cut the corner three times, twice for the card length and one to cut apart to give dimension to the various elements.

I covered the card base with a sheet of the Watercolored Memories 6" x 6" paper pad from Ken Oliver Crafts, before adhering the butterfly corners and single butterfly die. A banner with the sentiment from Sweet 'n Sassy Stamps, Keep in Touch, Too set, was adhered below the large butterfly.

Thanks, for joining me today, and be sure to visit again, for more great card ideas daily from our wonderful design team.


There is still time to join our Classy Cards 'n Such challenge. Click on the Current Challenge tab on the right side of the blog for all the details. Come and join the fun! 

Thanks for stopping by!!! Until next time... 


Pin It

Saturday, July 4, 2015

Hello Daisy

Hello, Diane with you today! I have a bright and cheerful card to show you.

I stamped a Heartfelt Creations Daisy Flourish, then colored it in with markers. Even if you are not the best at coloring, (like me), this stamp is super easy to color in!


Once the image was colored, I used a Wink of Stella glitter pen here and there for a bit of sparkle!

The frame was cut using Spellbinders Decorative Labels Eight. I like to stamp my image, then cut the label, so as to get perfect placement.

A butterfly from the Joy! Crafts Butterflies, was cut from Mandarin Curious Metallic,111# card stock. I added a bit of bling to that. I used the polka dot butterfly in the trio, which I thought was a perfect match for the background paper, from an Authentique paper pad.

The sentiment is from JustRite Hello Daisy stamp set.

To finish I added a ribbon and Green Pearls!

Thank you for visiting with me today!

All Cheery Lynn Die Cuts 50% off

Enter coupon code CLD at check out

Only one coupon code per order


Thanks for stopping by!!! Until next time...


Pin It

Wednesday, June 17, 2015

GREAT DEALS!!!

All orders which total $30.00 or more after all discounts and prior to shipping charges will receive a FREE GIFT valued at approximately $10.00!!! 

All orders which total $60.00 or more after all discounts and prior to shipping charges will receive a FREE GIFT valued at approximately $20.00!!! 

Enter FREE GIFT in comment section of order.
No coupon code needed!!
All Cheery Lynn Die Cuts 50% off
Enter coupon code CLD at check out

Only one coupon code per order


All TOOLS are 14% off
Enter coupon code TOOLS14
Only one coupon code per order
Sale ends Wednesday, June 24

Tool 'n One by Spellbinders
Susan's Garden Tool Kit

Click here to shop!

Thanks everyone!


Pin It

Tuesday, June 9, 2015

Wedding Time

Hi, Diane here with you today!

I think June is well known for being the month of weddings. Actually my wedding anniversary is June 20th.
Which fits right in with our challenge this week, Make a wedding card.


I love  how this card turned out, so let me tell you how easy it was to create, with all the gorgeous dies Beverly carries in her store.

I started with a white card stock panel, and embossed it with Crafts Too Mini Fans embossing folder.

I used the outline frame from Sue Wilson California Collection- Beverly Hills to cut out the center of the embossed panel.

I placed a panel of Graphic 45 paper pad behind the cutout area, just to give a bit of color, though you can't really see the pattern.

I then cut the same Sue Wilson California Collection-Beverly Hills die, using all 3 pieces in the set, and cut all at the same time, one inside the other.


I popped both the inner panels up using Joy Small Foam Pads, that I cut in half and carefully placed, so as not to be seen.

I made a Rose using Heartfelt Mini Vintage Floret stamp set and Heartfelt Vintage Floret die.


The leaves are from a Cheery Lynn Designs flower stacker set.

I added a heart that opens for a little message using.

Thanks for visiting with me today.
I encourage you to join in our challenge with us!!


Want to plan ahead and join our weekly challenges? Just click on the Challenge Calendar label, located on the right side of the page. We would love to have you share your creative ideas! Invite your friends to play along! You could be our next Classy Cards 'n Such prize winner!

Thank you for stopping by!!! Until next time...


Pin It