Showing posts with label Baby. Show all posts

Saturday, April 18, 2015

Baby Buggy

Hi, it's Jenny here with a baby card.  It seems like everyone around me is having baby girls lately.  


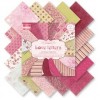
I kept this card simple because the background paper can really stand on it's own.  The background paper is from the Trimcraft Love Letters paper pad, and has a bit of shimmer that is difficult to see in the photo. I thought the alphabet design was perfect for a baby card.

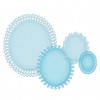
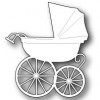
The Baby Carriage is a Memory Box die and I the gingham paper is from my stash.  The beautiful oval doily is Spellbinders Oval Bliss die.  The oval was adhered to the background using Joy! Foam Adhesive Pads.

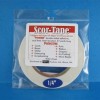
The little buttons are from my stash and were adhered with Scor-Tape. This stuff is incredible, it really holds on heavy embellishments amazingly well.

Thanks for visiting and don't forget to check out our weekly challenge for a chance to win a great prize!


Don't forget to check back tomorrow for our next challenge! We have an inspirational photo for you, for our CCNS #81 Cherry Blossoms / Dogwood challenge!

Thanks for stopping by!!! Unti next time...


Pin It
Saturday, December 27, 2014

Baby Shower

Hi, it's Jenny posting again! I made this for my friend to give at a shower. The invitation was blue and brown so I tried to use those colors.


I cut the umbrella from an old die, but you could achieve the same look with the new Spellbinders Umbrella Trio die that as been added to the New section at the Classy Cards 'n Such shop. I cut the umbrella from a piece of Authentique paper I had in my stash. I added Rhinestones to the centers of the stars on the umbrella. 

I cut a white oval using the new Spellbinders Oval Bliss die and then sponged Antique Linen distress ink onto it using the die as a stencil. The yellow dotted paper is from an older 12x12 older paper pad.  Once I liked the shading on the circle, I adhered the umbrella using Joy! Foam Pads.  I doubled up the pads on the center of the umbrella to add more dimension and give a rounded appearance to the die.  The sides are also popped with Joy! Foam Pads but I didn't add an extra layer so the sides would sit closer to the paper.

For the brown layer I cut a piece of Kraft card stock but then decided I wanted something a little darker, so I brushed Distress Ink around the edges to darken the Kraft paper before I glued the layers together. 

I added a boy with a small button and voila!  This was a quick card if you need something for a shower in a snap.  Thanks for looking and remember to use code JENNY-10 for 10% off your next order.


Don't forget to check back in tomorrow! We start a new challenge #65 - Time For A New Year! Invite your crafty family and friends to join you in the challenges!

Thanks for stopping by!!! Until next time...


Pin It

Thursday, May 23, 2013

A Baby Carriage and FREE SHIPPING!!!


It's time for a FREE SHIPPING weekend!!! 

FREE SHIPPING on all domestic orders.
  
Maximum $6.50 off international orders.

Enter coupon code FREESHIP-ALL at checkout.  

Expires Wednesday, May 29th.


Good morning, Steph here again and I've got babies on the brain today.  My niece is having a baby soon and I knew this little Baby Carriage die from Memory Box would be perfect for a baby card.  

I started by creating a 5 1/2" square card from Burgundy Linen Cardstock.  This is a wonderful quality cardstock that is perfect for a card base.   You know I love the papers in the Love Letters Paper Pad and I had just the right papers left.  This paper pad has allowed me to create a lot of different cards.   Using three different sheets of pattern paper, I created the layers for the card.  Then I used Augusta Green Linen to cut the baby carriage.  Love the details of this die.
  

Before assembling the card, I wrapped ribbon around it and tied some Doodle Twine around it.  I mounted the baby carriage on two layers of Spellbinders Nested Oval Medallion Dies.  A little brown ink between the layers allows the two dies to stand out.  Joy Foam Adhesives behind the dies created a three dimensional effect.

 
The sentiment is a rub-on from My Sentiments Exactly.  It's actually from the Graduation pack, but I thought it was quite appropriate for this card.  I placed the sentiment on the card with a double layer of Joy Foam Adhesives as I needed it to stand apart from the card.

Click on any of the gold links above for more info.

Thanks for stopping by!!!  Until next time...


Pin It