Showing posts with label Sparkle 'n Sprinkle. Show all posts

Tuesday, February 2, 2016

Valentine Love

Good morning!  Are you getting ready for Valentine's Day?  Thanks to the Classy Cards 'n Such on line store, I'm on the home stretch for making all of mine.


For this one, a stencil was cut and ink was sponged on using an ombre techniques with a Ranger Mini Ink Blending Tool.  The die cut flower is Cecilia Flower Outline by PoppyStamps.  The sentiments is from JustRite's Hugs & Kisses Sentiments and was heat embossed using Sparkle 'n Sprinkle's Black Detail Embossing Powder.  The head of the flower and the sentiment tag were popped up using some small Joy Foam Pads.

Why don't you join in this challenge?  It's time for a Valentine!! Use pink/and or red, white and a heart. Check out the guidelines at Classy Cards 'n Such, get some inspiration from the designers and at the Classy Cards 'n Such blog. Classy Cards 'n Such link has some super bargains on right now.

Thanks for looking at my card.  Have Happy Stamping Day!


Thanks for stopping by!!!  Until next time...


Pin It

Friday, January 29, 2016

You're the Best

Good morning!  Joy here today showing you a card that I made this week using supplies from the Classy Cards 'n Such on line store.  


First was to emboss a piece of cardstock using the folder called Quilt Blocks by Darice.  Then I sponged on a little color using a Ranger Mini Ink Blending Tool.  The stitched khaki color rectangle base was die cut using My Favorite Thing's Blueprints 13.  The sentiment  from Stampavie called Sweet Wishes was heat embossed using Sparkle 'n Sprinkle's Brown Fizz Embossing powder - it has a pretty sparkle and shine that I tried to capture with my camera.  The sentiment was popped up using Small Joy Foam Pads.   You might take the opportunity to check out the sale at the Classy Cards 'n Such on line store.

Thanks for looking at my card.  Have a Happy Stamping day!
There is still time to join our Classy Cards 'n Such challenge. Click on the Current Challenge tab on the right side of the blog for all the details. Come and join the fun!

Thanks for stopping by!!!   Until next time...


Pin It

Saturday, November 28, 2015

Nativity Scene

Hi, Diane with you today!

For my card today, I started with a pretty blue background
using Stardream Lapis Pearlized Metallic paper.  I used white card stock and cut a center out with Spellbinders Nested Medallion Label Dies.


I then used a Memory Box Stars, Stardust Stencil with Dreamweavers Metallic Gold Embossing Paste.

The scene was cut from Die Versions Nativity Border.
Cutting it once from white card stock and a second time
from a black craft foam.

To finish, I simply added Aztec Gold Glitter and a pretty sheer ribbon/bow.

Thank you for visiting with me today!


Come back tomorrow, and we will have a new CCNS challenge for you. It will be Challenge #113 - O' Christmas Tree. There are beautiful cards just waiting to inspire you by the CCNS Design Team.

Thanks for stopping by!!!   Until next time...


Pin It

Friday, November 27, 2015

Beauty of the Season

Good Morning! Joy here today. The Classy Cards 'n Such online store has the supplies I used to make this card.


The first thing was to pull out my favorite die set from My Favorite Things called Blueprints 4 along with the die set called Silverdale Snowflake Duet by Memory Box, the Spellbinders Labels Eighteen and die cut them all out using the paper from the 6x6 paper pad Candy Cane Lane Collection by Bo Bunny.

The sentiment is from Sweet 'n Sassy called Christmas Joy and was heat embossed with Sparkle 'n Sprinkle's White Detail Embossing Powder on a piece of Heavy Weight Vellum. The little heart was added and the snowflakes were covered with Wink of Stella - wish I could get the pretty sparkle to show up in photos. It only took a few minutes to arrange the elements.

Thanks for looking at my card. Have a Happy Stamping Day.


There is still time to join our Classy Cards 'n Such challenge. Click on the Current Challenge tab on the right side of the blog for all the details. Come and join the fun!

Thanks for stopping by!!!  Until next time...


Pin It

Friday, November 13, 2015

Gold Merry Christmas

Good afternoon! Joy here today, showing you a really quick elegant card. It is quick, I promise! The supplies for this card are from the Classy Cards 'n Such online store.


I used the Spellbinders large and medium dies from the set, Decorative Labels Eight. From the Spellbinders regular Labels Eight set, I used the small, medium and large dies, to cut out a layer of Gold Mirricard. This is a gorgeous, shiny gold. Each layer was popped up with Joy! Large Foam Pads.

The 'Merry Christmas' sentiment, is from JustRite's Noel Christmas Ornaments stamp set. I heat embossed it with Sparkle and Sprinkle's fine Gold Detail embossing powder.

The teal blue snowflake paper is from the Candy Cane Lane paper pad by Bo Bunny.


There is still time to join our Classy Cards 'n Such challenge. Click on the Current Challenge tab on the right side of the blog for all the details. Come and join the fun! 

Thanks for stopping by!!! Until next time...


Pin It

Wednesday, November 11, 2015

Snowy Mittens

Thank you for joining us at Classy Cards 'n Such for our idea samples for this week's challenge, #110 Mittens and/or Stockings. We were instructed to use the colors red, white, with a touch of green.

Mindy here, to share a snowy card that makes me chilly just looking at it!


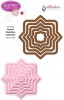
My card started with a bright white watercolor card base that I used an edge border, Agatha Edges, by Elizabeth Crafts Designs, to die cut the top edge of the base card.

Using the stitched rectangle and fishtail banner tag from the Blueprints 13 Die-namics, by My Favorite Things, I die cut a red rectangle and white/gold fishtail banner for the front of my card.

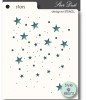
I just fell in love with the Stacked Mittens die from PoppyStamps, so I cut it from red card stock, and the Small Snowflake Set from Impression Obsession, was cut from white card stock. I layered my snowflakes, and added a touch of glitter for falling snow, before adding a sentiment to complete the card.

I hope you will join our challenge this week and create a few more Christmas cards for your stash. We love seeing what you create!


You're invited to Classy Cards 'n Such to see all the amazing products available.

Join the Classy Cards blog email list in the upper left column of this blog and receive exclusive weekly deals not available elsewhere! A one-time 20% discount on an order of your choice! Subsequent orders receive a 10% discount. Don't miss out, join today!

Thanks for stopping by!!! Until next time...


Pin It