Showing posts with label Distress Glitter. Show all posts

Saturday, February 27, 2016

Quieting Our Fears

Hi, it's Joy posting.  Today is a bittersweet day for me.  This will be my last post for Classy Cards 'n Such.  Beverly, the owner, is retiring and God has some new adventures in store for her.  I have so enjoyed serving as a Design Team member.  She has been so very gracious (especially when I was running late on my projects!) and generous with the Design Team.

Here is my card for today.


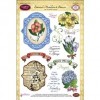
I used some of my favorite paper (which I have hoarded) from Heartfelt Creations but let go of for this special occasion. The Stamp is from Sweet 'n Sassy's God Is Stamp Collection -- also my favorite.  The centers of the blossoms have Art Institute Adhesive and Pumice Stone Distress Glitter.  The birdie has Wink of Stella on his wings.

Be sure to check out the Classy Cards 'n Such online store.  There are some FANTASTIC bargains on supplies, stamps, and dies from many great companies.

Thank for looking at my card.  Blessings to you Beverly and all you have done to make our hobby fun and enjoyable.  

Thanks to each of the design team members, past and present, for their kind words and faithful support of me and this blog!   A special thanks to Debbie Z. for her many, many hours spent in support of Classy Cards!!   Working with each of you has been my pleasure and privilege!

You, our customers, have made it possible for us to enjoy such a wonderful craft as cardmaking and we thank you!

And now...our final markdown of the Classy Cards inventory begins!   
Enter coupon code FINAL53 at checkout
for 53% off your entire order!
Only one coupon code per order
All sales are final

This sale will end at midnight Central time on Monday, February 29th.

Thanks!!!!


Pin It

Friday, February 12, 2016

God Is

Hello friends.  It's Joy here.  Today I needed a few cards to pass out at a Bible Study and pulled out some supplies from Classy Cards 'n Such.


The base is a panel from some paper by Heartfelt Creations.  I stamped the sentiment from Sweet 'n Sassy's God Is.  The little flower centers were covered with Art Institute Glue and then sprinkled with Pumice Stone Distress Glitter.

Thanks for looking at my card - have a happy stamping day!

Thanks for stopping by!!!  Until next time...


Pin It

Saturday, September 6, 2014

Pink and Black Glittery Flowers

Hi, it's Holly posting today!  Have you played with the yummy Distress Glitters yet?  They are gorgeous!

Don't let the "distress" in the name fool you.  These are not dull or drab glitters by any means.  They are beautiful and they look almost like glass glitters even though they are not made from glass.


I used the Spun Sugar Distress Glitter on the flowers here. Isn't that a gorgeous pale pink?  See how the glitters are more "glassy" instead of silvery/mica-y?  Love love love!

To make this card, I started with this elegant black and white toile paper from the Kaisercraft Porcelain Rose paper pad and adhered it to a black card base.

I added a strip of pink paper from the same Porcelain Rose paper pad near the bottom and I stamped the sentiment from the JustRite Botanical Medallions and Banners set onto the pink paper.

Next, I cut out the Zinnia Bouquet die from black cardstock and set it aside.

I used the Zinnia Bouquet Background die and some Scor-Tape 6x6 sheets to cut out some sticky flower backgrounds. I peeled the backing away from the tops of each flower head and stuck them behind each of their matching black outlines on the Zinnia Bouquet die cut. With the sticky top side exposed, I covered the flower heads with the Spun Sugar Distress Glitter, burnished the glitter with my fingers, and then tapped off the excess. I then adhered this Zinnia Bouquet to my card next to the sentiment.

I love this color combo of pale pink, black, and white, and that glitter just makes me squeal!  It's so pretty!  I hope you are inspired to pull out your glitters and have fun!


Want to plan ahead and join our weekly challenges? Just click on the Challenge Calendar tab, located on the right side of the page. We would love to have you share your creative ideas! You could be our next Classy Cards 'n Such prize winner!

Thanks for stopping by!!! Until next time...


Pin It

Wednesday, January 29, 2014

Washi Glitter Hello card

Hi, it's Holly posting today!  I pulled out some glitter and some washi tape and played around with those today.  I came up with this fun card to share with you.


I love these two washi tapes and I wanted to find a way to use them together on a card.  Since they both have green in them, I thought green glitter could be the unifying force.  So I gave it a shot, and this is what happened. 

I adhered a strip of the Aqua Antique Floral Washi Tape on a diagonal on white cardstock. Then I laid down a strip of the 1/4" Scor-Tape above and below the Washi tape.  A strip of the Antique Floral Washi Tape, (pink and white), was adhered above the Scor-Tape.  I then laid down another strip of the Scor-Tape above the pink and white Washi tape, and then repeated with the Aqua tape and another strip of Scor-Tape.

I carefully trimmed off the excess edges of the tapes and then set my piece down on some scratch paper.  I peeled the liners off all the Scor-Tape strips, and then I covered them with Peeled Paint Distress Glitter.  I used the Glitter Roll technique from Technique Junkies to make sure all the glitter was well-adhered, and then I shook off the excess.

I glued this piece down onto a green card base.  I used the same green cardstock to cut out the Hello - set of 2 die (Cheery Lynn Designs), and then I adhered the "Hello" to the bottom of the glittery background piece.

I thought about leaving this card alone at this point, but it just seemed to be screaming for a 3D flower.  I cut out the Olive Branches and glued them down on the left side. Next I cut out the Sweet William Strip, and used the tiny tweezers from the Paper Blossoms Tool Kit to curl up the flower petals. I used a rhinestone brad to adhere the flowers together and then I glued the flower down over the Olive Branches.

I love how the Washi tape looks with the glitter in between them. It's so much fun to use glitter and the Scor-Tape and so much easier than messing with liquid glue!


Your card is so bright and cheery! Thanks Holly! 

Click any of the gold links above for more info or to purchase any of the products Holly used.

Thanks for stopping by!!! Until next time...
 
Pin It

Friday, October 25, 2013

Distressed Glitter Ornaments; Blog Special!!!

Hi Classy friends!  It's Holly posting today and I've got a fun Christmas card to share with y'all.  Yes, I'm making Christmas cards.  Gotta beat the heat by thinking cool thoughts!! 


For my card today, I pulled out the new Distress Glitters that were recently stocked in the Classy Cards 'n Such store.  I really LOVE these new glitters!!!  They are so cool! They have a "distressed" aspect to them, in that they are a chunky glitter, and are more like colored glass with a little bit of sparkle to them. They are not super shiny as in blinding, but more of a glassy prism of color.  Very cool!

I started by taking one 6" x 6" Double sided adhesive sheet.  I pulled the backing off one side of the sheet and stuck it down on some white cardstock.  I left the wax paper on the top side of the adhesive while I die cut the round ornament from the 2013 Heirloom ornaments, by Spellbinders, three times.  With my three ornaments cut out, I carefully used scissors to cut the wax paper off at the top where the ornament cap meets the bulb.  While the adhesive ONLY at the top was exposed, I covered it with a silver glitter and pressed it into the adhesive with my fingers before tapping off the excess.

Then I peeled off the wax paper from the bottom round ornament area and covered each ornament with Distress Glitter.  I used Festive Berries, Shabby Shutters, and Tumbled Glass distress glitters.  Aren't those colors gorgeous?  

Now with my ornaments all glittered up, I worked on my background.  I totally stole this idea from my fellow DT gal, Joy Hadden, after I saw this gorgeous card of hers that she posted on 9-7-13. I loved how she created her background, and it stuck in my head when I was making this card.  I changed it up just a tad by stamping the Vines - Cover-A-Card by Impression Obsession, stamp three times with three different green inks.  I did not add the berries like Joy did, because they would have clashed with my ornaments.  

I pulled out the new Christmas Inner Thoughts stamp set by JustRite, and stamped the "Tis the Season" with green ink onto a small piece of white cardstock.  I adhered this sentiment to an olive layer and then glued it to the green vines background.

I glued the green vines background piece to a white cardstock layer, and then arranged my glittered ornaments on it.  Each ornament was affixed using some Joy! Foam Pads Large so they would look like they were dangling down on the card.  As a final touch, I threaded some silver cording through the tops of each ornament and taped the cording to the back of the white cardstock layer.  I then glued my piece down onto an olive card base.

I loved playing with these new glitters!!  These colors are perfect for the upcoming festive holiday season and I know I'll be using them again and again and again. 


Your holiday card is so pretty! Thanks Holly!!!
Click any of the gold links above for more info or to purchase any of the products Holly used. 

BLOG SPECIAL
20% off through Sunday, October 27!
No coupon code needed!


Thanks for stopping by!!!  Until next time...


Pin It