Thursday, December 31, 2015

Thank You

This year is drawing to an end and there are many people to thank for a year full of blessings.  Mindy with you today to share a card that is suitable to send for just about any occasion you want to thank someone for.


There are many beautiful colors of metallic papers available in the Classy Cards 'n Such Online Store that would make a perfect card base. I used a blank of the Starburst Lichen Aspire Petallic Metallic Paper and die cut one of the English Rose Bouquet by Memory Box to adhere to the center of the card.  Before adhering, I colored the leaves with a marker, and the blooms with my Clear Glitter Pen by Wink of Stella. For the corners, I followed one of my fellow design team members in using one of the decorative accents from the Brick House die cut from Impression Obsession. The sentiment was from my stash.

I thank you all for visiting our blog and web site this past year, and supporting us with all your wonderful comments and inspired creations.  I look forward to more creativity in our challenges, and want to wish you all a Happy and Safe New Year in 2016.

Happy New Year to all!


Pin It

Thanks a Latte

Hello!  It's Diana with you this morning.  Have you gotten those thank you cards written for all your Christmas presents?  I've got an easy design for you in case you're in need of some.  


You want to first sponge some white card stock with your favorite colors of distress inks or sprays.  Here I used Squeezed LemonadePeacock Feathers, and Broken China.  I then die cut this darling PoppyStamps Teacup Stack out of the sponged card stock.  My top layer was cut to size with Spellbinders A2 Matting Basics A and Impression Obsession Fancy Border Cutout.  

I  glued my teacup stack die cut on there and stamped a thank you note and embossed with black detail embossing powder.   I then popped up this layer on top of the sponged colors so that the colors could peek through.  


Just a few days left in our 25% off store wide sale!   Grab your bargains now!   Details here.

Thanks for stopping by!!!  Until next time...


Pin It
Wednesday, December 30, 2015

Let It Snow two ways

Hello! Diana here today.  Did you have a white Christmas? Ours was just a bit damp but no snow. Oh, well, I can still bring on the snowflakes in the craft room though! I made two cards with this Let it snow stamp from Quietfire Design. On the first one, I used clear embossing powder on plain white card stock and sponged in different blues: Broken China, Chipped Sapphire, and Salty Ocean distress inks. I then used Spellbinders A2 Matting Basics A to trim it out as well as make a matting for my white card base. I added some snowflakes using Impression Obsession Small Snowflake Set and popped up my sentiment with some large foam tabs.


For my second take, I clear embossed on watercolor paper and instead of distress inks, I used Ultramarine Blue color burst. The card is brighter but the "let it snow" did not pop up as much so I colored it in with a white gel pen. Which do you like better?

                                               
Thanks for stopping by!!!   Until next time...


Pin It

Each is Different

Welcome to the weekly challenge this week at Classy Cards 'n Such. Mindy here with my collection of Snowflakes, that shows that snowflakes are like fingerprints.  Each one is different.


I started my card with a layer of one of the beautiful metallic papers sold in the Classy Cards Store, then a holographic print, and die cut a background of snowflakes. I removed a portion of the background die and stamped the Bible verse on a square of card stock and centered it in the opening. I then cut layers of various size single snowflakes and adhered them together on top of the background for dimension.  Baby pearls were then added to the snowflake centers and to the sentiment square.

I used the following products from the Classy Cards Online Store:
Snowflake Background Die Cut- by Impression Obsession, one similar from my stash
Small Snowflake Set - by Impression Obsession
Cast All Your Cares Stamp Set- by Just Rite Stamps
Baby Pearls - white -by Want 2 Scrap and
Dries Clear Adhesive - by Art Institute

I hope you have enjoyed my card, and will consider adding a card of your own creation to our challenge this week.

Want to purchase some or all of the products used in today's card?   Classy Cards carries those that are in gold and underlined.   Click those or the pictures below.  Happy shopping!!

Thanks for stopping by!!!  Until next time...


Pin It

Tuesday, December 29, 2015

Snow, Snow Snow

Good morning! Just wanted to share this card for the Snowflake Challenge at Classy Cards 'n Such.   Supplies for this card are from Classy Cards 'n Such online store. This card reminds me of Elvis Presley's Blue Christmas.


The blue water colored rectangle uses the Ken Oliver's Color Burst Indigo - I really like that you can get several shades of color from one bottle.  The die cut snowflake is from Memory Box called Silverdale Snowflake Duet.  The watercolor rectangle was popped up using Small Joy Foam Pads.

Now it's time to join all the others in this fun Snowflake challenge.  First go to the Classy Cards 'n Such blog, get some inspiration from the Design Team members and make your project using snowflakes - be sure to look at the details on the blog and then link your project at the Classy Cards 'n Such blog. - You could be the winner of a nice prize.

Thanks for looking at my card and have a Happy Stamping Day!

We've made it easy for you to find our future challenges! Click on the Challenge Calendar tab on the right side of the blog. All of the challenges are listed through February 2016!


Thanks for stopping by!!!   Until next time...


Pin It

Inside Looking Out

Hi, Diane with you today!  After all the holiday rush and activities it sure feels good to be back in the creative room again.

My card was made for our current challenge "Let It Snow"
and I hope you will join in with us.


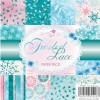
I did a somewhat simple window winter scene which I am calling Inside Looking Out.  I started with a pretty snowflake paper from Wild Rose Frosted Lace 6 x 6 paper pad.

I cut two windows using PoppyStamps Small Madison Window.  
I cut one from the Frosted Lace Paper and used the negative, then the second one from a scrap of white card stock and popped it up over the negative using Joy! Foam Pads Small.


However, before adhering it down, I cut a few snow banks, and a few birch trees using Impression Obsession Birch Trees and arranged both behind the window for my outside scene.

Snowflakes were cut from Impression Small Snowflake Set.  Each snowflake then was brushed with glue and coated with Sparkle 'n Sprinkle Crystal Ice Glitter.

I finished with a winter wonderland sentiment I had on hand, but you could use Walking in a Winter Wonderland stamp, which I wish I had to use, it's so pretty!

A few sequins were also added for a bit of balance.


Thank you for visiting with me today!

Be sure to take advantage of our current sale for 25% off site wide! Some exceptions apply.  Details are here.

Thanks for stopping by!!!  Until next time...


Pin It