This
week's card is a multi-layered card, featuring beautiful romantic
images, butterflies, roses, tags, and handwriting.
Mindy with you to
share this card using various layers of paper from the Romance Paper Bloc by
Joy! Crafts. I collected the sheets I loved, then cutting various sizes
and shapes adhered the block of papers in a pleasing manner to my card
front.
On a sheet of White Pearl stock, I then stamped the Dream in Beauty stamp from Heartfelt Creations, and used the Botanical Wings die set also
by Heartfelt Creations, to die cut the butterfly from the stamped image.
My Tim Holtz Distressed Markers were used to color the butterfly, and Joy! Large Foam Pads were placed under the butterfly wings to give the card dimension.
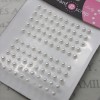
To complete the card I stamped some handwritten phrases on the front of the card, and placed a few Sleek Strips Pearls- Le Creme from Want2Scrap for a little shine.
Have a wonderful day, full of joy and romance.
Join
the Classy Cards newsletter list in the upper left column of this blog
and receive exclusive weekly deals not available elsewhere! A one-time 20% discount on an order of your choice! Subsequent orders receive a 10% discount. Don't miss out, join today!
Thank you for stopping by!!! Until next time...
Pin It
Thursday, April 30, 2015
Perfect Beach Day
Hello! Diana here, and as promised, here is the second of my cloud cards.
I did many of the same things as the challenge card - sponging and masking the clouds on the stitched background from MFT Blueprint 13 with Broken China, popping up the clouds from ODBD, with Joy! small foam pads, and tearing up the paper for the sand and the sea.
The beach elements are from ODBD Umbrella Dies, Impression Obsession Mini Nautical Set and Mini Beach Fun Set. For the water, I also brushed on shimmer with the Wink of Stella Glitter Pen. I also added some of the dies to the inside of the card to continue the fun. I hope you like it!
There are lots of really great new items that have been added to the Classy Cards shop! Please keep your eyes on the NEW!!! section of the shop!
Thank you for stopping by!!! Until next time...
Pin It
I did many of the same things as the challenge card - sponging and masking the clouds on the stitched background from MFT Blueprint 13 with Broken China, popping up the clouds from ODBD, with Joy! small foam pads, and tearing up the paper for the sand and the sea.
The beach elements are from ODBD Umbrella Dies, Impression Obsession Mini Nautical Set and Mini Beach Fun Set. For the water, I also brushed on shimmer with the Wink of Stella Glitter Pen. I also added some of the dies to the inside of the card to continue the fun. I hope you like it!
There are lots of really great new items that have been added to the Classy Cards shop! Please keep your eyes on the NEW!!! section of the shop!
Thank you for stopping by!!! Until next time...
Wednesday, April 29, 2015
Cloud Confetti
Hi it's Jenny posting with a card for our Cloudy Day challenge. I tried
to recreate the beautiful relaxing feel of the inspiration photo in a
shaker card.
I made an A2 sized card out of a piece of Kraft Card Stock. The Joy Crafts Waves were cut with a blue card stock. I used the die as a stencil and highlighted the accents with a Mini Ink Blending Tool and Peacock Feathers distress ink.
The shaker was created by layering two sizes of nesting circle dies. I glued a piece of clear packaging material I salvaged from toy packaging to the back of the circle. The shop has Clear Card Stock that would work perfectly for this. I stamped my sentiment stamp onto white card stock and sponged Tumbled Glass distress ink around the words. Then I used a really thick foam adhesive to adhere the circle to the sentiment layer after adding some bugle beads inside. I glued the back of the sentiment layer to the card front. I tucked another piece of waves into the front of the circle too, trimming until I liked the result.
The clouds are from a die in my stash but you could achieve a similar look with many of the cloud dies or even cloud stencils currently in stock. I added a couple of them using Joy Crafts Foam Adhesive Pads.
The seahorse was cut from Joy Crafts Crab and Seahorse die set and colored with distress ink. I sponged more Peacock Feathers distress ink over the die using it as a stencil and then added liquid pearls for interest.
Thanks for visiting!
Click any of the links below to be taken to the products from the Classy Cards shop used on this beautiful card for more information or to purchase the items!
Thank you for stopping by!!! Until next time...
Pin It
I made an A2 sized card out of a piece of Kraft Card Stock. The Joy Crafts Waves were cut with a blue card stock. I used the die as a stencil and highlighted the accents with a Mini Ink Blending Tool and Peacock Feathers distress ink.
The shaker was created by layering two sizes of nesting circle dies. I glued a piece of clear packaging material I salvaged from toy packaging to the back of the circle. The shop has Clear Card Stock that would work perfectly for this. I stamped my sentiment stamp onto white card stock and sponged Tumbled Glass distress ink around the words. Then I used a really thick foam adhesive to adhere the circle to the sentiment layer after adding some bugle beads inside. I glued the back of the sentiment layer to the card front. I tucked another piece of waves into the front of the circle too, trimming until I liked the result.
The clouds are from a die in my stash but you could achieve a similar look with many of the cloud dies or even cloud stencils currently in stock. I added a couple of them using Joy Crafts Foam Adhesive Pads.
The seahorse was cut from Joy Crafts Crab and Seahorse die set and colored with distress ink. I sponged more Peacock Feathers distress ink over the die using it as a stencil and then added liquid pearls for interest.
Thanks for visiting!
Click any of the links below to be taken to the products from the Classy Cards shop used on this beautiful card for more information or to purchase the items!
Thank you for stopping by!!! Until next time...
Treasure
Mindy here, with a special card containing clouds, a rainbow, butterfly and LOVE!
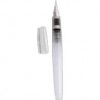
I started by using a sheet of watercolor paper to stamp my sentiment, Love Becomes a Memory from Verses in black permanent ink. I then used the Modern Cloud Cover stencil by Memory Box, with some Dreamweaver Regular Embossing Paste and an old credit card to add the paste clouds around my sentiment. When the paste was dry, I used my blue watercolor pencil, and my Tim Holtz Water Brush- Broad nib to paint a thin blue layer of sky around each cloud. Again when this was dry, I cut the watercolor paper to fit the front of my card base.I also added a small rainbow and butterfly before adding a frame, using the Rectangles 6-in-1 Frame Die by Impression Obsession.
I used the Joy! Foam Pads- Small to attach the frame to the card front, then used my Clear Glitter Pen, from Wink of Stella, to paint around the clouds and sky to give it a little twinkle. I also added a couple of tiny pearls just to give the card a little more texture.
I hope you have enjoyed my card, and will participate in our card challenge this week. Thanks for visiting today!
We appreciate your sharing our cards and ideas on Facebook, Pinterest, Goggle+, Instagram...anywhere your crafty friends can be found. The icons below my signature make it easy to share.
Thank you for stopping by!!! Until next time...
Tuesday, April 28, 2015
Your Smile
Good Morning! Joy here today with a Cloudy Day challenge from Classy Cards 'n Such.
If you have heard on the news, we in Texas have received a LOT of rain for several months in a row so this was a challenge that was easy! So, here is my card.
I used Blueprints 4 to cut out the white card stock and I used Blueprints 13 for the little stitching. Blueprints 13 die set has a stitch line that allows you to create stitching on any shape. I just love it.
The sentiment is from Black-Eyed Susan Vintage Labels Five by JustRite. See the little sunshine? It is actually a flower die. I popped up all the elements with Joy Large Foam Pads.
The last thing I did was to round the corners of the blue card stock with the corner round on my Envelope Punch Board.
Clouds, Clouds, Clouds - why don't you join in the Classy Cards 'n Such Cloudy Day challenge. We would love to see what you create. Be sure to check out all the specifics in the challenge rules.
There are new dies, stamps and stencils in the shop this week along with lots of other new additions! You can see everything here.
Thank you for stopping by!!! Until next time...
Pin It
If you have heard on the news, we in Texas have received a LOT of rain for several months in a row so this was a challenge that was easy! So, here is my card.
I used Blueprints 4 to cut out the white card stock and I used Blueprints 13 for the little stitching. Blueprints 13 die set has a stitch line that allows you to create stitching on any shape. I just love it.
The sentiment is from Black-Eyed Susan Vintage Labels Five by JustRite. See the little sunshine? It is actually a flower die. I popped up all the elements with Joy Large Foam Pads.
The last thing I did was to round the corners of the blue card stock with the corner round on my Envelope Punch Board.
Clouds, Clouds, Clouds - why don't you join in the Classy Cards 'n Such Cloudy Day challenge. We would love to see what you create. Be sure to check out all the specifics in the challenge rules.
There are new dies, stamps and stencils in the shop this week along with lots of other new additions! You can see everything here.
Thank you for stopping by!!! Until next time...
Subscribe to:
Comments (Atom)


.jpg)


