Saturday, March 31, 2012

Linda's Easter Card


Hello everyone!  Since Easter is just around the corner, I thought I'd put together a little card to celebrate the season.  For the card base I used the beautiful Pearlized Esse White Metallic cardstock.  I hope you can see the beautiful shine in the photo.  I embossed the top portion of the card with the Dots Embossing Folder from Crafts Too! and left the bottom portion smooth so that I could add my Easter sentiment from My Sentiments Exactly!  These sentiments are so easy to apply and you honestly can't see that it isn't a stamped image. 
 
The little rabbit hidden in the flowers is the Stampavie "Rabbit in Watering Can" stamp.  I colored him with colored pencils and die cut with the Spellbinders Lacey Ovals die.  I popped this up on the Cheery Lynn Swedish Spring Oval Frame which was cut from the Stardream Punch paper and adhered with Scor-Tape.  I added the Cheery Lynn Designs Small (formerly called Mini) Exotic Butterfly adorned with Want2Scrap Pearls to the corner of the card.  

For the final touch, I added some White Picot Lace Trim and attached some additional Want2Scrap pearls.  Just remember that you can find all the things used on this card in the Classy Cards 'n Such shop


Thanks, Linda, for another beautiful card!!!

Be sure to check out our latest weekly deals here!

Thanks for stopping by!!!  Until next time...


Pin It

Thursday, March 29, 2012

Linda's Challenge #4


Hi there!  It's Linda again with another card for our Classy Cards 'n Such Challenge - Embossing Folders.  This was such an easy card to put together and I just love the end result!  And, what's even more important, everything I used on this card can be found in Beverly's Classy Cards 'n Such shop!


The beautiful embossing folder I used is called Spring from Crafts Too!   The detail on this embossing folder is just incredible!  I added just a little bling to the butterfly in the form of  Baby Blue Rhinestones from Want2Scrap.   This was layered on a mat I created using the Stardream Fuse Vista paper.  These were adhered using Scor-Tape to the card base which was cut from Esse Smooth Pearlized White.  I cut an oval using the Spellbinders Lacey Ovals diecut and added  the sentiment from the Friends Rubz from My Sentiments Exactly!  I used the Bow-Easy to make a bow using the Chalk White Seam Binding.

This card is a very good example of how you can make a great card without needing to have alot of items in your craft room to work with. It's really just about using your imagination.  Won't you join us and play along with the challenge this week and show us those beautiful cards you've created?
Thanks, Linda!!!  

The weekend is almost here!  Won't that be a great time to enter your card in our challenge and be eligible to win a $10 Gift Certificate to the Classy Cards shop???

Thanks for stopping by!!!  Until next time...


Pin It

Wednesday, March 28, 2012

Josephine and Kiki


The supplies I used on this card that can be bought from Classy Cards 'n Such are: 

Other supplies:  Copic markers, Crafts too! embossing folder, Oval Spellbinders die, gems, flowers, ribbon, double stick tape, yellow and green paper, glue

The image was stamped on white cryogen paper and colored with Copic Markers.  I cut Josephine and her cat out using an oval Spellbinders die which I mounted on the green Lattice Rectangle from Spellbinders. 


I embossed the yellow sheet of paper with an embossing folder. Since my cardstock was bigger then my folder, I put the cardstock in the embossing folder sideways and embossed twice after flipping the paper. I covered the seam with ribbon. The layers on top of the blank card are the yellow embossed sheet, green lattice, then the mini flourish.  I glued the flourish down and added flowers along the flourish and finished by adding a little bling to the corners of the card.


Thanks, Debbie!!!


Click on the gold links above to find any of these items in the Classy Cards shop!


Thanks for stopping by!!!  Until next time...


Pin It

Monday, March 26, 2012

Chirpy, the Easter Chick


Chirp, chirp!  It's Holly posting today, and I've used this adorable Chirpy stamp from Classy Cards 'n Such to make a fun little bag for Easter.  The bag is something I found at the dollar store, just a plain white bag in a package of 10 for a dollar.  I used the Dabbed Shimmers technique from Technique Junkies all over to add some color and I tied some ribbon, Mauve - Carolina Asian Sheer to the handle.  Chirpy was colored with Copic markers and I colored the ribbon on the egg to match the ribbon I used on the bag. 


Did you know that Classy Cards 'n Such has GLITTER now??  I love glitter!  I bought all of them as soon as I saw them, and I used the Carnation glitter on the polka dots on this egg.  It matches the Mauve ribbon beautifully!  Then I fussy-cut the image and adhered it to the bag.  All I need is some Easter candy to put in the bag and I can give this to a special someone.  :-)
Thanks, Holly!!!


Click here and see all of our Easter stamps and stickers!!


Thanks for stopping by!!!   Until next time...


Pin It

Sunday, March 25, 2012

Katie


Hi again!  It's Holly posting today and this is the card I created for the embossing challenge on the Classy Cards 'n Such blog posted on March 23.  I have used quite a variety of products from the Classy Cards 'n Such store, and I am listing them here for you:

Katie stamp (Stampavie)
Wild Cherry cardstock layer from Layering Swatches #2
Festive Berries distress ink (from the Winter 2011 Seasonal distress ink package)
Classic Scalloped Oval Small die (for the sentiment)


I started by stamping Katie with black ink onto white cardstock.  I colored her skin, hair, boots, and the flower stems with Copic markers.  With a water brush, I picked up some Tumbled Glass distress ink and colored the little bird.  Barn Door distress ink was used to color the flowers, and Festive Berries was used to color the dress and the bow in Katie's hair.  I set this aside to dry while I stamped the sentiment and cut it out with the Classic Oval Small die.  I cut a Classic Scalloped Oval Small from black cardstock to layer behind the sentiment.

The Wild Cherry cardstock was embossed with the Daisies embossing folder, and I cut some black cardstock slightly larger than the Wild Cherry cardstock.  These were adhered together and then adhered to a white card base (5.5" x 4.25").  When the watercoloring was completely dry, I used a Petite Oval Large die to cut out the stamped image, and then I layered that with a scalloped oval cut from black cardstock.  Some white lace was adhered to the embossed Wild Cherry cardstock, then Katie and the sentiment were adhered over the lace.  

Don't be afraid to mix up your coloring mediums.  You can see I used both Copic markers and distress inks to color in this image.  It's fun to break out of your normal style and do something different.  :-)

Thanks, Holly!!!


This is another easy challenge!!  Show us your favorite card or other paper crafting project and be eligible to win a $10 Gift Certificate to the Classy Cards shop.   Details are here


Thanks for stopping by!!!  Until next time...


Pin It

Saturday, March 24, 2012

Mummu


Supplies from Classy Cards 'n Such 
Other Supplies: Circle die cut from Spellbinders, scissors, Copic markers, double stick tape, black ink

This week's blog challenge at Classy Cards'n Such is to use an embossing folder.  The embossing folder I chose is the Tulip Frame from Crafts Too!  I chose to try something different.  I embossed the white cardstock then I inked the raised edges and then colored in the flowers from inside the embossing. I cut out the frame part using detailed scissors.


I colored Mummu with Copic markers. I just love this little lady!  She just seems to be dancing, so happy 
and comfortable with herself!  That's the way I would like to be at that age.

I added flowers to the lower corner and the saying from JustRite stamps to the upper corner.


Thanks and please be sure you enter the challenge!

Debbie

Thanks, Debbie!  Mummu is so cute!


There are LOTS of new Want2Scrap bling in the shop today!  And I do mean LOTS!!  There are also a couple of new Cheery Lynn Designs. Tim Holtz Distress Ink Pad are on sale!!!  You can see all of the details when you click the Weekly Deals icon on the right sidebar.


Thanks for stopping by!!!  Until next time...


Pin It

Friday, March 23, 2012

CCNS Challenge #4 - Embossing folders


Welcome to our latest challenge - embossing folders!!!  Embossing folders can be used in many ways - a great background, embossing an element of your project, use them with or without additional coloring or embellishments and more!   Click here to see the embossing folders in the Classy Cards shop.


Here's how to play:

  1. Make a classy card, tag or other paper crafting project using an embossing folder.
  2. The card must contain at least one item currently sold in the Classy Cards 'n Such shop.  
  3. The Classy Cards 'n Such item(s) must clearly be listed in the blog or gallery post with the entry.
  4. Post your card or other paper crafting project to your blog or gallery such as SplitCoastStampers.  
  5. Blog/gallery posts with challenge entries must have a direct link back to the Classy Cards 'n Such challenge post.   All gallery posts should include keyword CCNS04 and include a direct link to the Classy Cards 'n Such challenge post if allowed by the gallery.
  6. Upload your project using the Inlinkz tool at the bottom of this post and link directly to your blog post or gallery post - not just to your blog or gallery in general.  
  7. Entries must be linked to this post by Thursday, April 5th at 7AM Central time.
  8. Enter as often as you like as long as the above rules are followed.
The winner will receive a $10 Gift Certificate to the   Classy Cards 'n Such online shop!   In addition, we will choose one or two entries to receive the Classiest Card Award!


Here are some ideas from the Classy Cards Design Team to get you started.


Debbie
Linda
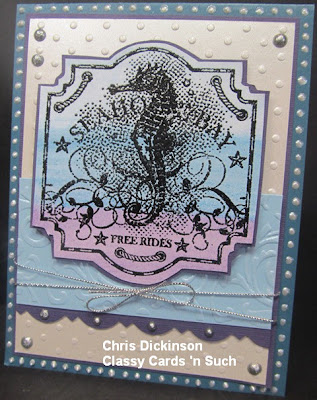
Chris
Holly
Over the next several days, I'll post each card individually so that you can see how each was made.   Show us your creations by using the Inlinz tool below!  Good luck!!


Thanks for stopping by!!!  Until next time...


Pin It

Thursday, March 22, 2012

WINNER - Challenge #3

Our challenge #3, a sketch created by Jennipher Lowery, has closed and the winner is Sue Spellman!!!   Congratulations, Sue!!   Please contact me at beverly@classycardsnsuch.com for instructions on collecting your $10 Gift Certificate at Classy Cards 'n Such!


Click here to see Sue's beautiful creation!  Sue's card is in the SplitCoastStampers gallery, so you may have to sign in to see it.


Be sure to check back tomorrow to see all of the details for our embossing folders challenge!   We hope you will play along!!


Thanks for stopping by!!!  Until next time...


Pin It

Tuesday, March 20, 2012

Fuzzy Blossoms


Howdy folks!  It's Holly posting today, and I'm sharing this Fuzzy Blossoms card that I created.  I had a blast playing with a bunch of the Cheery Lynn Designs dies and these fun spring-like colors.  The following products from Classy Cards 'n Such have been used on this card:
Olive Branches (Cheery Lynn Designs)
Fanciful Flourish (Cheery Lynn Designs)
Medium Rose (Cheery Lynn Designs)
Miniature Rose (Cheery Lynn Designs)
Country Girl Border (Cheery Lynn Designs)
I stamped the sentiment with a darker blue ink directly onto a pale blue card base (5.5" x 4.25").  I added two strips of designer paper to the bottom half of the card.  I die cut the Country Girl border, wove some yellow tafetta ribbon in through the holes, and then adhered this to the strip of orange designer paper.  I also die cut the Fanciful Flourish, Olive Branches, and roses and adhered them to the upper part of the card.  I've used the Distressed Fuzz technique from Technique Junkies for the fuzzy centers of the flowers.

I've fallen in love with this Country Girl border die cut!  One little tip regarding ribbon - you want to use a rather narrow ribbon with this die cut.  This ribbon is 3/8" wide, and it's a perfect fit with the holes.  You could also use a 1/4" wide ribbon, but I wouldn't go any wider than 1/2".  Of course, you don't "have" to use any ribbon in this die cut, but it's a fun little embellishment to make your cards special.  :-)

Thanks, Holly!!

There's just a little over a day and a half to enter our current sketch challenge.   Join us, won't you???  Details are here.

Thanks for stopping by!!!  Until next time...


Pin It

Cheery Lynn and Grandma's Doilies


I wanted to focus today on some of the very cool dies that are in the Classy Cards 'n Such shop.


Supplies from Classy Cards:
JustRite stamps Grandma's Doilies
Cheery Lynn Lace Corner Deco F 
Cheery Lynn French Pastry Doily
Cheery Lynn Border Carnivale
Prima Flowers Ceylon Garden
Cheery Lynn Cuttlehug
Other supplies:  
Cuttlebug embossing folder; 
Cuttlebug; 
double stick tape; 
clear drying glue; 
colored pencils; D
istress Ink Faded Jeans; Glue dots, gems


I started by stamping the JustRite stamp of Grandma's Doilies with Distress ink and coloring with colored pencils.  Then I layered this on the French Pastry Doily which was cut from the foil.  Then I glued the flower. After embossing the pink paper with the embossing folder, I wrapped the border around the layer of pink and blue

I then glued the corner dies in place with the clear drying glue and finally 
added the gems.

Debbie


Thanks, Debbie!

Be sure to join our Yahoo group here for 20% off an order of your choice and exclusive weekly deals!


Thanks for stopping by!!!  Until next time...


Pin It

Monday, March 19, 2012

Another Botanical Butterly


Hello Friends! This is Chrissy D here. Today I am sharing a card using the beautiful Botanical Butterflies from JustRite stamps set available at Classy Cards 'n Such. I stamped the image in black ink and colored it using Copic markers.  

The layout comes from one of Splitcoast Stampers Sketch Challenges. I started with 8 1/2" x 5 1/2" blue cardstock and scored it at 4 1/4" using the Scor-Buddy Mini Scoring Tablet. I layered the 5 1/4" x 4" artichoke cardstock on top of that and the 5 1/8" x 3 7/8" sand cardstock on that. I layered patterned paper on those. Classy Cards 'n Such has a wonderful selection of beautiful patterned papers that you can view HERE.

I used two techniques called Stacked Nesties and the Worn Wallpaper techniques from the Technique Junkie Newsletter. I used the Spellbinders ovals & circles to layer my dies, popping them up with the Joy! Foam Pads. I cut out some flourishes using the  Cheery Lynn Designs Fanciful Flourishes. In order to eliminate additional paper shims, I used the Large Cuttlehug to make a snugger fit. I also used the Crafter's Tools by Cheery Lynn Designs to help remove the Fanciful Flourish from the die and place it where I wanted it on the card.

To finish off the card, I tied a bow using the Eggshell Seam Binding.


I hope you enjoyed my project today! Have a wonderful day!

Thanks, Chris!


Do you have your Easter cards ready yet?  I know I don't!   Click here to see some of the Easter stamps, Rubz and stickers that Classy Cards 'n Such has to offer!  Of course, anything spring or floral always works too!  Be sure to check out Chirpy, our newest addition, and the wonderful Easter Blessings Oval Medallions with the matching Spellbinders Oval Medallions die cuts!!  Order now and we'll get them right out to you!  


Thanks for stopping by!!!  Until next time...


Pin It

Sunday, March 18, 2012

Chevron Stripes for a Birthday!!!


Hi!  It's Holly posting today, and I just had to play with my new Chevron Stripe background stamp that I just bought.  I think this is going to be a well-loved favorite!  The products from Classy Cards 'n Such that I used on this card are:
 
Dancing Doily Lace border (Cheery Lynn Designs die)
French Pastry Doily Die (Cheery Lynn Designs die)


I stamped the Chevron Stripes with vanilla ink directly onto my chocolate card base.  I didn't cover the entire card - just the bottom 2/3rds of the card.  The doily was cut from StarDream Fuse Azalea cardstock (a gorgeous shimmery pinky mauve color), and then I cut off the top third of that doily.  That was adhered to the upper part of my card.  The lace border is cut from kraft cardstock and adhered below the doily.  I cut a length of Chalk White seam binding, scrunched it up in my hands, misted it with a little water, and scrunched it up some more.  Then I tied the seam binding around the card between the doily and the lace border.  The sentiment was stamped with chocolate ink onto vanilla cardstock and cut out with a circle die.  I cut out a scallop circle from chocolate cardstock and adhered that behind the sentiment.  This is then adhered to the card directly over the seam binding.
 
You don't have to use the entire die cut when you cut something out.  I only used part of the French Pastry Doily die cut on this card, and I still have the other piece that I can use on another card later.  If you think a particular die will be too big, think about how you can use just half of it.  You can get even more mileage from your dies when you "think outside the box."


Great card, Holly!!!  Thanks so much!

Keep those challenge entries coming!!  Click here for all the details if you haven't seen them yet.  The deadline is 7AM Thursday morning, so there is still plenty of time!

Thanks for stopping by!!!  Until next time...


Pin It