Tuesday, September 9, 2014

Fall Leaf Spray

Hello Classy Friends! Diane here today! Here it is September already, can you believe it? Labor Day is over, the kids are back in school and we are all thinking about "Fall" including the Design Team at Classy Cards 'n Such.

The challenge this week is all about Stripes, Dots, and Chevrons. I have been thinking of getting my Fall decorations out, and normally one of the first places I start is with my back door...usually hanging a pretty "fall leaf spray" on it. Which is where my card idea came from and using the inspiration photo (located here).


I started with the cutest Impression Obsession Dot Straw,
which I stamped three times and then cut out.

Adding next to my fall spray is the Impression Obsession Pine Branch, and on top of that I cut 2 Impression Obsession Large Bird On A Branch dies. Shhh don't tell anyone, but I snipped those poor birdies right off!

To finish the fall spray, I cut various small leaves from the pretty Impression Obsession Small Leaf Set. I added a bit of Stickles to each leaf for some shimmer. Then added my Maya Ribbon bow and a sentiment.


Won't YOU join us this week for our Stripes, Dots and Chevrons challenge? We would love to see your project!


We appreciate your sharing our cards and ideas on Facebok, Pinterest, Google+, Instagram...anywhere your crafty friends can be found. The icons below my signature make it easy to share.
  
Thanks for stopping by!!! Until next time...


Pin It

Fall Roses

It's Graciellie today, to share with you the card I made for this week's challenge: Stripes, Dots, Chevrons. You can use all of the patterns or just one of them! I decided to go for the dots.

To make my card, first I printed a digital patterned paper that I designed on White Pearl Linen. Then I die cut the patterned paper with Spellbinders A2 Matting Basics A.


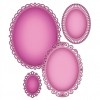
To embellish the front of my card I die cut three ovals from Spellbinders Elegant Ovals, one medium size and two small ones. I created a medallion label with the last two, mounting one over the other. I ran across a piece of gross grain ribbon in cream between the medium oval and the small medallion label.

I added a few pine leaves to one side of the Elegant Ovals that were die cut from PoppyStamps Pine Garland, that looks quite charming and goes along well with the Fall theme.


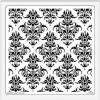
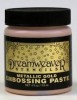
Before I adhered the ovals to the patterned layer, I mounted them on a strip of beige cardstock that I previously stenciled with Metallic Gold Embossing Paste, using a Large Damask brass stencil, both from Dreamweaver. To finish the design I added two Baby Pearls - LeCreme.

I enjoyed very much making my card. I loved using the rich, gold embossing paste, experimenting with my dies and seeing it all resulted together with the roses and the dots.

I hope you can join our challenge this week! To visit the store and check out the supplies I used, click here. Thanks for stopping by.


Classy Cards 'n Such online store has added new products. Click here to find all the new items that have been added! 

Click on the Weekly Deals label found in the right hand column of the blog. You'll love the special sales!

Thanks for stopping by!!! Until next time... 


Pin It

Monday, September 8, 2014

Poppy Passion

Hi, it's Jenny posting today!  For this challenge I was inspired by the colors and patterns in the inspiration photo.

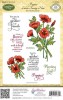
I love this JustRite Poppies Labels Twenty-nine stamp, and instead of the usual red I thought I'd try coloring it with more orange-toned Copics.


I stamped the image with black Memento ink, and cut around the flowers, that would fall outside of the Spellbinders Small Oval die perimeter.  I cut the image with the oval die, making sure to leave out all the flowers and leaves that fell beyond the perimeter out of the circle while I rolled it through my Big Shot.

Once it was cut, I colored the image and glued it down on top of a larger white Spellbinders Oval.  The ovals were popped up using Joy! Foam Pads.

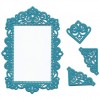
The corner dies were from the Joy! Frame and Three Corners die set.

The Just Because sentiment (I love that cursive font) is from the JustRite Floral Vintage Labels Two stamp set.

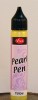
To finish I added a little glitz by dotting a Gold Viva Decor Pen in the centers of the poppies.  The shine is so pretty and the gold pen created little raised dots, perfect for a little something extra on a card. 

Thanks for visiting and I can't wait to see your challenge cards.  Come join us this week!


Click on the Weekly Deals label found in the right hand column of the blog. You'll love the special sales!

Classy Cards 'n Such online store has added new products. Click here to find all the new items that have been added!

Thanks for stopping by!!! Until next time...


Pin It

Daisy Grace

Our card challenge theme for this week is Stripes, Dots, and Chevrons at Classy Cards 'n Such.

Greetings friends! Mindy here to share with you my use of dots and stripes.


I started with a sheet of Nude Curious Metallic card stock cut to 4 X 5.25 inches. I then embossed the top third of the card stock with the Dots embossing folder by Crafts Too! and the bottom half with the Stripe embossing folder by Darice.  I then took the Crowned Medallion border strip embossing folder by Anna Griffin, and embossed it between the Dots and Stripes. I then mounted this background on an A2 size greeting card base.


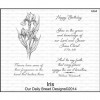
The next step was to stamp the single daisy stamp from the Daisies stamp set by Stacy Stamps. I also stamped the sentiment from the Iris stamp set by Our Daily Bread Designs. I colored the flowers with Copic markers then fussy cut them with my scissors.

I then die-cut around the sentiment with Labels Twenty Six Dies by Spellbinders and a border in a slightly larger die. Most Spellbinder's dies are "Special Order Items", and can be custom ordered from the Classy Cards 'n Such online store if they aren't in stock.

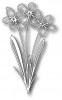
I also cut the leaf and stem set from Joyful Bouquet die from Memory Box, to add just before tying the bow from colored bias binding.

The sentiment was then attached with Joy! Foam Pads to the label die to give it depth and dimension.

I hope you are inspired by my fellow Design Team members to create a card this week for our challenge.


If you would like to view the challenge for the week and the rules, click on the Current Challenge label, located on the right side of the page.

Want to plan ahead and join our weekly challenges? Just click on the Challenge Calendar tab, located on the right side of the page. We would love to have you share your creative ideas! You could be our next Classy Cards 'n Such prize winner!

Thanks for stopping by!!! Until next time...


Pin It