Good morning! Steph here with a quick and easy Christmas card.
I
wanted to use this great Spellbinders Medallion Oval die so I chose to create a card around it. The nesting ability of these
dies make it easy to create fabulous projects. I stamped the sentiment using
JustRite's Nature's Nested Sentiments using Tim Holtz Crushed Olive Distress Ink. This ink is perfect when you want to
create a project quickly because the ink rarely smears. Before adhering the
sentiment to the next die layer of cardstock, I also inked the edges with Tim Holtz Crushed Olive Distress Ink.
I chose to use papers from Simple Stories Handmade Holidays paper pack. It has wonderful colors and patterns that can be mixed
and matched for fabulous results. I tied a ribbon around the center square, then
added the sentiment on top with Joy Foam Adhesives for dimension.
Some Christmas green Pearls were a perfect finishing touch to the edges of the sentiment.
Lace, trim, ribbon roses and more are on sale through Thursday, November 29th. Details about sales and how to win a $75 shopping spree are here!
Thanks for stopping by!!! Until next time...
Pin It
Thursday, November 22, 2012
Tuesday, November 20, 2012
Herringbone Christmas card
Hi, it's Holly posting today, and I am sharing this fun Herringbone Christmas
card with you. I've never made a Herringbone card before, and I love the way
this turned out.
Pin It
I started by cutting strips of paper from the Handmade Holiday 6x6 paper pad and then I followed the Herringbone Technique tutorial
from Technique Junkies. I layered this onto some vanilla cardstock and then
onto a burgundy cardstock layer. I wrapped some Chalk White seam binding around this herringbone layer and then I adhered this to
my kraft card base.
Next, I stamped the sentiment from the Christmas Sentiments stamp set (Impression Obsession) with some burgundy ink onto
kraft paper. I cut that out with an oval die, and then I layered it with a
vanilla oval die cut from the Classic Scallop Oval Small die set (Spellbinders). I then layered the sentiment
onto a burgundy oval die cut from the Lacey Ovals die set (Spellbinders). This sentiment oval was adhered to the right side
of the herringbone layer.
The last thing I did was cut out a Holly Corner (Cheery Lynn Designs) from some olive cardstock. I cut off the
little flourish that was on the side of the leaf and then glued the holly corner
down next to the sentiment. I needed some berries, but none of my pearls nor
rhinestones were a deep burgundy color. So I used a 1/8" hole punch to punch 3
circles from burgundy cardstock and affixed those to my holly corner.
Everyone placing a minimum $25 order after all discounts and before shipping/handling will be placed in a drawing for a $75 shopping spree at Classy Cards! Domestic orders only. Your name will be entered once for every $25 you spend, increasing your chances of winning! International orders of $100 or more after all discounts and before shipping/handling will be entered as well - once for every $100 in purchases.
Thanks for stopping by!!! Until next time...
Monday, November 19, 2012
Fall Twig Wreath
Hi Everyone!
This Twig Wreath card was so fun to make! I started with a card base of Esse Smooth Pearlized Cocoa 8.5 x 5.5 and scored in the center. This cardstock is a great weight for the base of a card! Using the A2 Matting Basics A, I cut a mat of Augusta Green Linen which is a beautiful sage color!
I cut the Twig Wreath from kraft paper. This wreath is so versatile! I used it for a fall wreath, but it comes with holly leaves, berries and a pine needle - ready for a Christmas wreath! You could also decorate for Easter or Spring or any other occasion you like! I cut a variety of leaves from scraps using the Leaves die cuts from Impression Obsession. Love these leaves!! The acorn in the center is cut from the Small Leaves #2 set from Cheery Lynn. I cut it twice - once from dark brown for the cap and again from lighter brown for the bottom of the acorn.
I chose a sentiment from the Thank You Rubz set and applied it with a stylus from the Paper Blossoms Tool Kit. I added gold lines for a frame.
Black Friday lasts through Sunday! Be sure to take advantage of all of the Classy Cards bundles and weekly deals! Click here for the Black Friday info and here for weekly deals! Clicking any of the gold links above will take you to the Classy Cards shop for more info.
Thanks for stopping by!!! Until next time...
Pin It
Sunday, November 18, 2012
BLACK FRIDAY begins now!
BLACK FRIDAY begins now at Classy Cards 'n Such and ends next Sunday, November 24th!
Everyone placing a minimum $25 order after all discounts and before shipping/handling will be placed in a drawing for a $75 shopping spree at Classy Cards! Domestic orders only. Your name will be entered once for every $25 you spend, increasing your chances of winning! International orders of $100 or more after all discounts and before shipping/handling will be entered as well - once for every $100 in purchases.
PoppyStamps dies which include those gorgeous windows, doors, Blooming Poinsettia, the very popular cats and more are 10% off this week when you enter coupon code 2012BlackFriday (all caps, no spaces) at checkout.
Christmas Bundles now available:
Pin It
Everyone placing a minimum $25 order after all discounts and before shipping/handling will be placed in a drawing for a $75 shopping spree at Classy Cards! Domestic orders only. Your name will be entered once for every $25 you spend, increasing your chances of winning! International orders of $100 or more after all discounts and before shipping/handling will be entered as well - once for every $100 in purchases.
PoppyStamps dies which include those gorgeous windows, doors, Blooming Poinsettia, the very popular cats and more are 10% off this week when you enter coupon code 2012BlackFriday (all caps, no spaces) at checkout.
Christmas Bundles now available:
- New today...
* Classy Christmas Ornament Bundle includes one Memory Box Ornament, 3 sheets of gorgeous Christmas colors of cardstock and one red glitter.
* Classy Sleigh Bundle includes two Cheery Lynn die cuts, 2 sheets of beautiful Stardream Jupiter cardstock and one red embossing powder.
Be sure to check out all three of our Classy Stocking Stuffer Bundles! These are great small gifts for the crafters on your list! The Classy Snowflake Bundles #1 and #2 are full of wonderful Memory Box dies! The Classy Cardstock Sampler is perfect for your cardmaking and die cutting needs at this time of year! If crafters are not on your gift giving list this year, treat yourself!
You can see all of the bundles above and more by clicking here.
Click on any of the gold links to see all of the details and to purchase.
All of these bundles are priced below retail! Backorders on these bundles must be specifically requested as it takes 2-3 weeks for some of these items to arrive from the manufacturer, so order now!!
Only one coupon code per order please.
Thanks for stopping by!!! Until next time...
Saturday, November 17, 2012
Blue Christmas
I started my card out with a Pearlized White Esse Metallic base measuring 4.25 x 5.5. Next, using the Jewel Tones Assortment Craft Foil by Spellbinders and the Winter Wonders Spellbinders M-Bossabilities, I embossed the dark blue foil. Once embossed, I sanded it to reveal the silver that is underneath. I was a bit hesitant about sanding but, this stuff sands like a dream! Once I had it sanded the way I wanted it, I cut around the bow part of the embossing and cut it down to fit my card base.
The embossing was so beautiful I wasn't sure what to add next. I could have stopped there and had a fabulous and elegant card. However, I decided to add some snowflowers. Using the beautiful silver paper that comes in the Foil Paper Textured Patterns 1 and the Cheery Lynn Designs Snowflowers Set 1, I die cut three snowflowers and added blue rhinestones to the center for finishing touches.
I love everything I used on my card today but, I'm totally in love with the craft foil by Spellbinders. I hope you'll give it a try!
Jenn's card was inspired by Latisha Yoast's beautiful card on page 46 of the November 2012 issue of CardMaker magazine. Isn't it beautiful???
I need to make room for all of the new products that have recently arrived and new arrivals yet to come, so I've put all Webster's Pages paper along with all Tim Holtz Ink Pads and Re-inkers on clearance! Great prices and once they are gone, they are gone!
All of the Spellbinders Dies D-Lites are now in stock and all pre-orders have been shipped. These little dies are the cutest!! Get yours now!!!
![]() |
| Medallion One |
Click any of the gold links above for more info or to purchase.
Thanks for stopping by!!! Until next time...
Pin It
Friday, November 16, 2012
Ornamental Christmas card
Hi again! It's Holly posting today and I've got an ornamental Christmas
card to share with y'all. I pulled out a bunch of my supplies and had a great
time mixing and matching to put this card together!
The supplies from Classy Cards 'n Such that I've used on this card
are:
Noel Christmas Ornaments stamp set (JustRite)
Rejoice 6x6 paper pad (Bo Bunny)
Lacey Ovals dies (Spellbinders)
2012 Heirloom Ornament dies (Spellbinders)
Merry Christmas dies (Cheery Lynn Designs)
Holiday Magic embossing folder (Spellbinders)
Joy Foam pads (small)
I started with a green card base and I cut a small strip of the ornament
paper and adhered it to the right side of the card. The Merry Christmas was die
cut from vanilla cardstock and adhered to the bottom left of the card. I
stamped the ornament with green ink, cut it with the matching 2012 Heirloom
Ornament die, and colored it with Copic markers.
I cut a Lacey Oval from
vanilla cardstock and a smaller plain oval from red cardstock. I embossed the
red oval with the Holiday Magic embossing folder and then used a Cuttlebug
Highlights technique from Technique Junkies to make the embossing pop out. The
embossed red oval was adhered to the lacey oval, and then I used some Joy foam
pads to adhere the ornament to the embossed red oval. The last thing I did was
fashion a bow from the Chalk White seam binding and affixed it to the top of the
ornament.
What a cute and easy card!
Are you looking for Christmas stocking stuffers for your crafty friends? Look no further! There are three Classy Christmas Stocking Stuffers available now. All are under $11.50 and include several similar items. If you want smaller gifts, you have several small gifts and no one is the wiser and you still got a great deal!
- Classy Christmas Stocking Stuffer #1 has four different supply items that every crafter can use.
- Classy Christmas Stocking Stuffer #2 has a variety of four embellishments, including a roll of Trendy Tape which you get to choose!
- Classy Christmas Stocking Stuffer #3 has a dozen each of seven different colors of beautiful, tiny roses. What a deal!
Click any of the gold links to order or get more info.
Thanks for stopping by!!! Until next time...
Monday, November 12, 2012
Friends are a Gift
Good morning! Steph here. It's getting near Christmas and it's time to start
those Christmas cards. Friendship and Christmas go hand in hand and there is
nothing better than creating a handmade card for a friend. Sometimes the
simpler cards make a dramatic impact.
Using JustRite's Friendship Nested Sentiments stamp set, I stamped a sentiment in brown ink, then used Tim Holtz Bundled Sage Distress Ink around the edges. After matting it on brown cardstock, I created a patchwork background using papers from Simple Stories Handmade Holidays.
Each layer of paper was inked with Bundled Sage Ink and matted on brown cardstock before adhering to the card. The sentiment layer was added with Joy Foam Pads as I wanted it to stand out from the card. Some beautiful
Christmas green pearls were added to the bottom of the card.
Thanks, Steph! Christmas will be here before we know it!
Click any of the gold links above to purchase or see more about the products Steph used!
Thanks for stopping by!!! Until next time...
Pin It
Using JustRite's Friendship Nested Sentiments stamp set, I stamped a sentiment in brown ink, then used Tim Holtz Bundled Sage Distress Ink around the edges. After matting it on brown cardstock, I created a patchwork background using papers from Simple Stories Handmade Holidays.
Each layer of paper was inked with Bundled Sage Ink and matted on brown cardstock before adhering to the card. The sentiment layer was added with Joy Foam Pads as I wanted it to stand out from the card. Some beautiful
Christmas green pearls were added to the bottom of the card.
Click any of the gold links above to purchase or see more about the products Steph used!
Thanks for stopping by!!! Until next time...
Pin It
Sunday, November 11, 2012
Christmas Stained Glass Window
Hi, it's Holly posting today. I've created this glittery stained glass window
card to share with you. The products from Classy Cards 'n Such that I've used
on this card are:
Grand Gothic Luminary Window die (PoppyStamps)
Grand Gothic Window die (PoppyStamps)
Embellishment #2 die set (Cheery Lynn Designs)
Wreath Strip die (Cheery Lynn Designs)
I started by embossing the Brick pattern onto my white card base, and then
I swiped a pale gray ink over the "grout." I cut out the Gothic window and the
Luminary window from white cardstock and adhered the Luminary window inside the
Gothic window. I hand-cut a piece of clear acetate to fit the window and
carefully glued it to the back of the window die. I then used the Stained Glass
Stickles Technique from Technique Junkies to achieve the glittery red and clear
areas in my window.
Once the glittery window was dry, I adhered it to my card base. Then I die
cut the Wreath Strips from olive cardstock and affixed them to the bottom of the
window. The three little white flowers are from the Embellishment #2 die set,
and I added a little dab of Yellow Viva Decor Pearl to the center of each flower.
Once the yellow pearls were dry, I glued them onto the greenery at the bottom
of the window.
I love the pop of red and green color against this mostly white card. This
card is intended to be a Christmas card, but you could use it for anything.
Just change the colors to suit your theme, and you have a wide variety of cards
you can make from these awesome window dies!
Classy Cards has a wide variety of window styles available along with flower boxes, shutters and doors. You can see them all here. Thanks for such a beautiful card, Holly!
Thanks for stopping by!!! Until next time...
Pin It
Thanks for stopping by!!! Until next time...
Friday, November 9, 2012
Christmas Blessings
Hello all - Jenn here, and I have a clean and simple yet
elegant Christmas card to share with you.
I started with a 6 x 5.5 base of Stardream Jupiter. To that, I added one of my favorite papers from the Kaisercraft Turtle Dove Paper Pad. These paper pads measure 6.5 x 6.5 and come with single sided patterned papers as well as specialty papers and 4 pages of die-cuts. Everything you would need to make a card!
Since I already knew that I wanted to use the sentiment of "Christmas Blessings", I thought a cross might be appropriate somewhere on the card. So, I pulled out the Cross Set from Cheery Lynn Designs along with the Foil Paper-Textured Patterns 1. I cut out my cross in the gorgeous red foil but when I laid it on my base, I felt something was missing. Immediately I thought, "dimension". So, I cut the cross out again and using the small foam pads I adhered the two crosses together and it was perfect!
I wanted to adorn my corners and the Lace Deco Corner E set along with the Reich Shine Champagne paper is what I used for just that purpose.
For finishing touches I stamped my sentiment on a die-cut label that came out of the Turtle Dove Paper pad. I inked the edges a bit and adhered it with large foam pads.
Isn't this gorgeous??? And so easy! Thanks, Jenn!
Bling is 15% off through November 15th! NEW PoppyStamps die cuts, red and green Viva Decor Pearl Pens and more in the Classy Cards shop. Get all the info when you click here!
Click any of the gold links to learn more!
Thanks for stopping by!!! Until next time...
Pin It
Thursday, November 8, 2012
Thanksgiving Pumpkins
Hi y'all! It's Holly posting today. Can you believe Thanksgiving is almost
here?? Wasn't it just summertime last week?? Time just flew by, didn't it?
:-) I have a quick and classy Thanksgiving card to share with you today.
I started by stamping the Gingham Cover-a-Card stamp onto some mustard cardstock and I used the Curled Corner technique from Technique Junkies on the upper left corner. I adhered this mustard layer onto a dark brown card base. The same dark brown cardstock was used to die cut the Happy and Thanksgiving dies from Cheery Lynn Designs and then I adhered them onto the mustard layer. I used some orange and green cardstock to cut the pumpkins and leaves from the Pumpkins die set (also from Cheery Lynn Designs). To give the pumpkins some depth, I sponged a darker orange ink onto the edges and I used a marker to color the stems. I then affixed the pumpkins to the mustard layer with some Joy foam pads (small) and adhered the leaves and tendrils in a random fashion around the pumpkins. It's really fast and easy to adhere these die cuts with the Quickie Glue Pen - it's the perfect size for these fonts and the delicate tendrils.
Such a cute card, Holly! The Mega Mount works great for stamping large images. Click the Mega Mount link and scroll to the bottom of the page for a video demonstrating how to use it.
Thanks for stopping by!!! Until next time...
Pin It
Wednesday, November 7, 2012
Happy Couple
Good morning! Steph here with a sweet wedding card.
The stamp titled Happy Couple is from Stampavie. Don't you love how he is holding her ever so close on this special day! I used a combination of gray and pink - love those colors together. The gray complements their clothes and the pink complements her roses and the trims.
I stamped the image on Cryogen White cardstock. It has a nice shimmer and shine and is perfect when using Copic Markers. So, using Copic Markers, I colored her gown with light shades of gray and his outfit with darker shades of gray. The roses are red violet and so are the trims on the clothes.
Once the image was colored, I sponged some Spun Sugar Distress Ink and some Victorian Velvet around the image. A sheer ribbon was tied around the card and some Doodle Twine was tied to the knot.
Cute wedding card, Steph!
Have you signed up for the Classy Cards newsletter yet? What are you waiting for??? The best Classy deals are available only to newsletter subscribers! Sign up just below the pink envelope on the left of the blog and you're in!
Click any of the gold links above for more info.
Thanks for stopping by!!! Until next time...
Pin It
The stamp titled Happy Couple is from Stampavie. Don't you love how he is holding her ever so close on this special day! I used a combination of gray and pink - love those colors together. The gray complements their clothes and the pink complements her roses and the trims.
I stamped the image on Cryogen White cardstock. It has a nice shimmer and shine and is perfect when using Copic Markers. So, using Copic Markers, I colored her gown with light shades of gray and his outfit with darker shades of gray. The roses are red violet and so are the trims on the clothes.
Once the image was colored, I sponged some Spun Sugar Distress Ink and some Victorian Velvet around the image. A sheer ribbon was tied around the card and some Doodle Twine was tied to the knot.
Cute wedding card, Steph!
Have you signed up for the Classy Cards newsletter yet? What are you waiting for??? The best Classy deals are available only to newsletter subscribers! Sign up just below the pink envelope on the left of the blog and you're in!
Click any of the gold links above for more info.
Thanks for stopping by!!! Until next time...
Sunday, November 4, 2012
Snowflower Season card
Hi Classy friends! It's Holly posting today and I'm sharing this clean and
simple Snowflower Season card. Sometimes you just want to make some quick and
easy Christmas cards so you can get them addressed and in the mail before the
season is over, and this card fits the bill. Other than the drying time for the
liquid Gold Viva pearls, this card can be made in less than 10 minutes.
Christmas Sentiments stamp set (Impression Obsession)
Rejoice 6x6 paper pad (Bo Bunny)
Classic Scalloped Oval Large dies (Spellbinders)
Snowflowers Set 1 dies (Cheery Lynn Designs)
Snowflowers Set 2 dies (Cheery Lynn Designs)
I started with a card base made from kraft cardstock and then I added a layer of dark brown cardstock. I cut a sheet of patterned paper from the Rejoice 6x6 paper pad and layered it onto the dark brown cardstock. Next, a small strip of green cardstock was adhered near the bottom of the card. The sentiment was stamped onto kraft cardstock and then cut out with an oval die. I layered that onto a Classic Scalloped Oval Large die cut from dark brown cardstock, and then adhered this to the small green cardstock strip.
The fun part was cutting out the new Snowflowers from Cheery Lynn Designs
and playing around with the layout to see which snowflowers I wanted to use on
my card. I ended up using only five of the six Snowflower die cuts and I
affixed them to the card in a random fashion. The snowflowers needed a little
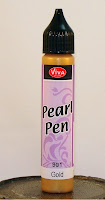
oomph so I squeezed some Gold pearls into the centers. This Gold Viva pearl pen
is a thick liquid that you can squeeze onto your projects. You can make round
pearls or you can make squiggles or lines, whatever you want. You can see how
the pearls are different sizes on my card - that's the versatility of these
pearl pens. Love that! :-)
![]() |
| Viva Decor Pearl Pen |
Love those Viva Decor Pearl Pens! I've just added Red and Green to the shop...perfect for Christmas! You can see all of the colors here.
Click any of the gold links above to go to the item in the shop.
Thanks for stopping by!!! Until next time...
Subscribe to:
Posts (Atom)