Sunday, May 13, 2012

Happy Mother's Day!!!

I want to show you the Mother's Day card that I made for my mom.  I couldn't post it earlier since my mother reads this blog and in addition to that, I didn't finish it until this morning!  J


And now for my card.  I started with a card base of Stardream Chiara Coral which is a delicate pink and scored it in the center.  The card is approximately 5" x 5 1/2" but I'm not one to measure if I don't have to.  Both mats are from my stash.


I cut the largest sized Floral Ovals from Cryogen White (love that sparkle!!) and sponged very lightly with Old Paper Distress Ink. The tulips are from the Iris & Tulip set just added to the shop this week.   A couple of tips:

  • The Floral Ovals are very frilly and detailed.   Place a piece of wax paper between your cardstock and the die cut to make removing the die cut MUCH, MUCH easier!  If you don't use wax paper (or similar), you run the risk of damaging your die cut.
  • Both the tulips and iris in this stamp set have a frame as part of the stamp.  I didn't want to use the frame for this card. I inked the stamp as usual with black ink and then I used a damp cloth and carefully removed the ink from the larger areas and used a cotton swab to remove it in the small areas.   Worked great!
I painted the tulips with two shades of pink Twinkling H2Os and the stems and leaves were painted with one shade of green.  I stamped, painted and cut out another image of the open tulip and adhered it with foam pads for some dimension.

I added Baby LeCreme pearls around the edge of the Floral Oval in four places for flower centers and on the lace corners.  I cut four corners from the Lace Corner Deco E set and adhered them with a Quickie Glue Pen.  I just love this corner with the little heart cutouts!  I also used the Quickie Glue Pen to add a touch of Lemonade glitter in the center of the open tulip.  I framed the card using the thinnest lines from the gold Lines sticker sheet.

I used the same papers and embellishments inside the card but on a smaller scale.  I added a sentiment from the Mother's Day Rubz.  


As always, click on the gold links above to be taken to the item in the shop.


If you have enjoyed the Mother's Day card, please feel free to share using the buttons below this post.

Happy Mother's Day to all!!!

Thanks for stopping by!!!  Until next time...


Pin It

Saturday, May 12, 2012

Graduation Congratulations!!!

Linda has created a quick and simple, yet elegant graduation card which is appropriate for a guy or a gal!


She started with Esse Smoothe Pearlized Cocoa for the card base.  The mat is Deep Blue from Layering Swatches #2.  The layering swatches are so handy since they are already cut to perfection to just the right size (3.75" x 5")!


Linda embellished the card with Graduation outline stickers and framed the card with the Lines outline stickers.  Congratulations is from the Gold Multi sayings outline sticker.  This is a very quick and easy card and looks great!


The Cat Grad stamp which Chris used three different ways in this post, the Graduation Rubz used in this post and the Graduation outline stickers which Linda used here are all on SALE!! Follow the gold links above and get yours now!!


Be sure to enter your creation, whether clean and simple or elegantly embellished, in our Graduation challenge here!  I can't wait to see what you have done!!


Paper Pads are 15% off at Classy Cards 'n Such when you enter promo code PaperPads (no spaces) at checkoutWe have paper pads from top companies including Webster’s Pages, Prima, Glitz Designs and Doodlebug!   This offer is effective through Friday, May 18th while supplies last!


NEW this week!!

  •    IMPRESSION OBSESSION - A new vendor of quality stamps for Classy Cards!!
    • Background stamps - Three fabulous LARGE (5.75" x 5.75") Cover-A-Card background stamps
    • Mega Mount - A rocker-style acrylic block with handle which can be used with any unmounted stamp - cling, acrylic or unmounted.   Scroll down on the Mega Mount page and watch the video to see how it works and what you can easily make with it!!  The Mega Mounts are on order and should ship to me next week!
    • Gorgeous FLORAL stamps!!


Thanks for stopping by!!!  Until next time...


Pin It

Friday, May 11, 2012

Holly's Bear all decked out in Purple!!!


Hi - it's Holly posting today!  I'm sharing a card with this adorable bear that I colored with Copic markers. 
Isn't that bear just darling??  I cut it out after I colored it, and then set it aside while I composed the rest of the card.  I sponged some blue ink at the top of some white cardstock, and then I sponged some green ink at the bottom.  


I used the Simple Whitewash technique from Technique Junkies on the fence and then I sanded it just a little bit to give it a more weathered look.  I cut out the grass twice, adhered one strip to the bottom of the white cardstock, adhered the fence, and then adhered a second strip of grass in front of the fence.  The Quickie Glue Pen is perfect for glueing down these strips of grass, the fence, and the flower stems.

I cut the daisies from some pale yellow cardstock and I cut their stems from some green cardstock.  I used white brads to adhere the daisies together, and then I adhered the flowers and their stems to the card.  I applied some Joy!  Foam Pads (small) to the back of the bear image and then adhered it to the card.  The bear pops up from the card, giving it a 3D appearance. 


The supplies that I've used from Classy Cards 'n Such are:
Bear with Parasol (Stampavie)
Darling Daisies die (Cheery Lynn Designs)
Grass Border die (Cheery Lynn Designs)
Victorian Picket Fence die (Cheery Lynn Designs)

I hope you've enjoyed this sweet little card.  Have a wonderful weekend!
Cute card, Holly!!

Leave a comment below if you like Holly's card.  She'll love it!  Follow the gold links to the items available in the Classy Cards shop!

Thanks for stopping by!!!  Until next time...


Pin It

Thursday, May 10, 2012

Mother's Day in Pink!!!

Hello everyone!  I needed a Mother's Day card for a friend's mother so I put together this very simple one. . . and because it's for Mother's Day, I used my favorite color pink!, The solid pink mat is cut from the Rose Quartz Paper and the design paper is a piece I had in my collection.  


I cut the Fancy Tags Two from the Rose Quartz Paper and  then added the matching Want2Scrap Nestabling.  These Nestabling elements add so much elegance to any card layout.  


I chose the sentiment from the My Sentiments Exactly Mother's Day rubz.  I added the small butterfly and highlighted it with some Want2Scrap pearls.  The Mini Flourish One was cut from some matching green paper and a small flower was added as an additional embellishment.  


This was very quick and easy to put together, but really makes a very classy looking card! 
Thanks, Linda, for another beautiful card!!  This is one that could be easily transformed into a very feminine birthday card, get well and many more!  Be sure to follow the gold links to find the items in the Classy Cards shop!


Be sure to enter our Graduation challenge to be eligible for a $10 Gift Certificate from the Classy Cards shop!   Click here for details!


Thanks for stopping by!!!  Until next time...


Pin It

Tuesday, May 8, 2012

Male Graduation Card

This year, our family graduate is a young man.  Male cards, for some reason, are almost always hard for me to do since some of my favorite embellishments - bling, flowers, ribbon and lace - may not be the most appropriate. 


I kept it clean and simple.   The patterned paper is from the Glitz Vintage Blue paper pad and is layered directly onto the card base with no other papers.  I applied a sentiment from the Graduation Rubz to a die cut with the new Labels Twenty-five.   I sponged gently around the edge with the die cut still in place using Tumbled Glass.


Rubz (rub-ons) are sooo easy to apply!   You can find detailed instructions here.  I added the gold diploma from the Graduation outline sticker sheet.


I framed the card with the smallest lines from the Lines (gold) sheet and used the thickest line atop the patterned paper.


Finally, I cut an outline mat from the same patterned paper, adhered it directly to the back of the white die cut from the Labels Twenty-five with the To the Graduate Rubz and adhered to the white card base with foam pads.  Quick and easy!!!  Give it a try, won't you???   The gold links above take you directly to the items in the Classy Cards shop!


Thanks for stopping by!!!  Until next time...


Pin It

Monday, May 7, 2012

Holly's Katie in Honey


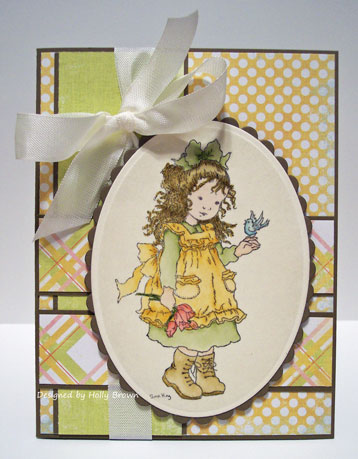
Hi again!  It's Holly posting today, and I'm sharing the first card I've colored with the brand new Tim Holtz Distress Ink Markers.
 
 
The entire image was colored with the new distress ink markers.  I loved playing with these markers - it was so fun and easy to color this image.  I stamped Katie with black Stazon ink onto watercolor paper and let that dry completely.  Then I added a little bit of color with a marker to the dress and used a water brush to drag the ink out to the rest of the dress.  These distress ink markers work beautifully with a water brush! 
 
I've used the following products on this card:
 
Katie (Stampavie)
 
I was thrilled at how my first try with the distress ink markers turned out!  The brush tip is so nice and fine.  I was able to color the tiny bird and those tiny roses with no problem.  The other side of the markers has a fine writing tip - perfect for writing a note or drawing fine lines on your artwork!  These markers are a wonderful investment!

Thanks, Holly, for a beautifully colored Katie!!!

Join our Distress Ink Marker Club for a more affordable way to purchase your marker set!   All of the details are here!!  Be sure to scroll down the page and watch Tim Holtz demo the markers!

Thanks for stopping by!!!  Until next time...


Pin It

Sunday, May 6, 2012

Cat Grads

Today, Chris is showcasing the Cat Grad stamp from Stampavie in three very different ways!   This post is longer than usual, but stick with us as I think the results are worth it!! The possibilities are really endless so let your imagination fly!!!  First up is the card shown on the announcement for the latest Classy Cards Challenge - Graduation!!

I stamped the Cat Grad with black and colored with Copic Markers on Cryogen White cardstock. I layered the Cat Grad on burgundy and mustard cardstock and then layered these with Joy! Foam Pads, small on the Layering Swatches #1 Metallic Papers which I embossed with the Dots Embossing Folder.

I cut a Fanciful Flourish and used a few tools to make this job a little easier.  I find the Crafter's Tools by Cheery Lynn Designs so helpful in moving and molding die cuts,  while the Cuttlehug helps eliminate the need for additional paper shims. The Sakura Quickie Glue Pen is a wonderful adhesive that works great on dies with a lot of details and small areas. 

I stamped Celebrate from the Topsy Turvy Cakes JustRite stamp set and added a small gold gem in the corner to add a little pizzazz. 


I stamped the Cat Grad three times on white cardstock in black ink and colored with Copic markers. I mounted the images on textured amethyst and black cardstock. I used patterned paper from my stash and adhered it to amethyst and black cardstock. 

This card will fit into a legal sized envelope. I wrapped black grosgrain ribbon around and then layered the Cat Grad stamp using the Joy! Foam Pads Small to give the card a bit of dimension.

I cut out the Canadian Kaleidoscope Doily in black, cut it into sections and adhered two of the corners using the Quickie Glue Pen. These doily dies are my FAVORITES and work best to add a shim. I used the Cuttlehug which helps eliminate the need for extra shims.

I used Spellbinders Labels Ten and stamped the frame and Celebrate from Topsy Turvy Cakes. I added black Viva Decor dots.

These Stampavie Stamps are so much fun to color! Classy Cards 'n Such even has the NEW Tim Holtz Distress Ink Markers! 


I painted the cute Cat Grad image using the Twinkling H20s Passion set with my aqua painter brush.  Once colored, I cut out the Spellbinders Lacey Circles and Circles. I slightly off set them when mounting them on red Layering Swatches #2 Deep Variety that I embossed. I mounted this on white cardstock embossed with the Dots Embossing Folder


To add a little flair to the card, I tied a grey satin ribbon around and added the little red flower made with the Miniature Rose Die from Cheery Lynn Designs and shaped the Paper Blossoms Tool Kit.  I used the Sakura Quickie Glue Pen to adhere all of the little blossoms together. Finally, I added three silver rhinestones on the internal portion of the flower and in the corner. 


Thanks, Chris, for some really cute examples of how one stamp can be used in so many different ways!!  Follow the gold links above to find the items in the Classy Cards shop.


Show us your graduation creations by entering our challenge here!  AND be eligible to win a $10 Gift Certificate to the Classy Cards shop!


Be sure to check out our deal on Tim Holtz Distress Ink Markers here.   Classy Cards has made these markers very affordable!


Thanks for stopping by!!!  Until next time...


Pin It

Saturday, May 5, 2012

Sweet Williams for Graduation!!!


Hi folks!  It's Holly posting today!  This is the card I created for the latest challenge - Graduation.  Isn't that sentiment perfect for a young girl graduating from high school or college?  I've used the following products from Classy Cards 'n Such on this card:
 
Celebrate stamp set (Stampavie)
Lace Light Deco Border (Cheery Lynn Designs)
Fanciful Flourish (Cheery Lynn Designs )
Stacker Flower #1 Leaf (Cheery Lynn Designs )
Sweet Williams (Cheery Lynn Designs )
 
I stamped the sentiment with dark pink ink and then adhered some patterned paper below it.  I cut out the Lace Light Deco Border and adhered that right above the patterned paper.  The flourish is cut from dark pink cardstock and I cut the leaves from green cardstock.  I cut the Sweet Williams flower twice from vanilla cardstock and sponged the dark pink ink on the edges.  I pinched each petal in the center, stacked each layer, and used a gold brad in the center of the flower to keep the layers together.


Thanks, Holly for a beautiful card!!


I have exciting news to share with you!!  If you have been wanting the new Tim Holtz Distress Ink Markers but needed a more affordable way to get them, click here for details of our brand new Distress Ink Marker Club!

We want to see your graduation card entered into our current challenge here.

Thanks for stopping by!!!  Until next time...

Pin It

Friday, May 4, 2012

CCNS Challenge #7 - Graduation!!!


It's that time of year when we honor those who have achieved one of life's most special milestones - graduation.  Whether it be high school, college, postgraduate or even kindergarten, graduation is a special time.


And so for this challenge, we want to see the classy cards you have made for the graduates in your lives!  Check out the graduation items in the Classy Cards shop, on sale this week, which the design team has used in our samples below  - Cat Grad, Celebrate,  Graduation Rubz and Graduation outline stickers!


Here's how to play:

  1. Make a classy card, tag or other paper crafting project with a graduation theme (see above).
  2. The card must contain at least one item currently sold in the Classy Cards 'n Such shop.  
  3. The Classy Cards 'n Such item(s) must clearly be listed in the blog or gallery post with the entry.
  4. Post your card or other paper crafting project to your blog or gallery such as SplitCoastStampers.  
  5. Blog/gallery posts with challenge entries must have a direct link back to the Classy Cards 'n Such challenge post.   All gallery posts should include keyword CCNS07 and include a direct link to the Classy Cards 'n Such challenge post if allowed by the gallery.
  6. Upload your project using the Inlinkz tool at the bottom of this post and link directly to your blog post or gallery post - not just to your blog or gallery in general.  
  7. Entries must be linked to this post by Thursday, May 17th at 7AM Central time.
  8. Enter as often as you like as long as the above rules are followed.
The winner will receive a $10 Gift Certificate to the   Classy Cards 'n Such online shop!   In addition, we may choose one or two entries to receive the Classiest Card Award!


And now for some inspiration from the design team:


Holly


Linda
Chris

Beverly
We would love to see your classy creations when you use the Inlinkz tool below to enter our challenge!!!  Good luck to everyone!!

Thanks for stopping by!!!  Until next time...


Pin It

Thursday, May 3, 2012

WINNER - Challenge #6

Congratulations to Vicki Romaine, entry #6!!!  You are the winner of a $10 Gift Certificate for the Classy Cards shop!!!   Please contact me no later than Monday, May 7th 6PM Central time for instructions about collecting your gift.


Thanks to all who played along without 3D challenge!!!  Please stop back by tomorrow when our next challenge will be posted.


Thanks for stopping by!!! Until next time...


Pin It

Tuesday, May 1, 2012

Holly's Zig Zag Accorrdian card with Darling Daisies!!!


Hi folks!  It's Holly posting today, and I'm sharing this fun 3D card with you.  The products from Classy Cards 'n Such that I've used here are:
 
Country Girl Border die (Cheery Lynn Designs)
Darling Daisies (Cheery Lynn Designs)
Small Angel Wing (Cheery Lynn Designs)
Exotic Butterfly Small (Cheery Lynn Designs)

I created the card base first, which is a Zig Zag Accordian card from one of the Technique Junkies' CDs (Fancy Folds and Motion Paper Crafts).  Then I added the layers of patterned paper and cut a bunch of daisies from the Darling Daisies die.  I stamped the sentiment and cut it out with the Classic Oval Large die and then matted it with a Classic Scallop Oval Large die cut.  There was a little space left over at the bottom of the sentiment, so I stamped the little flower (also from the Happy Birthday set) and colored it in with Copic markers. 
 
On the front panel, I added the Country Girl Border die cut from dark brown cardstock, and then adhered three stacked daisies onto that.  The middle panel has one of the stacked daisies popping on the side, and then I added two more daisies to the background.  I die cut the butterfly and then die cut the matching Angel Wing from dark brown cardstock to put behind the pale peach butterfly.  I used my fingers to fluff up the butterfly and the flower petals.  This card folds flat so it can be mailed in a regular envelope.  :-)


Thanks, Holly!    Love this cute card!!!  Those Darling Daisies are so fun!!  Grab yours now.  Click any of the gold links above to be taken directly to the item in the Classy Cards shop.

Thanks for stopping by!!!  Until next time...


Pin It