Hi everyone,
Thanks for playing along with our Red~Black~Rooster challenge! Unfortunately, the minimum of seven entries was not reached so no prize will be awarded this week.
We do get entries from time to time that cannot be considered for a prize, often because our guidelines were not followed. Please be sure to read and follow our guidelines on the announcement post to allow us to consider your beautiful art.
Our next challenge is fun and super easy! It's called The Color Purple. A gorgeous inspiration photo will be in the CCNS Challenge #91 announcement that will post later this morning. Details will be in the new announcement. We love to see your cards or projects so please join us!
Please encourage your friends to play along with us too, and be sure to follow ALL the requirements.
Thanks for stopping by!!! Until next time...
Pin It
Sunday, June 28, 2015
Saturday, June 27, 2015
The Master Calls
Hello friends, Joy, here today showing you a butterfly card I made with supplies from Classy Cards 'n Such.
Don't forget to check back tomorrow for our next challenge! We have an inspirational photo for you, for our CCNS #91 Purple Ride challenge!
Thank you for stopping by!!! Until next time...
Pin It
The embossing on the white card stock is from an Anna Griffin embossing folder called Juliet Damask.
The Anna Griffin folders emboss so well. I was amazed at the depth of
embossing achieved from any of the folders.
I colored some plain white card stock with a Tim Holtz Mini Ink Blending Tool, overlapping each color.
Then I used a die cut called Blissful Butterfly Border, cutting one from black card stock, and one from the card stock that I colored. I used the black for the outline, fitting in the colored butterflies. Then I stamped the sentiment from Sweet 'n Sassy's Majestic Monarchs.
Thank you for looking at my card. Have a happy stamping day.
I colored some plain white card stock with a Tim Holtz Mini Ink Blending Tool, overlapping each color.
Then I used a die cut called Blissful Butterfly Border, cutting one from black card stock, and one from the card stock that I colored. I used the black for the outline, fitting in the colored butterflies. Then I stamped the sentiment from Sweet 'n Sassy's Majestic Monarchs.
Thank you for looking at my card. Have a happy stamping day.
Don't forget to check back tomorrow for our next challenge! We have an inspirational photo for you, for our CCNS #91 Purple Ride challenge!
Thank you for stopping by!!! Until next time...
Pretty Shells
Hi there! Diane with you today with a card to inspire you
to do a little shell collecting..lol!
I can remember vacations as a child going to the lakes and always looking for shells...but we never had any like these!
I started my card by first dusting my card stock with the Anti-static Bag, then stamping a splatters stamp with Versamark, and applying Frantage Embossing Powder-Aged Gold and heat setting it. I like the way it gives the appearance of sand.
A few shells were cut from Impression Obsession Shell Set. After each shell was cut, I lightly inked the edges. Want smaller shells? Then you would like Impression Obsession Mini Shell Set.
I added a few LeCreme Pearls among the shells.
I finished with a sentiment stamped from the JustRite Floral Basket stamp set, then added a few strands of twine!
Thank you for visiting with me today.
Want
to plan ahead and join our weekly challenges? Just click on the Challenge Calendar label, located on the right side of the page. We would
love to have you share your creative ideas! Invite your friends to play along! You could be our next Classy
Cards 'n Such prize winner!
Thanks for stopping by!!! Until next time...
Friday, June 26, 2015
Have a Happy Day
Good afternoon friends! Joy, here today showing you a happy day card, with supplies I found at the Classy Cards 'n Such online store.
I love shaker cards - and I'm kinda stuck on making them. Here is one I made for a friend.
The papers are from Graphic 45's Botanical Tea, and the yellow is from Secret Garden.
The Butterfly is from the Majestic Monarchs stamp set by Sweet 'n Sassy, which was stamped on Clear Card Stock by Heartfelt Creations. This is great for shaker cards because it is thicker and has great body. I used the 1/4" Scor-Tape because I needed the strength to keep the clear cardstock firmly in place.
The sentiment is from Stampavie Sweet Wishes, and was stamped on some Heavyweight Vellum and attached with a brad.
Thanks for looking at my card. I hope you have a Happy stamping day!
Pin It
I love shaker cards - and I'm kinda stuck on making them. Here is one I made for a friend.
The papers are from Graphic 45's Botanical Tea, and the yellow is from Secret Garden.
The Butterfly is from the Majestic Monarchs stamp set by Sweet 'n Sassy, which was stamped on Clear Card Stock by Heartfelt Creations. This is great for shaker cards because it is thicker and has great body. I used the 1/4" Scor-Tape because I needed the strength to keep the clear cardstock firmly in place.
The sentiment is from Stampavie Sweet Wishes, and was stamped on some Heavyweight Vellum and attached with a brad.
Thanks for looking at my card. I hope you have a Happy stamping day!
We
hope you come back every day to see two new cards posted daily that the
design team has created not only for the weekly challenge, but we also
post two regular cards daily, later in the week, to give you even more
inspiration!
Thank you for stopping by!!! Until next time...
Beach Step Card
Hi! It is Shirley posting today. I saw an accordion fun fold card
on Pinterest the other day, that looked interesting and not to difficult
to make. There was a video/tutorial and it was easy to follow. That
is a good thing, because if it gets too involved or things take a bad
turn, I usually am done with making something new. I bet you know what
I mean. If you want to watch the tutorial, click on the link above.
Pin It
Graphic 45~Beach Fun
I used a turquoise card base and layered it with a yellow card stock. The designer paper that I used is the Graphic 45 By The Sea 8 X 8 paper pad.
The
"By The Sea" title was cut from the By The Sea paper pad. This pad makes
it easy to make cards. I love the pictures they provide so you can make
a really quick card if you like. The beach sign post was made with a
die from my collection and the "To The Beach" was cut from the paper
pad, also.
I used the Impression Obsession Mini Nautical Die Set to cut the anchors, the lighthouse and the ring buoy. The sailboats were cut with the Impression Obsession Sailboats die set. The waves were made with a border die from my collection. *There is a really cool Waves die by Joy Craft in the CCNS online store that is available. It is in the supply list below.*
The truck was created by using the Impression Obsession Classic Truck die. I made the mounds of sand using a border die. The grass was cut using the Impression Obsession Grass die.
I hope you enjoyed my card today. Come back and see us again soon.
There is still time to join our Classy Cards 'n Such challenge. Click on the Current Challenge tab on the right side of the blog for all the details. Come and join the fun!
Thanks for stopping by!!! Until next time...
Thursday, June 25, 2015
Fowls of the Air
Welcome to the Classy Cards 'n Such blog! Mindy with you today, to share a card I made from a New stamp set from
the Classy Cards 'n Such online store. The card is called Fowls of the
Air, and features a lovely bird with ferns and a scripture from Matthew
6:26.
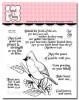
I began this card by embossing a background with a wood grain embossing folder, and then stamping the lovely bird from the Peace of God stamp set from Sweet 'n Sassy Stamps, on watercolor paper and colored it in with watercolor pencils.
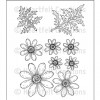
While this was drying, I stamped the sentiment also from this set on the watercolor paper and framed it with some green stock. I thought the card needed a little something else, so I stamped three leaf sprigs from the Delightful Daisy Stamps, from Heartfelt Creations. I stamped them on colored card stock, then highlighted them with a Clear Glitter Pen by Wink of Stella for sparkle.
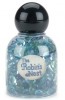
After adhering all the elements of the card to the base, I added three Water Dew Drops, from the Robin's Nest to add a little more sparkle and dimension to the card.
I'm glad you stopped by today for a visit, and hope you will submit a card for our challenge this week. Check the Challenge Calendar to see what we are working on this week.
There is still time to join our Classy Cards 'n Such challenge. Click on the Current Challenge tab on the right side of the blog for all the details. Come and join the fun!
Thanks for stopping by!!! Until next time...
Pin It
I began this card by embossing a background with a wood grain embossing folder, and then stamping the lovely bird from the Peace of God stamp set from Sweet 'n Sassy Stamps, on watercolor paper and colored it in with watercolor pencils.
While this was drying, I stamped the sentiment also from this set on the watercolor paper and framed it with some green stock. I thought the card needed a little something else, so I stamped three leaf sprigs from the Delightful Daisy Stamps, from Heartfelt Creations. I stamped them on colored card stock, then highlighted them with a Clear Glitter Pen by Wink of Stella for sparkle.
After adhering all the elements of the card to the base, I added three Water Dew Drops, from the Robin's Nest to add a little more sparkle and dimension to the card.
I'm glad you stopped by today for a visit, and hope you will submit a card for our challenge this week. Check the Challenge Calendar to see what we are working on this week.
There is still time to join our Classy Cards 'n Such challenge. Click on the Current Challenge tab on the right side of the blog for all the details. Come and join the fun!
Thanks for stopping by!!! Until next time...
Subscribe to:
Posts (Atom)