Wednesday, April 4, 2012

Linda's Rose Birthday


The designer paper I used on this card came from the Glitz Laced with Grace paper pad.  I really like the rose on this sheet and there are alot of other beautiful sheets in this pack to choose from.  The bronze mat is cut from paper I had in my collection and the bottom mat is cut from Stardream Chiara Coral.  I used the Spellbinders Labels 20 to cut out the matching Justrite "Kindness" cling stamp  to make my sentiment.  It was stamped with Memento Potters Clay ink and popped up on foam dots.  The butterfly is cut with the Cheery Lynn Exotic Butterflies Small Die (formerly Mini Die) and highlighted with Want2Scrap Coral Pearls.  For the ribbon, I used Chalk White Seam Binding that I dyed with the Memento ink pad. I added the Petite Lace for interest.


Thanks, Linda!   This is another beautiful, yet easy, card!!

Here's one last chance to enter our embossing folders challenge!   Entries close tomorrow, Thursday, April 5th, at 7AM Central time.  YOU could win a $10 Gift Certificate to the Classy Cards 'n Such shop!  Details are here.   Join us, won't you???

Thanks for stopping by!!!  Until next time...


Pin It

Tuesday, April 3, 2012

Hedgehog with Butterflies


This is another fun card!  These are the supplies from Classy Cards 'n Such:

Other supplies:  Copic markers, designer paper, black ink, brad, charms, double stick tape, Perfect Pearls - Forever Red

I started by stamping my image on white paper and coloring it with Copic markers. Then I embossed the designer paper with the Butterfly Frame, and highlighted this with the Festive Berries. I cut out the window from the frame and framed the part of the image I wanted to use.

I cut out one Stacker Flower 3, one Stacker Flower 6 and four of the Rose Creations. I sprayed each layer with Perfect Pearls and used a brad to hold these all together.  I glued the butterflies together, alternating the colors, and  layered.


I hope you enjoyed the cute little Hedgehog amid the Butterflies and flower.

Debbie
Thanks, Debbie!

Have you seen the embossing folders in the Classy Cards shop?   A couple of favorites are back in stock, along with a couple of new ones.   Check them all out here!

Thanks for stopping by!!!  Until next time...


Pin It

Sunday, April 1, 2012

Holly's Textured Blossom


Howdy again!  It's Holly posting today, and I've got an elegant card to share with you.  Have you played in our Embossing Folder challenge?  Here's another fun idea for using your embossing folders - look at the rose on my card.
 
Yup - the flower petals are embossed with an embossing folder!  Here's how to do that:
 
Die cut the flower petals from the Rose Creations dies (Spellbinders).  Place the petals inside the Flower Flourish embossing folder and run it through your machine.  Use an ink pad to add color to the embossed areas and set it aside to dry.  When it is dry, adhere the petals (largest one goes on the bottom, smallest one on the top) and then use your fingers to shape each petal.  Tie some thread through a button and adhere the button to the center.  Give it a try - it's fun and easy!

The paper is from the Vintage Blue 6x6 paper pad and the stamp is from Stampavie's Sweet Wishes set.  Card size is 5.5" x 4.25".


Thanks, Holly, for beautiful and easy card with embossing!

Thanks for stopping by!!!  Until next time...

 
Pin It

Chris' Embossed Challenge Card

Hello Classy Cards 'n Such Friends! This is Chrissy D sharing a card from our current challenge! This week's challenge is to use EMBOSSING on your cards! You can join us in the fun HERE.

I used the Simple Swipes technique from the February/ March issue of Technique Junkies. I then stamped an image from the Sea Shell Bay Labels Twenty Two stamp set from JustRite in Versamark ink and sprinkled Black Fine Detail Embossing Powder over the image and heat set it with the heat tool.  I cut out the stamped image using Spellbinders Labels Twenty-two.

I started my card with an 11" x 4 1/4" card base of navy cardstock.   I then layered a mat of eggplant which measured 3 7/8" x 5 1/8".   On top of that, I placed another layer measuring 3 3/4" x 5" of the gorgeous Pegasus cardstock from Layering Swatches #1 Metallic which was embossed with the Dots embossing folder.   Toward the middle of the card, I added a strip of beautiful Bluebell, also from the Layering Swatches #1 Metallic which measured 3 3/4" x 2" and was embossed with the Scrollworks embossing folder.  Just beneath that, I used a Martha Stewart Victorian Edge punch to punch a strip of eggplant.   I then popped up the focal image using the Joy! Foam Pads Small to give the card some dimension. 

Using the Silver Viva Decor Pearl Pen, I added some accents in each of the corners. Once that dried, I used the Cream Viva Decor Pearl Pen and added a dotted border around the entire card.To finish off the card, I wrapped silver cord around and tied a bow.


I hope you enjoyed my card today! We hope you will join us in this current challenge!  Have a wonderful day!
Thanks, Chris!  There are still a few more days before the current challenge featuring embossing folders closes.   I hope you will join us!  Details here.


Thanks for stopping by!!! Until next time...


Pin It

Saturday, March 31, 2012

Linda's Easter Card


Hello everyone!  Since Easter is just around the corner, I thought I'd put together a little card to celebrate the season.  For the card base I used the beautiful Pearlized Esse White Metallic cardstock.  I hope you can see the beautiful shine in the photo.  I embossed the top portion of the card with the Dots Embossing Folder from Crafts Too! and left the bottom portion smooth so that I could add my Easter sentiment from My Sentiments Exactly!  These sentiments are so easy to apply and you honestly can't see that it isn't a stamped image. 
 
The little rabbit hidden in the flowers is the Stampavie "Rabbit in Watering Can" stamp.  I colored him with colored pencils and die cut with the Spellbinders Lacey Ovals die.  I popped this up on the Cheery Lynn Swedish Spring Oval Frame which was cut from the Stardream Punch paper and adhered with Scor-Tape.  I added the Cheery Lynn Designs Small (formerly called Mini) Exotic Butterfly adorned with Want2Scrap Pearls to the corner of the card.  

For the final touch, I added some White Picot Lace Trim and attached some additional Want2Scrap pearls.  Just remember that you can find all the things used on this card in the Classy Cards 'n Such shop! 


Thanks, Linda, for another beautiful card!!!

Be sure to check out our latest weekly deals here!

Thanks for stopping by!!!  Until next time...


Pin It

Thursday, March 29, 2012

Linda's Challenge #4


Hi there!  It's Linda again with another card for our Classy Cards 'n Such Challenge - Embossing Folders.  This was such an easy card to put together and I just love the end result!  And, what's even more important, everything I used on this card can be found in Beverly's Classy Cards 'n Such shop!


The beautiful embossing folder I used is called Spring from Crafts Too!   The detail on this embossing folder is just incredible!  I added just a little bling to the butterfly in the form of  Baby Blue Rhinestones from Want2Scrap.   This was layered on a mat I created using the Stardream Fuse Vista paper.  These were adhered using Scor-Tape to the card base which was cut from Esse Smooth Pearlized White.  I cut an oval using the Spellbinders Lacey Ovals diecut and added  the sentiment from the Friends Rubz from My Sentiments Exactly!  I used the Bow-Easy to make a bow using the Chalk White Seam Binding.

This card is a very good example of how you can make a great card without needing to have alot of items in your craft room to work with. It's really just about using your imagination.  Won't you join us and play along with the challenge this week and show us those beautiful cards you've created?
Thanks, Linda!!!  

The weekend is almost here!  Won't that be a great time to enter your card in our challenge and be eligible to win a $10 Gift Certificate to the Classy Cards shop???

Thanks for stopping by!!!  Until next time...


Pin It

Wednesday, March 28, 2012

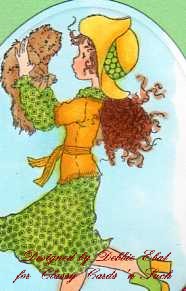
Josephine and Kiki


The supplies I used on this card that can be bought from Classy Cards 'n Such are: 

Other supplies:  Copic markers, Crafts too! embossing folder, Oval Spellbinders die, gems, flowers, ribbon, double stick tape, yellow and green paper, glue

The image was stamped on white cryogen paper and colored with Copic Markers.  I cut Josephine and her cat out using an oval Spellbinders die which I mounted on the green Lattice Rectangle from Spellbinders. 


I embossed the yellow sheet of paper with an embossing folder. Since my cardstock was bigger then my folder, I put the cardstock in the embossing folder sideways and embossed twice after flipping the paper. I covered the seam with ribbon. The layers on top of the blank card are the yellow embossed sheet, green lattice, then the mini flourish.  I glued the flourish down and added flowers along the flourish and finished by adding a little bling to the corners of the card.


Thanks, Debbie!!!


Click on the gold links above to find any of these items in the Classy Cards shop!


Thanks for stopping by!!!  Until next time...


Pin It

Monday, March 26, 2012

Chirpy, the Easter Chick


Chirp, chirp!  It's Holly posting today, and I've used this adorable Chirpy stamp from Classy Cards 'n Such to make a fun little bag for Easter.  The bag is something I found at the dollar store, just a plain white bag in a package of 10 for a dollar.  I used the Dabbed Shimmers technique from Technique Junkies all over to add some color and I tied some ribbon, Mauve - Carolina Asian Sheer to the handle.  Chirpy was colored with Copic markers and I colored the ribbon on the egg to match the ribbon I used on the bag. 


Did you know that Classy Cards 'n Such has GLITTER now??  I love glitter!  I bought all of them as soon as I saw them, and I used the Carnation glitter on the polka dots on this egg.  It matches the Mauve ribbon beautifully!  Then I fussy-cut the image and adhered it to the bag.  All I need is some Easter candy to put in the bag and I can give this to a special someone.  :-)
Thanks, Holly!!!


Click here and see all of our Easter stamps and stickers!!


Thanks for stopping by!!!   Until next time...


Pin It

Sunday, March 25, 2012

Katie


Hi again!  It's Holly posting today and this is the card I created for the embossing challenge on the Classy Cards 'n Such blog posted on March 23.  I have used quite a variety of products from the Classy Cards 'n Such store, and I am listing them here for you:

Katie stamp (Stampavie)
Wild Cherry cardstock layer from Layering Swatches #2
Festive Berries distress ink (from the Winter 2011 Seasonal distress ink package)
Classic Scalloped Oval Small die (for the sentiment)


I started by stamping Katie with black ink onto white cardstock.  I colored her skin, hair, boots, and the flower stems with Copic markers.  With a water brush, I picked up some Tumbled Glass distress ink and colored the little bird.  Barn Door distress ink was used to color the flowers, and Festive Berries was used to color the dress and the bow in Katie's hair.  I set this aside to dry while I stamped the sentiment and cut it out with the Classic Oval Small die.  I cut a Classic Scalloped Oval Small from black cardstock to layer behind the sentiment.

The Wild Cherry cardstock was embossed with the Daisies embossing folder, and I cut some black cardstock slightly larger than the Wild Cherry cardstock.  These were adhered together and then adhered to a white card base (5.5" x 4.25").  When the watercoloring was completely dry, I used a Petite Oval Large die to cut out the stamped image, and then I layered that with a scalloped oval cut from black cardstock.  Some white lace was adhered to the embossed Wild Cherry cardstock, then Katie and the sentiment were adhered over the lace.  

Don't be afraid to mix up your coloring mediums.  You can see I used both Copic markers and distress inks to color in this image.  It's fun to break out of your normal style and do something different.  :-)

Thanks, Holly!!!


This is another easy challenge!!  Show us your favorite card or other paper crafting project and be eligible to win a $10 Gift Certificate to the Classy Cards shop.   Details are here. 


Thanks for stopping by!!!  Until next time...


Pin It

Saturday, March 24, 2012

Mummu


Supplies from Classy Cards 'n Such 
Other Supplies: Circle die cut from Spellbinders, scissors, Copic markers, double stick tape, black ink

This week's blog challenge at Classy Cards'n Such is to use an embossing folder.  The embossing folder I chose is the Tulip Frame from Crafts Too!  I chose to try something different.  I embossed the white cardstock then I inked the raised edges and then colored in the flowers from inside the embossing. I cut out the frame part using detailed scissors.


I colored Mummu with Copic markers. I just love this little lady!  She just seems to be dancing, so happy 
and comfortable with herself!  That's the way I would like to be at that age.

I added flowers to the lower corner and the saying from JustRite stamps to the upper corner.


Thanks and please be sure you enter the challenge!

Debbie

Thanks, Debbie!  Mummu is so cute!


There are LOTS of new Want2Scrap bling in the shop today!  And I do mean LOTS!!  There are also a couple of new Cheery Lynn Designs. Tim Holtz Distress Ink Pad are on sale!!!  You can see all of the details when you click the Weekly Deals icon on the right sidebar.


Thanks for stopping by!!!  Until next time...


Pin It

Friday, March 23, 2012

CCNS Challenge #4 - Embossing folders


Welcome to our latest challenge - embossing folders!!!  Embossing folders can be used in many ways - a great background, embossing an element of your project, use them with or without additional coloring or embellishments and more!   Click here to see the embossing folders in the Classy Cards shop.


Here's how to play:

  1. Make a classy card, tag or other paper crafting project using an embossing folder.
  2. The card must contain at least one item currently sold in the Classy Cards 'n Such shop.  
  3. The Classy Cards 'n Such item(s) must clearly be listed in the blog or gallery post with the entry.
  4. Post your card or other paper crafting project to your blog or gallery such as SplitCoastStampers.  
  5. Blog/gallery posts with challenge entries must have a direct link back to the Classy Cards 'n Such challenge post.   All gallery posts should include keyword CCNS04 and include a direct link to the Classy Cards 'n Such challenge post if allowed by the gallery.
  6. Upload your project using the Inlinkz tool at the bottom of this post and link directly to your blog post or gallery post - not just to your blog or gallery in general.  
  7. Entries must be linked to this post by Thursday, April 5th at 7AM Central time.
  8. Enter as often as you like as long as the above rules are followed.
The winner will receive a $10 Gift Certificate to the   Classy Cards 'n Such online shop!   In addition, we will choose one or two entries to receive the Classiest Card Award!


Here are some ideas from the Classy Cards Design Team to get you started.


Debbie
Linda
Chris
Holly
Over the next several days, I'll post each card individually so that you can see how each was made.   Show us your creations by using the Inlinz tool below!  Good luck!!


Thanks for stopping by!!!  Until next time...


Pin It

Thursday, March 22, 2012

WINNER - Challenge #3

Our challenge #3, a sketch created by Jennipher Lowery, has closed and the winner is Sue Spellman!!!   Congratulations, Sue!!   Please contact me at beverly@classycardsnsuch.com for instructions on collecting your $10 Gift Certificate at Classy Cards 'n Such!


Click here to see Sue's beautiful creation!  Sue's card is in the SplitCoastStampers gallery, so you may have to sign in to see it.


Be sure to check back tomorrow to see all of the details for our embossing folders challenge!   We hope you will play along!!


Thanks for stopping by!!!  Until next time...


Pin It