Saturday, February 28, 2015

Arianna Thanks

Hi, it's Jenny posting again, with a Clean and Simple style card. 

If you've seen my cards lately you know I have been using my Arianna Blooms flower die on almost everything, but I haven't used the delicate central part of the flower that is part of the die.


I thought it would be fun to create a negative space card with the centers of the Heartfelt Creations Arianna Blooms die. This part of the die reminded me of snowflakes and by changing the colors this could make a simple and elegant Christmas card.

I first positioned the three dies over a piece of white card stock and ran it through my big shot using the magnetic spacer platform so the dies would stay in place. I then took the white panel and layed it over different colors of designer paper to see which looked best underneath. I wanted a simple paper that wan't too pale because I wanted contrast with the white. I chose a paper from my Love Letters paper pad, and found the pink paper in the same stack to cut the 'Thanks' word from the Impression Obsession Greeting Set.

I used Joy Foam Pads to adhere the white card stock to the green paper to really show off that negative space. Then I layered and glued the three die cuts to form a flower.  I added Pink Rhinestones and used Joy Foam Pads to attach the flower to the center of the largest cut out.

To finish off, I added some Wink of Stella glitter to the 'Thanks' word. Then I glued the word and added rhinestones to the centers of the other two cut-outs.  Thanks for looking and I hope you can join our challenge this week!


Check out our Easter SALE here!!!   Enter coupon code EASTER14 and get 14% off these items while supplies last!   Some items are very limited in quantity and when they are gone, they are gone!

Thanks for stopping by!!! Until next time...


Pin It

Trust in the Lord

Hi, Diana here again with another shabby chic card.  Whenever I try something new, I tend to keep trying and playing with it, so bear with me!  

Since these toys were already out from my last card, I made another card.  My base layer was made by using my largest stitched die from My Favorite Things' Blueprint 13.  To add a bit of gold (and to try my new Inka Gold rub), I used a stencil from my stash and the Memory Box Amira Flourish which is cut out of metallic gold card stock. 

Popped up with small Joy! foam pads is a white layer trimmed using Spellinders A2 Curved Borders.  I love that bit of the pink card stock showing through.  And I finally figured out how to make sure my flowers and bow stay glued on - use a hot glue gun!  I rarely use it on paper crafts but wow - what a light bulb moment for me!  Again I added a little tag embossed in gold with a sentiment from ODBD Ornate Frame Sentiments and cut from tag dies.


 Thanks for looking!  I hope you like it.

We appreciate your sharing our cards and ideas on Facebook, Pinterest, Goggle+, Instagram...anywhere your crafty friends can be found. The icons below my signature make it easy to share.
  
Thanks for stopping by!!!  Until next time...


Pin It

Friday, February 27, 2015

The Good Life

Hello, Joy here today.  I wanted to show you a card I made with supplies from Classy Cards 'n Such.


The pink base and banner paper, Lady Rose by KaiserCraft, were cut using the die set Blueprints 13 from My Favorite Things.

The sentiment base was cut using Spellbinders Labels Eighteen, (on sale), and green paper from Lady Rose by KaiserCraft was die cut using A2 Matting Basics A by Spellbinders.

The sentiment base was shaded using the Mini Ink Blending Tool before it was stamped with the sentiment called You Are Beautiful from Impression Obsession.   The sentiment panel was popped up using the Large Joy Foam Pads.

My two favorite supplies from this card are the Blueprints 13 die set and the A2 Matting Basics A.  Both are my favorite "go to" tools. I feel like if I have these cut out, the card almost makes itself!

Hope you get some time to do some crafting -- or browsing the online store at Classy Cards 'n Such. Remember they have a wish list tool that when you put items you would like on the list, those items will stay until you remove them.


There is still time to join our Classy Cards 'n Such challenge. Click on the Current Challenge tab on the right side of the blog for all the details.  Come and join the fun!

Thanks for stopping by!!! Until next time...


Pin It

No Place Like Home

Hello, Shirley here today posting another card with pretty blooms on it.  I received some Heartfelt Creation products this week and I couldn't wait to use them.


I started out using a sky color card base and added a layer of pink. Now the fun begins! I added the designer paper with the fence and flowers to build my card on.

I stamped my flowers and leaves in black ink using the Heartfelt Creations NEW Botanical Rose Stamps. I colored them with my markers and cut them out by hand. Beverly has some of the matching dies coming to the store soon. I used my stylus on them to give them some detail. I glued them together and placed a Joy Small  Foam Pads behind the flower and attached it to my card.

I used the Spellbinders Fancy Label Tags One die to cut my "No Place Like Home" sentiment from a scrap from the paper I used on my card. The same label die was used to  cut three more tags from the Sky card stock. I layered them behind the sentiment to give it a border and attached it to the card.

I used a hole punch and punched a hole for my May Arts Textured two tone Pink/White Ribbon to go through. Instead of tying a knot, I just twisted the ribbon and used adhesive to secure it. I place a self adhesive White Pearl over the top of it and added it to the tag. I also added a pearl to the flower center. I added some White Pearl Swirls from my stash going from the flower to the corner of the card. I stamped another flower, colored it and added it to the corner with a white pearl. *Note - if you go to the Classy Cards 'n Such online store, click on the Bling tab and you will find a section called Swirls, Brackets and More. There are Pearl Swirls in different colors.

That finishes up my card for today. I hope you like it! 


If you are unable to find an item in the store, or would like something special ordered, please email me at beverly@classycardsnsuch.com.

Thanks for stopping by!!! Until next time...


Pin It

Thursday, February 26, 2015

Birthday Posies

Birthday Wishes shared today by Mindy, who created this wreath which is suitable for birthdays, get well, and thinking of you. 


The card was begun by selecting three colors of card stock that complimented the colors I chose for my flowers.  The flower used is the single flower from the Floral Basket Clear Stamps by JustRight Stamps. On a sheet of eggshell card stock, I drew a circle using a circular die as a template.  I stamped the flower stamp around the circle alternating the direction of the stamp to give it a different but balanced appearance. The flowers were colored with Copic markers and left to dry. When the Copics were dry, I highlighted each leaf and flower with a Gelly Roll Stardust Clear Pen by Sakura. I also stamped five extra flowers and colored them the same as the wreath, then fussy cut around each one.

I assembled my three layers of card stock for the background. The layer where the wreath was placed is embossed with the Vintage Flowers Folder by Crafts Too!  I adhered the wreath with Joy! Foam Pads Large, and cut a few of the pads in quarters for the smaller single flowers.  They were placed around the wreath to fill in empty spaces. 

The sentiments were from the Floral Basket set and the Happy Birthday stamp from Art Impressions. The stamps were embossed with embossing powder on Heavyweight Vellum then attached with brads. After all the layers were attached, I adhered the card front to an eggshell card base.

Thank you for visiting with us today. Please join us again soon!

Be sure to sign up to get the Classy Cards blog by email or by reader on the left side of this blog.  You don't want to miss any of the beautiful cards waiting to be posted!

Thanks for stopping by!!!  Until next time...


Pin It

Soft and Pretty
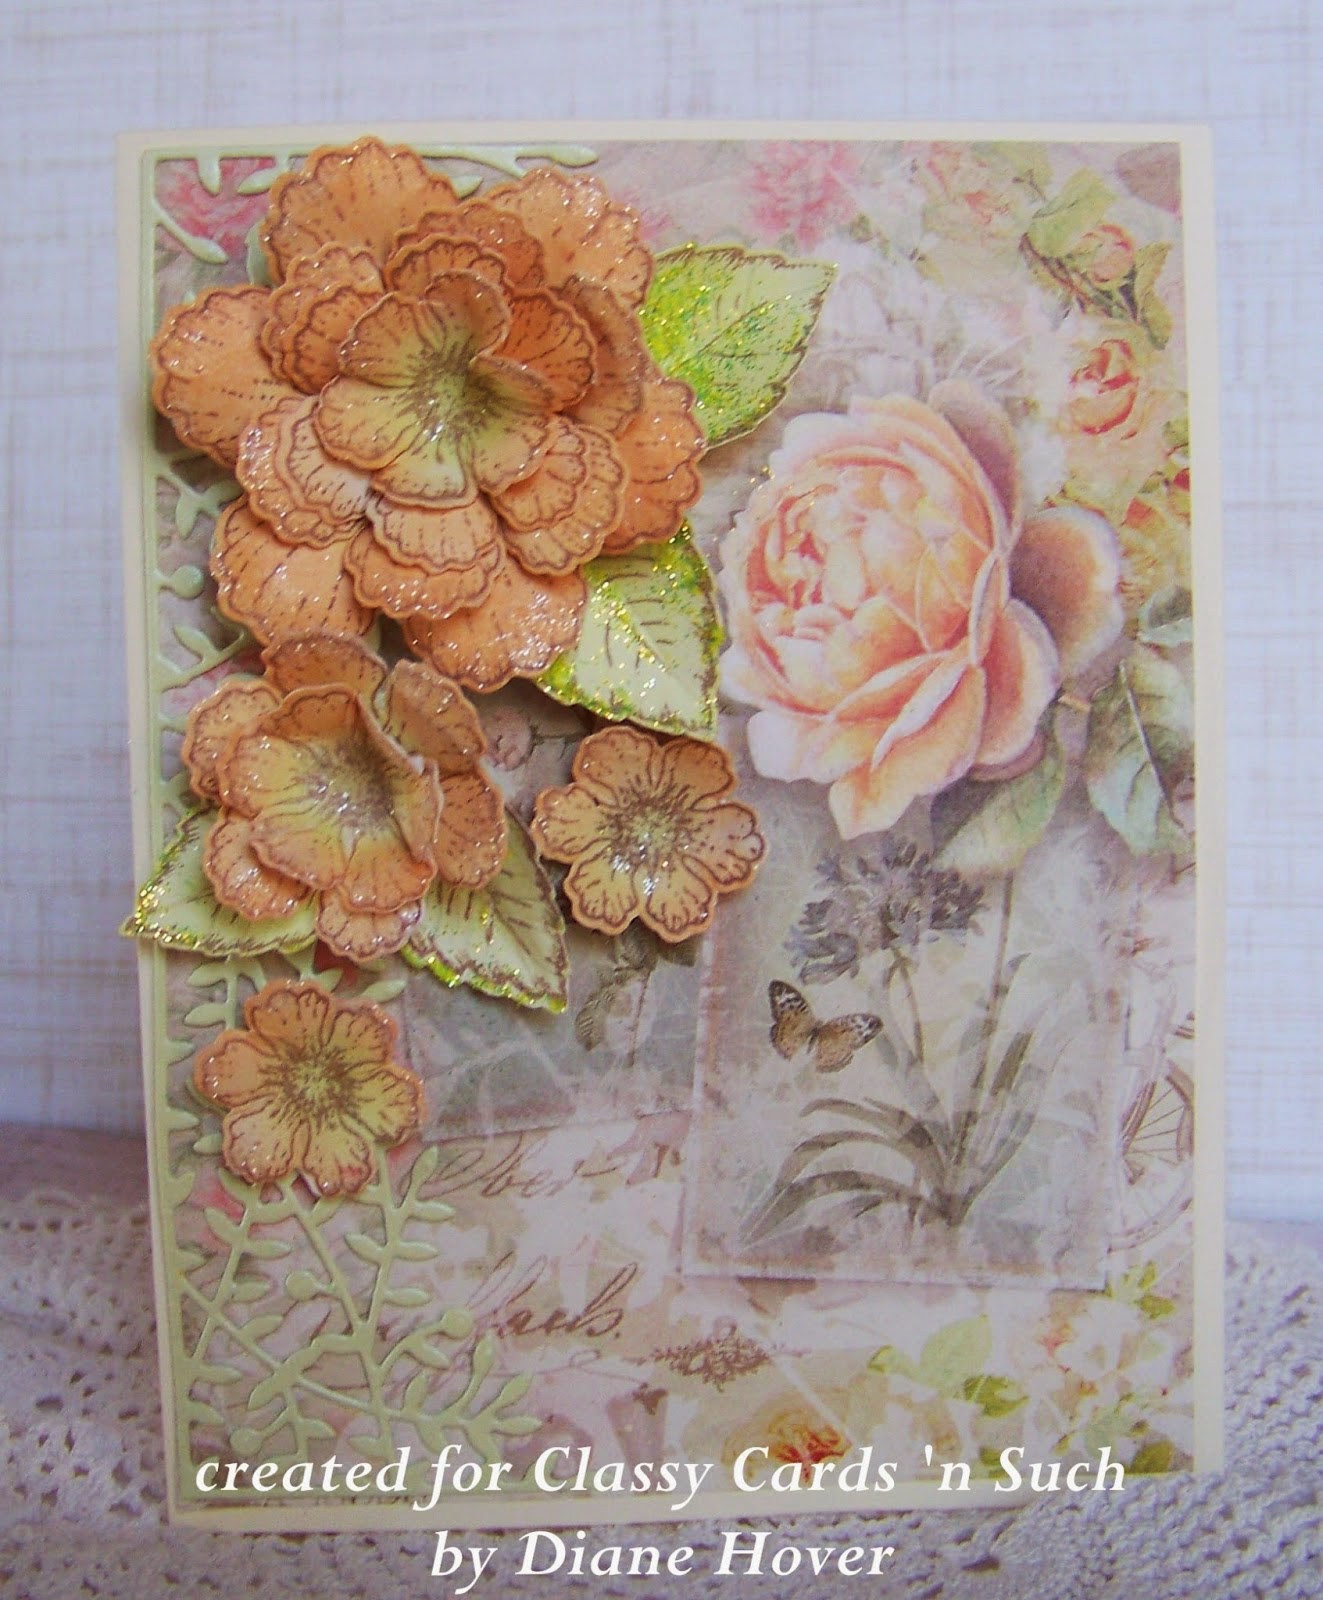
Hi, Diane with you today!! I am so excited as I received the new and beautiful Heartfelt Creations Botanical Rose stamp set and Botanical Wings die set.   I couldn't wait to start creating with it!


There are so many different flowers you can create with these sets.  Just think of all the pretty colors, too...it is endless!!  I stamped my flowers with Versafine vintage sepia ink.  Using the Botanical Wings die set, I cut them out.  The die fits perfectly over the stamped flowers for cutting.  I love that feature!!


I then chose Versa Magic Dew Drop chalk inks to color my flowers using Key Lime on the inner part of the flower and Persimmon on the outer petals, blending as I applied.


Using the Paper Blossoms Craft Molding Mat and Paper Blossom Tool Kit, I began forming my flowers.  I added Cloud Nine Velvet (microfine) glitter to the tips of the petals then stacked the flowers, adhering them with Art Institute Clear Adhesive.  The background paper is from Joy! Crafts Romance 6 x 6 collection.  To that, I lightly adhered Leafy Sprig Border by PoppyStamps, then adhering the flowers to that.  I could have easily added much more to this card, but I decided to let the flowers and the gorgeous paper speak for themselves!!


You will see me using more of this beautiful flower die and stamp set in the weeks to come...I am quite loving it...a lot!!

We appreciate your sharing our cards and ideas on Facebook, Pinterest, Goggle+, Instagram...anywhere your crafty friends can be found. The icons below my signature make it easy to share.

Thanks for stopping by!!!  Until next time...


Pin It