Sunday, February 23, 2014

CCNS Challenge #20 Winner!!!

It's time to announce the Classy Cards 'n Such Challenge #20 - Twinkling H2Os!

Congratulations to Judy Studer for entry #2!!!
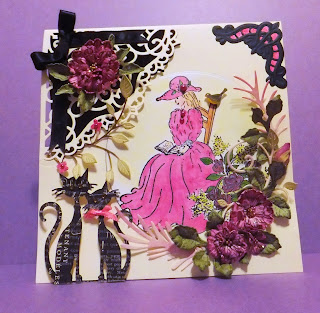

You have won the


Winner must claim prize by 
Wednesday, February 26, 2014. 
Please send your mailing information to 

We would like to thank all entrants for their Classy entries!

Don't forget to check in tomorrow for the next challenge -#21 Vintage Hues at Classy Cards 'n Such.  We are revising the rules somewhat beginning with tomorrow's challenge, so please review them carefully.  This is going to be a very fun challenge!   Be sure to join us with your creation!

Join the Classy Cards blog email list in the upper left column of this blog and receive exclusive weekly deals not available elsewhere! A one-time 20% discount on an order of your choice! Subsequent orders receive a 10% discount. Don't miss out, join today! 

Thanks for stopping by!!! Until next time...

   
Pin It

Saturday, February 22, 2014

Daisy Today

Hi, it's Misti!  

I don't know about where you live, but our weather has been a little crazy lately.  I'm ready for some warm weather and some color! That means it's time to bring out the flowers!  


I started with my Spellbinders Fleur De Lis Squares.  Don't forget to use the Cuttlehug, it will make a HUGE difference is the ease of those detailed pieces coming out!

The single daisy from Daisy Today by Impression Obsession fits in the middle of the square, so I stamped it onto a piece of white cardstock. I used the Tim Holtz Distress Ink Markers and the Detailed Water Brush to color it in.

I used the Dots embossing folder from Crafts Too for my white panel, layered that onto a piece of black cardstock and then layered that onto my white base card.

I cut one of the pink pieces of patterned paper from Porcelain Rose 6.5" x 6.5" paper pad by Kaisercraft to layer on top of the embossed layer. This page did have a design in the right corner, but for the size I needed, I was able to cut that part off.


Your card and flower look ready for spring! Thanks Misti!

Click any of the gold links above for more info or to purchase any of the products used.

If you like Misti's card, please share it on Facebook, Pinterest, Google+, Instagram...anywhere your crafty friends can be found! The icons below my signature make it easy to share.

Thanks for stopping by!!! Until next time...

  
Pin It

Thursday, February 20, 2014

Yummy Birthday Cake

Hi folks, it's Holly posting today! Do you know anyone who has a birthday coming up? This card would be perfect, don't you think?  


I pulled out the Vintage Bliss 6" x 6" paper pad and pulled out some fun papers for my cake layers. I cut out each layer of the Petite Cakes die from a different sheet of paper. I then cut out the Scalloped Cake Stand from a natural white cardstock. I only needed the largest cake stand, so I set the two smaller ones aside.

An oval was cut from Kraft cardstock, and then I used the natural white cardstock to cut a matching scallop oval from the Spellbinders Classic Scalloped Ovals Large set. I assembled the cake stand and the cake layers on the Kraft oval. The small and medium cake layers were popped up with Joy! Foam Pads Small.

I used the cake layers as inspiration to create my background, so I cut the same papers from the Simple Stories Vintage Bliss 6" x 6" paper pad. I adhered the background papers to a sheet of natural white cardstock and then adhered that to a Kraft card base.

The ovals with the cake was adhered Joy! Foam Pads Small to the center of the card.

I then cut out the Happy - set of 2 sizes and the Birthday - set of 2 sizes, (both die sets from Cheery Lynn Designs are sold out), from Kraft cardstock and adhered them above and below the birthday cake.


That designer cake looks good enough to eat! Thanks Holly!

Click any of the gold links above for more info or to purchase any of the products used.

If you like Holly's card, please share it on Facebook, Pinterest, Google+, Instagram...anywhere your crafty friends can be found!   The icons below my signature make it easy to share.

Thanks for stopping by!!! Until next time...


Pin It

Wednesday, February 19, 2014

Water Coloring With H20s

Hello Classy Friends!  Diane here with you today on the Classy Cards 'n Such blog.  This week  our challenge is using Twinkling H2Os.

I have a love for these little pots of Twinkle.  They add a perfect bit of sparkle or you can use them as I did to water color.


I used the Dreamweaver Wisteria brass stencil which was embossed onto water color paper. To emboss a stencil, use the same stacking order you would to emboss a regular die. I taped my stencil on first with removable tape to hold it in place to color.

For this technique, I used the Spritzer Bottle and spritzed not only my H20s,  but my mat as well.  You don't want your brush too wet, but you also don't want you H2Os to go on too thick, after all, this  is water coloring!  By dipping your brush in the H2Os and then in the water on your mat, you get a mix that is easier to move around on your image. Just be careful not to let the color seep under the stencil.  

The Twinkling H2Os used for this project are:
Think Pink - Courageous and Lucky Apple
Holiday Sparkle - Sugar Plum and Emerald
Springtime - Plum Blossom and Spanish Moss

I matted my finished water color on So... Silk Fabulous Purple. This is a gorgeous paper that I hesitated to even cover up, but it was so pretty with the Wisteria!!

The sentiment is from the Flourishes set Always Blooming.

Thank you for visiting with me today. I hope you will join us in our challenge this week using your H20s!!


Your card is full of gorgeous color! Thanks Diane!

Click any of the gold links above for more info or to purchase any of the products used.

If you like Diane's card, please share it on Facebook, Pinterest, Google+, Instagram...anywhere your crafty friends can be found! The icons below my signature make it easy to share.

Thanks for stopping by!!! Until next time...

  
Pin It

Tuesday, February 18, 2014

Twinkling Cards

Hi, it's Joy today, showing you a couple of cards I made using some great supplies I found at Classy Cards 'n Such.

I wasn't sure what the big deal was about Twinkling H20s, but with this challenge -- I now understand!  THESE are fabulous paints to use with cards.  As soon as they are completely dry, the colors just sparkle and shine - I'm painting chipboard frames this afternoon and then I'm going to look for other things to paint!

I used two very different techniques using one stamp set on both cards.

On the first card, after wetting the Twinkling H2Os, I mounted a stamp from a set called Black Eyed Susan Vintage Labels Five by JustRite, and painted directly onto it. Water was lightly spritzed onto the painted stamp and stamped onto watercolor paper. It made a flowing watercolor type of image - I love this technique.  After it was completely dry, the sparkle just popped out!

The ribbon was colored by putting a little of the color into the Spritzer Bottle and sprayed onto Chalk White Seam Binding and when it dried - it was so shiny!

The butterfly from the Black Eyed Susan set was stamped, painted, cut out and popped up with Joy Foam Pads.

The green background paper is from The Lake House paper pad by Kaisercraft.


For the next card, Twinkling H2Os were used just like regular water colors with a Tim Holtz Water Brush after the same image was stamped on watercolor paper.

The sentiment was cut out using Spellbinders Vintage Label Five Dies and popped up with Joy Foam Pads.

Again the butterfly was stamped, painted, cut out and popped up with Joy Foam Pads.

The pretty green designer paper is called Harvest Lane paper pad by Simple Stories.


I wish you could see the sparkle - it is amazing! Oh, dear, I've got a new habit.  I now want every color. Beverly, owner of Classy Cards 'n Such describes them as "delightful little pots of color with a touch of sparkle" - and they are!


Your cards are so delightful!  Thanks Joy!

Click any of the gold links above for more info or to purchase any of the products used.

If you like Joy's card, please share it on Facebook, Pinterest, Google+, Instagram...anywhere your crafty friends can be found! The icons below my signature make it easy to share.

Thanks for stopping by!!! Until next time...


Pin It

Monday, February 17, 2014

Be Always Blooming

Hello Classy friends! Diane here with you today on the Classy Cards 'n Such blog.  This week our challenge is Twinkling H20s.  I have a gorgeous card to share with you using these luscious little pots of color.


If you are not familiar with Twinkling H20s, they come completely dry.  In fact when I purchased my first set, I thought "oh no, these are all dried up!" LOL.  They are supposed to be dry. You simply use a Spritzer Bottle
to wet them, just leave the lids off and let them dry before putting the lids back on.

For my card, I used two pieces of scrap white card stock and simply started painting the colors on, using a back and forth motion. Starting with the lightest color and adding the darker colors on top, giving a contrast of color.  The colors I used came from the sets of Think Pink, Holiday Sparkle, Springtime, and Autumn Brilliance.


After I let the papers dry, I used the Hydrangea Set dies, from Impression Obsession, to cut my flowers and leaves.  The die cuts 8 flowers at a time so I cut 9 sets of flowers.  I then conditioned them using the Paper Blossom Tool Kit and Paper Blossoms Craft Molding Mat. Using Art Institute Dries Clear Adhesive, I first glued all the larger flowers, then filled in with the smaller flowers.


My sentiment is from the Flourishes set Always Blooming. The background die cut is from the Spellbinders set called Exquisite Circles. Beverly would be more than happy to order this set of dies, if you are interested.

The colors from the Twinkling H20s sets are:

Think Pink:   Luv-U Pink, Lucky Apple
Springtime:  Chiffon Pink, Plum Blossom
Holiday Sparkle:  Emerald
Autumn Brilliance:  Spanish Moss

Thank you for joining me today.  I hope you will join us in the challenge this week!


Wow, your card just blooms with color! Thanks Diane!

Click any of the gold links above for more info or to purchase any of the products used.

If you like Diane's card, please share it on Facebook, Pinterest, Google+, Instagram...anywhere your crafty friends can be found! The icons below my signature make it easy to share.

SALE!!! - ALL Cheery Lynn Dies are 25% off!   Use coupon CLD at checkout.

Thanks for stopping by!!! Until next time...


Pin It