Saturday, July 4, 2015

Hello Daisy

Hello, Diane with you today! I have a bright and cheerful card to show you.

I stamped a Heartfelt Creations Daisy Flourish, then colored it in with markers. Even if you are not the best at coloring, (like me), this stamp is super easy to color in!


Once the image was colored, I used a Wink of Stella glitter pen here and there for a bit of sparkle!

The frame was cut using Spellbinders Decorative Labels Eight. I like to stamp my image, then cut the label, so as to get perfect placement.

A butterfly from the Joy! Crafts Butterflies, was cut from Mandarin Curious Metallic,111# card stock. I added a bit of bling to that. I used the polka dot butterfly in the trio, which I thought was a perfect match for the background paper, from an Authentique paper pad.

The sentiment is from JustRite Hello Daisy stamp set.

To finish I added a ribbon and Green Pearls!

Thank you for visiting with me today!

All Cheery Lynn Die Cuts 50% off

Enter coupon code CLD at check out

Only one coupon code per order


Thanks for stopping by!!! Until next time...


Pin It

Friday, July 3, 2015

Elegant Butterfly

It is Shirley posting today. The card I am going to share with you today was relatively easy to make and it went together fairly quick. 


I used ivory card stock for my base, and added a layer of Graphic 45 Botanical Tea paper. I used my Sue Wilson California Collection - Beverly Hills dies to cut the next two decorative layers with the Botanical Tea paper.  

I adhered these pieces together using Art Institute Dries Clear Adhesive. I used Joy Small Foam Pads to pop up the main layer of the Sue Wilson die cut.  

I used the Memory Box Willoughby Butterfly Wings die to cut the butterfly, and added silver beads. The corner pieces were cut with dies from my collection. I added Silver Rhinestones to the butterfly, and the main layer.  

Thank you for stopping by to join us for another episode of Classy Cards 'n Such.  Please, join us for the challenge!


There is still time to join our Classy Cards 'n Such challenge. Click on the Current Challenge tab on the right side of the blog for all the details. Come and join the fun!

Thanks for stopping by!!! Until next time...


Pin It

Thursday, July 2, 2015

Summer Sunshine

Happy Thursday! Mindy with you today sharing a card that celebrates June and Summer, two of my favorite times of the year.


This card was designed with the Time to Flourish paper pad by Graphics 45. This paper pad is designed with the twelve months of the year featured, and the holidays that fall in that month. There are two double sided sheets dedicated to each month, which gives you plenty of embellishments and backgrounds for cards and pages. For my card base, I used a sheet of the Starburst Lichen Aspire Petallic Metallic paper, sold at the Classy Cards 'n Such.

After attaching my layers to the card front, I stamped several of the flowers and leaves from the Delightful Daisy stamps from Heartfelt Creations, and die cut using the Delightful Daisy dies. Using my Paper Blossom Tool Kit, I shaped, then adhered the flowers to my card. Within just a few moments, I had a lovely card suitable for a Birthday or just Thinking of You.

Thank you for visiting with me today. I hope you are having a wonderful week!


There is still time to join our Classy Cards 'n Such challenge. Click on the Current Challenge tab on the right side of the blog for all the details. Come and join the fun!

Thanks for stopping by!!! Until next time...


Pin It

Watered Honey Blossom Sprig

Hello, it's Diana! I just love dies - so much that sometimes I don't even add a stamp! Today I have another card to share with you that is all dies. I like these type of "blank" note cards because then I can send them for any reason. It's also simple enough to add a stamp inside later on if I want it for a specific purpose. 


I started my card with a teal base and a white stitched layer using MFT Blueprints 13. I think I use this die at least once a week! I had some watercolor paper left over, from when I played with the bubbles and soap with my son. With watercolor paper, I always use the strongest adhesive I have, because sometimes, it looks like it will stay but I've noticed that after a couple of weeks, it might pop up here or there.

I wanted something similar to a bokeh background, so I used the stitched circle dies  to cut out three overlapping circles.

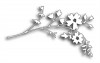
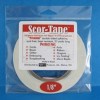
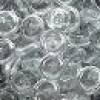
I then added a white, Memory Box Honey Blossom Sprig on top of the circles. So I used my Scor-tape, just to make sure it stays put. Finally, I added some Clear Dew Drops, and Water Dew Drops, to give the impression of morning dew.


Instead of just lining my envelope with a matching stitched white base, I decided to die cut out of the white, the Honey Blossom Sprig. I carefully glued back the white portions that are not attached to the large rectangle, (by replacing the sprig die cut temporarily). Similar to leaving in all the puzzle pieces, and taking out the sprig when done. I love how something so simple can add such elegance to the inside of the card - a great surprise for the recipient.


If you are unable to find an item in the store, or would like something special ordered, please email me at beverly@classycardsnsuch.com.

Thanks for stopping by!!! Until next time...


Pin It

Wednesday, July 1, 2015

Places You'll Go

Hello!  It's Jenny today with a card inspired by our new challenge.  I loved the purple bicycle inspiration photo this week, and once I found this stamp in my supplies, this card just flew together.


I made the bicycle using purple paper and my Memory Box Brand New Bicycle die. The wheels were cut with white card stock, colored with markers, and paper pieced on top of the die cut. I colored the handlebars and seat with a black marker.  

The rest of this card was simple. I found purple design paper in my stash, and cut a center with a Spellbinders Oval die. I then cut a frame in white with a smaller oval. The base is a light blue A2 card. I wanted to use blue, so the background would look like a clear sky.

Using my MFT Books stamp set, I stamped the Dr. Seuss quote with black ink, and then adhered the white and purple frame on top, using Joy Foam Pads for dimension.

The Poppystamps Weeping Willow Branches were glued on top, and the bicycle was also adhered with Joy Foam Pads. There's more dimension than appears in the photo. The willow branches were cut twice. I don't think it's visible, but I actually cut a couple of long branches and glued them on the right side of the card, to get long branches on that side also.

Thanks for visiting and don't forget to link up a card to our new challenge this week for a chance to win a great prize!


Check out all the new fun dies, stamps and more in the NEW section.

Thanks for stopping by!!! Until next time...


Pin It

Bikin' at the Beach

Happy Wednesday friends! Thank you for joining me, Mindy, at the Classy Cards 'n Such blog this week, for our Challenge #91, Purple Ride. I had so much fun designing my card using a bike and the color purple, with the inspiration photo provided.


I started my card by embossing a sheet of watercolor paper, with the folder Shell Corner by Darice. I fussy cut around the embossed shells to use as an element on my card. I also added sparkle to the shells with my Clear Glitter Pen by Wink of Stella.  

I decorated the base card with sections of patterned paper, from the Time to Flourish paper pad by Graphics 45. It is a lovely paper pad, with papers for every month. It is so easy to use.

The Basket Bicycle cling stamp, by Poppystamps, was stamped on Amethyst Stardream Metallic card stock, then die-cut with the matching Basket Bicycle die. The bicycle and shell border were popped up on the card using Joy! Foam Pads Large, to give texture and dimension to the design.

Thank you again for joining me today. Why not create a card for our Challenge #91, Purple Ride? Submit it for a chance at a wonderful prize.  The Challenge instructions are available by clicking on  the "Current Challenge" tab. Hope to see you there!


If you are unable to find an item in the store, or would like something special ordered, please email me at beverly@classycardsnsuch.com.

Thanks for stopping by!!! Until next time...


Pin It