Friday, November 9, 2012

Christmas Blessings

Hello all - Jenn here, and I have a clean and simple yet elegant Christmas card to share with you. 

I started with a 6 x 5.5 base of Stardream Jupiter. To that, I added one of my favorite papers from the Kaisercraft Turtle Dove Paper Pad. These paper pads measure 6.5 x 6.5 and come with single sided patterned papers as well as specialty papers and 4 pages of die-cuts. Everything you would need to make a card!


Since I already knew that I wanted to use the sentiment of "Christmas Blessings", I thought a cross might be appropriate somewhere on the card. So, I pulled out the Cross Set from Cheery Lynn Designs along with the Foil Paper-Textured Patterns 1. I cut out my cross in the gorgeous red foil but when I laid it on my base, I felt something was missing. Immediately I thought, "dimension". So, I cut the cross out again and using the small foam pads I adhered the two crosses together and it was perfect! 

I wanted to adorn my corners and the Lace Deco Corner E set along with the Reich Shine Champagne paper is what I used for just that purpose. 

For finishing touches I stamped my sentiment on a die-cut label that came out of the Turtle Dove Paper pad. I inked the edges a bit and adhered it with large foam pads. 
Isn't this gorgeous???  And so easy!  Thanks, Jenn!

Bling is 15% off through November 15th!  NEW PoppyStamps die cuts, red and green Viva Decor Pearl Pens and more in the Classy Cards shop.  Get all the info when you click here! 

Click any of the gold links to learn more!

Thanks for stopping by!!!  Until next time...


Pin It

Thursday, November 8, 2012

Thanksgiving Pumpkins

Hi y'all!  It's Holly posting today.  Can you believe Thanksgiving is almost here??  Wasn't it just summertime last week??  Time just flew by, didn't it?  :-)  I have a quick and classy Thanksgiving card to share with you today.  


I started by stamping the Gingham Cover-a-Card stamp onto some mustard cardstock and I used the Curled Corner technique from Technique Junkies on the upper left corner.  I adhered this mustard layer onto a dark brown card base.  The same dark brown cardstock was used to die cut the Happy and Thanksgiving dies from Cheery Lynn Designs and then I adhered them onto the mustard layer.  I used some orange and green cardstock to cut the pumpkins and leaves from the Pumpkins die set (also from Cheery Lynn Designs).  To give the pumpkins some depth, I sponged a darker orange ink onto the edges and I used a marker to color the stems.  I then affixed the pumpkins to the mustard layer with some Joy foam pads (small) and adhered the leaves and tendrils in a random fashion around the pumpkins.  It's really fast and easy to adhere these die cuts with the Quickie Glue Pen - it's the perfect size for these fonts and the delicate tendrils.   
Such a cute card, Holly!   The Mega Mount works great for stamping large images.  Click the Mega Mount link and scroll to the bottom of the page for a video demonstrating how to use it.

Thanks for stopping by!!!  Until next time...


Pin It

Wednesday, November 7, 2012

Happy Couple

Good morning!  Steph here with a sweet wedding card.

The stamp titled Happy Couple is from Stampavie. Don't you love how he is holding her ever so close on this special day! I used a combination of gray and pink - love those colors together. The gray complements their clothes and the pink complements her roses and the trims.


I stamped the image on Cryogen White cardstock. It has a nice shimmer and shine and is perfect when using Copic Markers. So, using Copic Markers, I colored her gown with light shades of gray and his outfit with darker shades of gray. The roses are red violet and so are the trims on the clothes.


Once the image was colored, I sponged some Spun Sugar Distress Ink and some Victorian Velvet around the image. A sheer ribbon was tied around the card and some Doodle Twine was tied to the knot.

Cute wedding card, Steph!

Have you signed up for the Classy Cards newsletter yet?   What are you waiting for???  The best Classy deals are available only to newsletter subscribers!   Sign up just below the pink envelope on the left of the blog and you're in!

Click any of the gold links above for more info.

Thanks for stopping by!!!  Until next time...


Pin It

Sunday, November 4, 2012

Snowflower Season card


Hi Classy friends!  It's Holly posting today and I'm sharing this clean and simple Snowflower Season card.  Sometimes you just want to make some quick and easy Christmas cards so you can get them addressed and in the mail before the season is over, and this card fits the bill.  Other than the drying time for the liquid Gold Viva pearls, this card can be made in less than 10 minutes. 


These are the products from Classy Cards 'n Such that I used on my card:
Christmas Sentiments stamp set (Impression Obsession)
Snowflowers Set 1 dies (Cheery Lynn Designs)
Snowflowers Set 2 dies (Cheery Lynn Designs)

I started with a card base made from kraft cardstock and then I added a layer of dark brown cardstock.  I cut a sheet of patterned paper from the Rejoice 6x6 paper pad and layered it onto the dark brown cardstock.  Next, a small strip of green cardstock was adhered near the bottom of the card.  The sentiment was stamped onto kraft cardstock and then cut out with an oval die.  I layered that onto a Classic Scalloped Oval Large die cut from dark brown cardstock, and then adhered this to the small green cardstock strip.
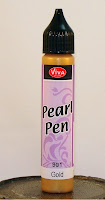
The fun part was cutting out the new Snowflowers from Cheery Lynn Designs and playing around with the layout to see which snowflowers I wanted to use on my card.  I ended up using only five of the six Snowflower die cuts and I affixed them to the card in a random fashion.  The snowflowers needed a little oomph so I squeezed some Gold pearls into the centers.  This Gold Viva pearl pen is a thick liquid that you can squeeze onto your projects.  You can make round pearls or you can make squiggles or lines, whatever you want.  You can see how the pearls are different sizes on my card - that's the versatility of these pearl pens.  Love that!  :-)
Viva Decor Pearl Pen
Love those Viva Decor Pearl Pens!  I've just added Red and Green to the shop...perfect for Christmas!  You can see all of the colors here.

Click any of the gold links above to go to the item in the shop.

Thanks for stopping by!!!  Until next time...


Pin It

Friday, November 2, 2012

Loving Mouse


Hi all, Jenn here and I'm back with a card to showcase one of the many fabulous Stampavie stamps that Beverly carries it the Classy Cards 'n Such Store. Today I am working with Mouse with Sunflower. I like this image because it can be used to send many different sentiments such as thinking of you, hello, happy birthday, and with love, just to name a few. I chose to make him a loving mouse for this card. 

My card base measures 5.5 x 5.5 inches and is a basic gray color. I chose gray to work off of the gray tones in the papers I had chosen from the French Kiss by Glitz Designs paper pad.

After layering my first pattern onto the base, I cut a 2.5 x 5.5 piece off of another pattern and layered it on a gray mat and then adhered to my card base off to the left side. Next, using Spellbinders Lacy Circles Dies, I die cut a gray circle and embossed it with the Dots embossing folder by Crafts Too. This was added to the lower portion of my base. 

After coloring my stamped image with Copic markers, I die cut it out using the Spellbinders Labels Eighteen and adhered to my card.  I stamped my sentiment on a smaller Labels Eighteen and popped it up with foam pads. For finishing touches, I added three Smokey Brown Rhinestones to the bottom and the top of the card. 

If you get a chance, check out the Stampavie Stamps. They are perfect for those of you that love to color!

So cute, Jenn!  Thanks!!

There are lots of new Stampavie stamps in the Classy Cards shop so be sure to check them out at the above gold link.   Gold links will take you to the items in the Classy Cards shop!

It's easy to pin cards from the Classy Cards blog to your Pinterest board!  Just click the Pin It! button next to my signature below.

Thanks for stopping by!!!  Until next time...


Pin It

Thursday, November 1, 2012

Fall Birthday card and FREE SHIPPING


Hi Classy folks!  It's Holly posting today and I'm sharing a birthday card that I made for a special someone.  I wanted this card to be classy and elegant and still reflect the gorgeous colors of this fall season.  Here are the supplies from Classy Cards 'n Such that I used:
 
Birthday stamp set - My Sentiments Exactly!
Floral Ovals dies - Spellbinders
Light Coral pearls - Want2Scrap
Francesca border die - Cheery Lynn Designs
 
I started by adhering one of the gorgeous floral papers from the Romantique paper pad to a brown card base and I added a Francesca die cut border (in dark rust cardstock) to the top of the card.  The little flag tail strip on the side is hand cut from another sheet of paper from the Romantique paper pad.  I tied the seam binding around the top and affixed two of the pearls to the bottom right corner.  I stamped the sentiment onto one of the cream-colored papers from the Romantique paper pad and cut it out with an oval die.  This was adhered to a larger oval die cut from a dark rust cardstock and then that was adhered to a brown Floral Oval die cut. 


I've already sent this to the birthday girl so she would have it before I posted this.  Hopefully she will enjoy this card as much as I enjoyed making it for her.  :-)  Happy Birthday, sweetie!!

Thanks for the beautiful card, Holly!!!  

And since today is my birthday, FREE SHIPPING is available through Sunday, November 4th on orders of any amount and any combination of products!  Enter coupon code FREESHIP-ALL at checkout!  Only one coupon code per order.  Domestic orders only.

Watch the NEW!!! tab in the Classy Cards shop for new items scheduled to arrive tomorrow, plus a few which have shipped but I don't have an arrival date yet!   And...I'm going to add a new bundle or two so watch the Bundles tab tab too!

Click any of the gold links above to find the item in the Classy Cards shop.

Thanks for stopping by!!!  Until next time...


Pin It

Tuesday, October 30, 2012

Scenic Combo

Good morning!  Steph here and I absolutely love this stamp from Heartfelt Creations. It's so peaceful. I chose to create a fall scene, but think how lovely it would look with summer colors!


I stamped the image and colored it with Copic Markers. Once I die cut to the oval shape, I used Crushed Olive Distress Ink and Tumbled Glass Distress Ink to add some color around the image.

I lightly sponged on both colors with an inking tool, then darkened the colors around the outside edges of the oval. Once done, I matted the oval with green cardstock then assembled my card.


The sentiment is from JustRite Stamper's Nature's Nested Sentiments. I stamped it with black ink and, after cutting to size, I inked the edges with Crushed Olive Distress Ink.  Joy Foam Pads provided a little dimension under the sentiment.
What a beautiful scenic card!  Thanks, Steph!

I hope and pray that all of our blog friends and your loved ones have made it safely through Sandy!  Please let us hear from you!

Thanks for stopping by!!!  Until next time...


Pin It

Monday, October 29, 2012

Gun Metal Berries Ornament card


Hi card-makers!  It's Holly posting today, and I bet you're wondering about the "gun metal" in my title.  LOL  That comes from the name of the pearls that I used on this card - Gun Metal Pearls from Want2Scrap.  I decided to do something different and used these dark silver Gun Metal pearls for the berries on top of the ornament on my card.  I love how they contrast with all the burgundy and beige on this card.


Here are the supplies I used for my card:
Gun Metal Pearls (Want2Scrap)
Twig Wreath die (Impression Obsession)
2011 Heirloom Ornament die (Spellbinders) - sold out
Joy Foam pads (small) 
 
I started with a vanilla card base and added a layer of black cardstock.  The burgundy with circles paper from the Handmade Holiday pad was layered on to the black cardstock.  I added a strip of black cardstock and then a smaller strip of the beige polka dot paper (also from the Handmade Holiday pad).  Next, I stamped the ornament with some burgundy ink and then colored in parts of it with Copic markers.  I stamped the sentiment with black ink directly in the middle of the ornament, and then I used the corresponding die from the 2011 Heirloom die set to cut the ornament out.
 
The pine branch at the top of my ornament was created by running the Twig Wreath die through my machine with some dark green cardstock.  I did this four times so I could have two sprigs of pine on either side of the ornament.  The pine branch is one of the smaller dies inside the wreath die.  I didn't use any of the other parts of the die - just the little pine branch.  I adhered the ornament with some Joy foam pads, affixed the pine branches at the top, and added three of the gun metal pearls to the center.

Another cute Christmas card!  Thanks, Holly!!

Paper pads are 15% off when you enter coupon code PAPERPADS (all caps, no spaces) at checkout. Great choices for your Christmas cards and projects as well as everyday paper crafting needs!   You can see them all here.  This deal expires Wednesday, November 1st.

Thanks for stopping by!!! Until next time...


Pin It
Sunday, October 28, 2012

Happy Thanksgiving!

Hi everyone!

I have a Thanksgiving card to share with you today.  I started with a kraft card base and used the A2 Matting Basics A to cut the mats.  These Spellbinders die cuts make cutting straight mats a breeze!  I cut the Lacey Pumpkin Corner Flourish and adhered it with dots of Art Institute Dries Clear Adhesive with the metal tip.  Using the metal tip with the adhesive gives lots more control over the amount of glue and the placement.  Love it!!!

I colored the pumpkin and flower with Distress Ink Markers. I filled the leaves with Meadow Spark Ultra Fine Glitter by Sparkle 'n Sprinkle.  I filled the leaves using the Quickie Glue Pen.   I wanted the glitter a little thicker in a few places, so I added some of the Art Institute Dries Clear Adhesive and sprinkled more glitter on top.


I die cut Happy and Thanksgiving and adhered them in the same way.  I didn't have matching baby pearls for the center of the flower and dotting the i's in Thanksgiving, so I colored White Baby Pearls with a matching Copic marker.


I framed it using one of the Assorted Gold Lines styles.  I think the lines add a finishing touch, don't you??


The NEW Spellbinders Die D-Lites are available as a Special Order Item and through Monday, October 29th, you can get 15% off!   Enter coupon code D-LITES (all caps, no spaces) at checkout.  Click here to see all of the Weekly Deals currently available! 

Thanks for stopping by!!!  Until next time...


Pin It

Saturday, October 27, 2012

Water Wheel Scene

Hi, it's Steph with another card using some awesome products from Classy Cards n Such.

I created a 5 1/2" square card and used my Scor-Buddy to  create the perfect fold. Using several pattern papers from Simple Stories Handmade Holidays 6x6 pad, I created the card layers. The stamp is part of a 2 piece set from Heartfelt Creations called Scenic Combo and I absolutely loved coloring it with Copic Markers. Since I wanted it to fit the front of my card, I chose to cut it into an oval shape, but made sure to keep the trees intact in the upper left. Using Spellbinders Labels 18, I created a mat for the image from cardstock.


The sentiment is from Justrite's Nature's Nested Sentiments and is just the perfect mate to this image. The image was added with small Joy Foam Pads while the sentiment was added with large Joy Foam Pads.


Beautiful card, Steph!!  Thanks!

Click any of the gold links above to see and purchase the products Steph used!

The NEW Spellbinders Die D-Lites are available as a Special Order Item and through Monday, October 29th, you can get 15% off!   Click on the Weekly Deals icon on the right to get all of the info about these and lots of other new products!

Thanks for stopping by!!!  Until next time...


Pin It

Friday, October 26, 2012

White Rose Wreath

Hi everyone!  It's Jenn and I have an easy to make wreath card to share with you this week.

For starters,  I began with a base of Stardream Ruby cardstock measuring 4.25 x 5.5 inches.   Next, using Stardream Emerald cardstock, I cut out the Curly Wreath Die by PoppyStamps. It's hard to see the wreath because I already have the flowers and leaves added, but this die cut has so many different potentials and cuts out nicely. 

Curly Wreath
Before I adhered the wreath to my card base, I decorated it. I started with the Mini Roses in White. These come with very long wire stems and I recommend that if you are going to use them to decorate a wreath that you cut the stems shorter so that you don't have so much wire to wrap around the wreath. Once I had the roses in place, it looked a little sparse so I used my leaf punch and the Stardream Emerald cardstock to create some leaves and fill in the gaps. I used glue dots to adhere my completed wreath to the card base. However, for added dimension you could use adhesive foam pads.

For finishing touches I cut out a label and stamped my sentiment on it. 


Such a beautiful card, Jenn!  Thanks!!

Stampavie has some great new Christmas stamps out this year!   Four of them are already in the Classy Cards shop along with some great foil from Spellbinders.   You can see it all when you click here!  Click any of the gold links above to go to the products which Jenn used on her card.

Thanks for stopping by!!! Until next time...


Pin It

Tuesday, October 23, 2012

Woodland Ornament


Hi folks!  It's Holly posting today, and I am sharing my Woodland Ornament card this time.  I love making rustic things, whether it is cards, wreaths, pies, or soups.  Here are the supplies that I used on this card:
Christmas Sentiments stamp set (Impression Obsession)
Deer Trio die (Memory Box)

I die cut the Deer Trio from kraft cardstock and then cut the largest deer away from the trio.  The antlers were colored with a brown Copic marker and I sponged some brown ink on his body.  I die cut the ornament from one of the patterned papers in the Handmade Holiday pad, wrapped some linen thread around the top, and adhered the deer to the ornament.  I added some white cardstock to the bottom, trimmed the edges, covered the white "snow" with the Art Institute glue and then sprinkled the Crystal Ice glitter on top.  You can see the glitter in the close-up picture below.


While I waited for the glue/glitter to dry, I ran some kraft cardstock through the Bricks and Bark embossing folder.  I used the Cuttlebug Highlights technique on the embossed piece and then distressed the edges.  I adhered that to some distressed artichoke cardstock and then adhered that to some more patterned paper from the Handmade Holiday pad.  I stamped the sentiment at the bottom of a kraft card base, adhered the papers to the card base, and wrapped some linen thread around the bottom.  The ornament was adhered to the embossed cardstock with some Joy foam pads.
Another great card, Holly!  When I first saw this one, I thought "What a great card for a man!"   Those are so hard sometimes, so here is a great idea!   In addition to the Deer Trio, we now have a set of Antlers by Memory Box!   You can purchase your own set, or any of the other products, by following the gold links above.

Thanks for stopping by!!!  Until next time...


Pin It